Final Project Post- Circular Pleating

Circular Pleating, Michael Sachen

  1. Exploration of new form and volume through curved (as opposed to linear) folding in garment construction


  1. Upload a video of your project (4 points). The video should include:
    1. The name of your project
    2. A brief description and demonstration of your project
I don’t have a “Dynamic project” PLEASE LET ME KNOW if you need a video, it doesn’t make sense to make one.

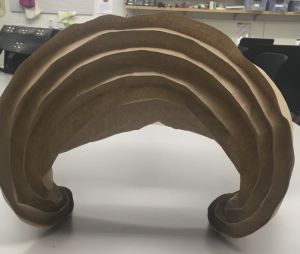
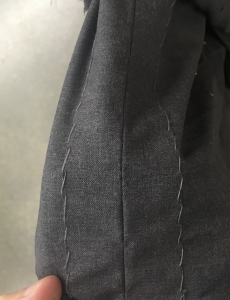
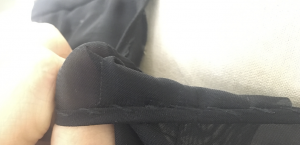
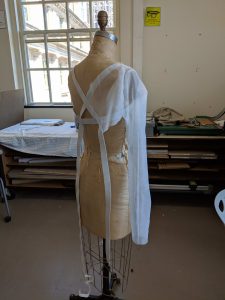
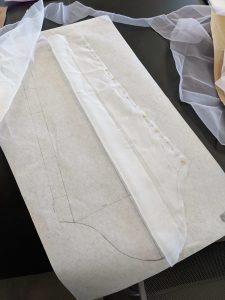
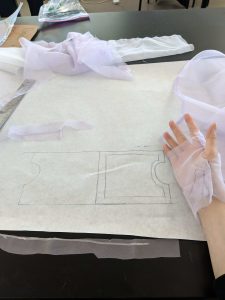
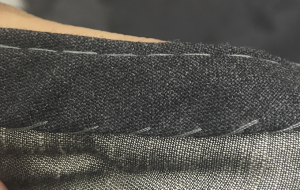
Brief Description– Approach volume and form in clothes making by “starting with a circular medium.” This changes most everything in the way we make clothes– how they are sewn, how volume is added and subtracted etc. ALL finishing on these garments was done by hand to minimize bulk and need for facings.

  1. Upload an image of your final poster as a JPG (1 point) 

  1. Describe what your project does and how it works (2 points) (Min. one Paragraph)  My garments are based on subverting the axiom within clothes making that we work in (relatively) rectangular forms. The volume “works” when we fold paper because of the interplay between bending and folding that happens simultaneously. What happens mathematically is ratio of the inter and outer radii decreases and the disk buckles to a stable position as a result. This does not happen with linear folding. An aside, is that all of smocking practices are done in linear grids, I believe this to be the most practical short term application of these principles.  There is extensive academic papers on this topic– I was concerned during final critique that instructors were unsure of viability in heavy weight materials, but there is literature on this that is linked
  2. https://erikdemaine.org/papers/CurvedCrease_Symmetry/


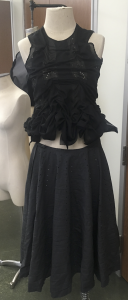
  1. Describe your overall feelings on your project. Are you pleased, disappointed, etc.? (2 points)(Min. one Paragraph) I have mixed feelings. For me this project was an experiment in delving further into the relationship between fabric, clothing and the world. Specifically thinking about contradicting what the fabric ‘wants’ to do. So the best part for me, is reinforcing and further understanding the dependance of cut to the fabric that you are working with– after this project, I think more about cutting within the constraints of the cloth and building the pieces of the garment into the fabric etc. I am obviously not happy that I ended up with a ‘skirt with holes in it’, to me there is a lot of hidden beauty, like finishing things completely flat and in circles that took much more time than traditional clothing as it has to be forced together so to say– and I think a lot of other things I learned about clothes making (try sewing a circle with a machine that sews straight lines etc.) But as it is not exactly what I set out to do I am upset, though I think I learned– What is interesting to me… the ideal scientist starts an experiment under the assumption that they are wrong, I used to believe that cutting with consideration to the human body foremost would lead to useful and new design– to me this was an experiment in not considering the fabric first (against the advice of the world’s best clothes makers) and I see that it opens up perhaps a non useful new set of design possibilities.
  1. Describe how well did your project meet your original project description and goals.  (2 points)(Min. one Paragraph) I believe my project well replicated the method I intended but not the result, the skirt pleated 100% as intended but the weight (an untested variable) was too much. That being said, while the intended goal for this class was to create the volume, it opened up new lines of thinking in fabric manipulation.
  1. Describe the largest hurdles you encountered.  How did you overcome these challenges?  (2 points)(Min. one Paragraph) It took a prohibitively long time to test my ideas– I think this is mostly due to the nature of the project. I think that I could have sacrificed quality of crafstmanship for speed, but my fear was to end up with a poorly made project. When the biggest hurdle (i.e. the skirt not taking up volume) was encountered, I started to think about the possibilites of these ideas in other applications such as fabric manipulation.


  1. Describe what would you do next if you had more time (2 points) (Min. one Paragraph) I think that it would be possible to create this form in fabric with more thorough materials testing. At the beginning of the semester, I was looking at non-woven silks and other non rectilinear fabrics– But the processing seemed prohibitive within the time scale– i.e. The silk needed was quite expensive and was a new type of material production that I would have to learn in itself. I think to thoroughly realize this project would involve producing the fabric which is a new set of challenges in itself


  1. 4 yards Worsted Wool and  3 yards Polyester Crepe

Final Project Post – Flow

Flow

Julia Kosier & Yiting Liu

A pair of wings that responds to sounds and colors for artists, performers, and adventurers.

Video


Poster

Describe what your project does and how it works (2 points) (Min. one Paragraph)

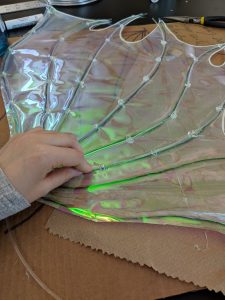
The project is a pair of light-up wings that reacts to external color and sound. The wings themselves are constructed with floral wire and cellophane. The light comes from four RGB LEDs that feed into 8 fiber optic cables on each wing. These LEDs are controlled by a Circuit Playground Express microcontroller. The color of the lights is determined by a color sensor attached to the sleeve of the project; the microcontroller collects the color data from the sensor and changes the LEDs to match. Meanwhile, the microcontroller’s microphone collects decibel level and maps it to the current LED brightness such that the LEDs will be brighter the louder the surroundings are.

Describe your overall feelings on your project. Are you pleased, disappointed, etc.? (2 points)(Min. one Paragraph)

We are very proud of our project overall. Through a lot of trial and error, we were able to get a functional product. Some pieces of our project could have been done better had we more time or another iteration – for example, the spray adhesive we used to attach the layers of cellophane ended up not securing as tightly as we could have liked and leaving visible splotches of glue – but for the time we were given and considering neither of us had made a project like this before we’re very proud of our work.

Describe how well did your project meet your original project description and goals.  (2 points)(Min. one Paragraph)

Our original goal was the incorporate reactions to both a color sensor and a microphone in an aesthetically pleasing way. We have accomplished this goal; our project correctly responds to that information and we made it aesthetically pleasing both in darkness and in light. Some details could be improved; for example, we originally wanted a material that would diffuse the light rather than making it clear where the light is emitted. In the final project, this doesn’t happen as well as we wanted: it can be seen clearly where the fiber optic cables the light runs through are placed. The light is also much dimmer than we may have wanted, requiring complete darkness to be properly seen. Overall, however, we think we properly accomplished our goals.

Describe the largest hurdles you encountered.  How did you overcome these challenges? (2 points)(Min. one Paragraph)

Yiting:

There are two hurdles I encountered. The first one is the difficulty of securing the optic fibers along the wires of the wings. Before I put my hands on the construction of the optic fibers, I thought the adhesive spray and the cellophane would make sure the optic fiber is aligned in place. Yet, it turned out to be more difficult than I expected since the fibers move around a lot. It would be very difficult to put cellophane on top of the wires and optic fiber while making sure they are placed neatly. In the end, I had to use hot glue to secure the optic fibers but the placement of the glue spots are not consistently placed, making it less aesthetically pleasing. If I were to make the wings better, I would have a 3d printing model to replace the wire and put optic fiber or Neopixel along with the printed model. Or, I would sew the optic fiber along the wire to make it less visible than the glue spots.

Another difficulty is to figure out the circuit design for the color sensor from the sleeve to the extended fabric attached to the cardboard panel while making sure there is enough space for the microcontroller and the soldering to the LEDs. If I have more time, I would 3d print the panel and make it a firm but flexible towards the back of the model so that the panel won’t appear downwards when being worn.

Julia:

The biggest struggle I encountered was in the coding. I used Arduino to write to the Circuit Playground, which introduced a couple of weird difficulties. For example, to change the color of the RGB LEDs, you need to be able to analog write to them; however, it took trial and error with Kevin to discover Arduino’s analog write function doesn’t work properly unless you refer to the pins by their digital numbers (6, 9, 10) rather than their analog numbers (A1, A2, A3). I also struggled with coding for the color sensor; there are few resources online for coding with it, and I spent a long time trying to debug why the code occasionally suddenly stopped working before realizing it’s not the fault of the code, but that the color sensor is very sensitive – if it loses connection with its SDA or SCL wire even momentarily, or if a short circuit occurs, even when it reconnects it will only read 0’s (thus turning off the lights) until the Circuit Playground is reset.

Describe what would you do next if you had more time (2 points) (Min. one Paragraph)

Yiting:

If I had more time, I would sew the optic fiber onto the floral wire rather than using hot glue to secure the optic fiber, create a more stable panel to hold the wings using 3D-printed model, design a better vest that is adjustable to everyone, and implement a better circuit design using conductive thread to connect from color sensor to the microcontroller.

Julia:

Given more time, I would try to fine-tune the code for more true color representation; the brightnesses of the red, green, and blue lights within the LED differ and even with different strength resistors connected to each pin the color is still slightly off. I’d also like to attempt sanding the sides of the fiber optic cables since we found even the side-emitting fiber optic cables are very dim unless in complete darkness.

List of materials:

Side Glow Fiber Optic Cable 1.5mm~8mm Optical Fiber [1.5mm for 15 meters]
Color Sensor
16 Gauge Floral Wire
Fabrics
Cellophane
Heat Adhesive Spray
Elastic
3D Printing Model

Final Project Post: Hackerman

Project Title: Hackerman

Project Team: Me, Myself and I

One Sentence: On-premises vulnerability assessment tools.

Video:

[Note: The entire state of Wisconsin, can’t handle the level of cheese in this video]

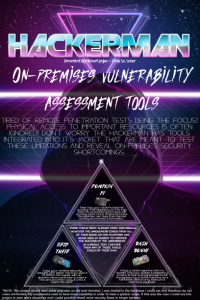
Final Poster:

Description of what project does and how it works:

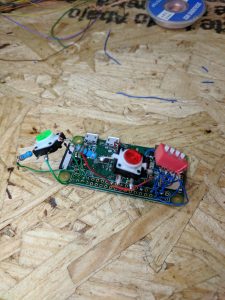
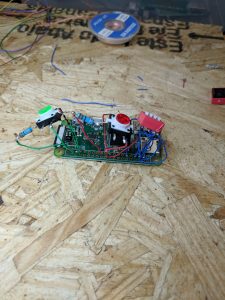
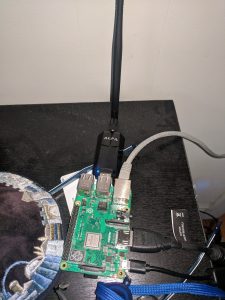
The purpose of the hackerman jacket is to reveal security flaws in the infrastructure of a physical location, it accomplishes this with three tools. The first tool is the RFID theif that uses a basic RFID reader in combination with a micro controller to copy the hash map of a 13.56 Mghz tag and paste it onto a blank card. The second tool is the bash bunny that is made up by a raspberry pi zero w with some push buttons and a DIP switch. This raspberry pi was programmed to be recognized as a keyboard, mouse or some other external device by the victim machine and then I could select one of my payloads on the DIP switch which would then execute on the host machine. The third tool is the Pumpkin Pi which was a retrofitted raspberry pi 3b+ with wifi adapters that was programmed to set up a fake access point, once a victim connects to it I can monitor their internet traffic if it is unencrypted. The hope is that when these tools are used in tandem, one could achieve more in a assessment then on their own.

Overall Feelings Project:

Overall I am disappointed with myself in my en devours with this project. I knew that doing such a hardware focused project would be difficult as I did not have experience in it before, but I did not expect such unreliable performance and extreme difficulty. I had to cut back the versatility of these tools to start with due to my inability to obtain the hardware for greater uses, which already limited the scope of my project. However, the most saddening part was that one of my tools was completely bricked right before the showcase and I had to restart my software work on my pumpkin pi at least 12 times due to me crashing the SD card on it. The fact that I couldn’t get two of three tools reliably working was overall a disappointment for the whole project.

How well did the project meet original project description and goals:

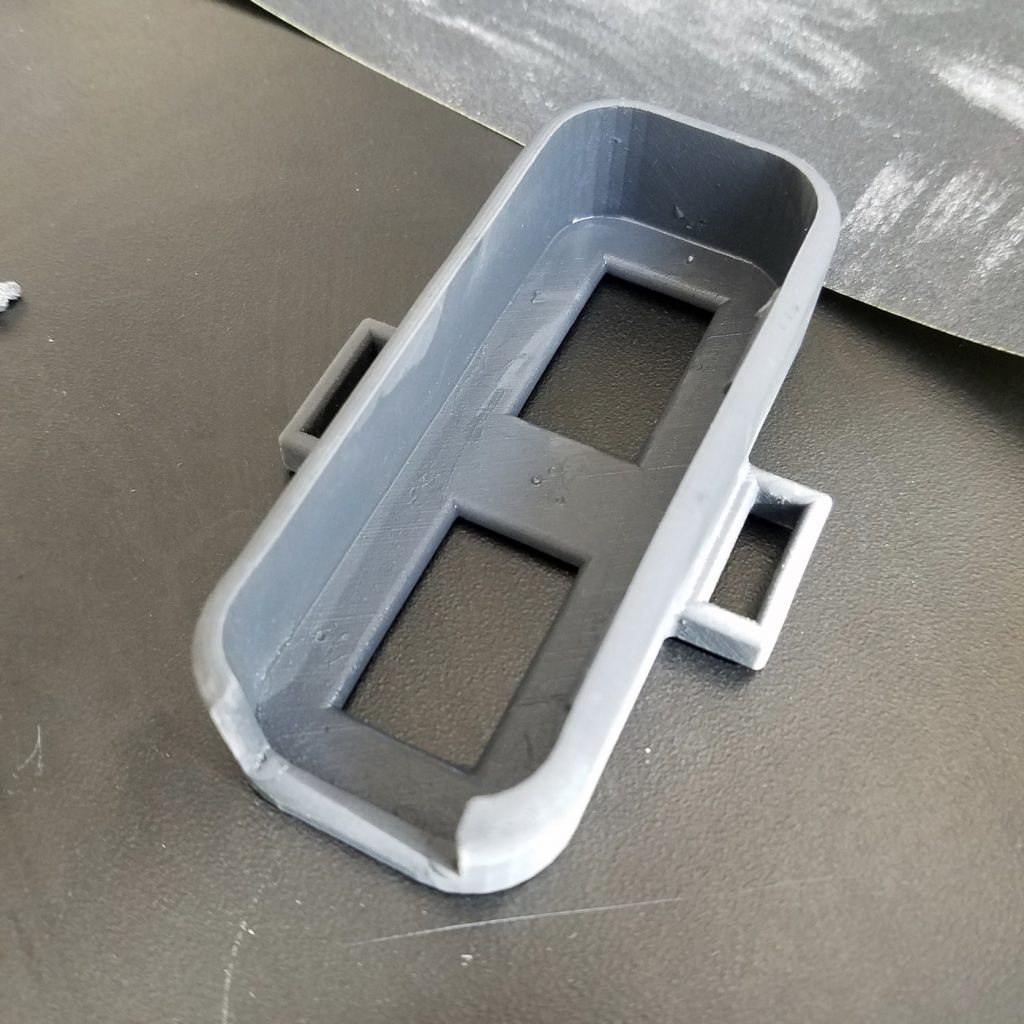
Technically speaking I did set accomplish what I set out to do. All of the tools that I originally wanted to make, were made and did work in a limited function. However, like I have been saying before I did not make these tools better then their commercial counter parts, rather I downgraded all of their versatility and increased their sizes, so this aspect of my original intentions were failed to be realized. In addition to this I intended for my tools to be easily taken in or out of the jacket, but this did not happen due to my difficulties with 3-D printing, my tools ended up being permanently attached to my jacket.

Largest hurdles and how they were overcome:

My biggest hurdles were definitely all my hardware challenges. I did not know how to solder, how to put a circuit together, how to 3-D print, all of these things were brand new to me. To overcome these challenges I spent a lot of time experimenting and training myself in the ways of soldering (purchased my own solder gun and ruined many good circuit boards). For this and the 3-D printing my main method for coping with these hurdles was simply trial and error and to my surprise this kinda worked, I did get all my circuits together, on and working (kinda). Even though that some of these tools broke I still consider these challenges overcome.

If I had more time:

If I had more time I would have acquired more versatile hardware and made my tools accomplish the scope that I set out for. In addition to this if I had more time I would have had more chances to get my holders/inserts for my tools the perfect size (and they would have been finally removable and protected!). In addition to this I wish I had more time to come up with a better demonstration for these tools instead of them just (working). Maybe this could have been a well shot video of all of these tools working in tandem in a real life scenario would have been easy to show.

Material List:

Part Price Quantity Link
wireless network adapter $28.50 1 https://www.amazon.com/gp/product/B0035OCVO6/ref=ppx_od_dt_b_asin_title_s01?ie=UTF8&psc=1
Ethernet cable $3 1 https://www.amazon.com/AmazonBasics-RJ45-Cat-6-Ethernet-Patch-Cable-5-Feet-1-5-Meters/dp/B00N2VILDM/?tag=whtnb-20
Raspberry Pi 3 or 3 B+ $38.10 1 https://www.amazon.com/ELEMENT-Element14-Raspberry-Pi-Motherboard/dp/B07BDR5PDW/?tag=whtnb-20
microSD card $6.85 1 https://www.amazon.com/SanDisk-microSDHC-Standard-Packaging-SDSQUNC-032G-GN6MA/dp/B010Q57T02/?tag=whtnb-20
power source (Enokay Power Supply for Raspberry Pi 5V 2.5A Micro USB Charger Adapter with On Off Switch) $8.59 1 https://www.amazon.com/Enokay-Supply-Raspberry-Charger-Adapter/dp/B01MZX466R/?tag=whtnb-20
USB keyboard/mouse interface (Rii Mini Wireless 2.4GHz Keyboard with Mouse Touchpad Remote Control, Black (mini X1)) $16.99 1 https://www.amazon.com/gp/product/B00I5SW8MC/?tag=whtnb-20
SD card adapter $7.99 1 https://www.amazon.com/Vanja-standard-Connector-Notebooks-Smartphones/dp/B00W02VHM6/?tag=whtnb-20
Raspberry Pi Zero Wifi $10.00 1 https://www.adafruit.com/category/933?src=raspberrypi
Pi Zero USB Stem $5.00 1 https://shop.pimoroni.com/products/zero-stem-usb-otg-connector
2 x Tactile Push Button Switch With LED lights $3.00 1 https://www.aliexpress.com/item/5PCS-1-set-12X12X7-3-Tactile-Push-Button-Switch-Momentary-Tact-LED-5-Color-12X12X7-3mm/32873551440.html?spm=2114.search0104.3.2.3b0241a0ILdgzL&ws_ab_test=searchweb0_0,searchweb201602_5_10065_10130_10068_10890_10547_319_10546_317_10548_10545_10696_453_10084_454_10083_10618_10307_537_536_10902_10059_10884_10887_321_322_10103,searchweb201603_58,ppcSwitch_0&algo_expid=0747bf75-f245-43c5-a0c1-4966ea4078a8-0&algo_pvid=0747bf75-f245-43c5-a0c1-4966ea4078a8&transAbTest=ae803_5
DIP switch with 4 switches $3.00 1 https://www.aliexpress.com/item/10pcs-lot-Slide-Type-SMT-SMD-Dip-Switch-2-54mm-Pitch-2-Row-4-Pin-2/32956815576.html?spm=2114.search0104.3.3.4c971641sXqPaV&ws_ab_test=searchweb0_0,searchweb201602_5_10065_10130_10068_10890_10547_319_10546_317_10548_10545_10696_453_10084_454_10083_10618_10307_537_536_10902_10059_10884_10887_321_322_10103,searchweb201603_58,ppcSwitch_0&algo_expid=60dfe6ec-dd9e-4db7-93f0-5f94aec30ef4-0&algo_pvid=60dfe6ec-dd9e-4db7-93f0-5f94aec30ef4&transAbTest=ae803_5
2 x 330R resistors HAVE 1
MFRC522 RFID reader module $5.49 1 https://www.amazon.com/gp/product/B01CSTW0IA/ref=ppx_od_dt_b_asin_title_s01?ie=UTF8&psc=1
MIFARE 1K RFID card (with changeable UID, 13.56Mhz) Included 1
some RFID card to copy (only 13.56Mhz cards can be read/written by this particular card reader module) Included 1
Tactile Touch Push Button Switch Tact Switches 6 X 6 X 5mm Included 1
LEDs (red, yellow, green) + resistors (1k ohm) $7.00 1 https://www.amazon.com/gp/product/B01ER728F6/ref=ppx_od_dt_b_asin_title_s02?ie=UTF8&psc=1
3 AA batteries (1.5V each) HAVE 1
2 zener diodes (3.7V) or (3.6V) $8.00 1 https://www.amazon.com/gp/product/B07BTKVRG8/ref=ppx_od_dt_b_asin_title_s01?ie=UTF8&psc=1
switch (3 Terminals ON/ON 2 Positions SPDT Electronic Push Button Sliding Switches) $5.00 1 https://www.amazon.com/gp/product/B0799R529Z/ref=ppx_od_dt_b_asin_title_s02?ie=UTF8&psc=1
cables, hot glue, tape (30AWG Insulated Silver Plated Single Core Copper PCB 0.25mm Kynar Wrapping Wire) $5.00 1 https://www.amazon.com/gp/product/B07M7BHKRV/ref=ppx_od_dt_b_asin_title_s01?ie=UTF8&psc=1
Arduino Pro Micro 5V $20.89 1 https://www.amazon.com/gp/product/B01MTU9GOB/ref=ppx_yo_dt_b_asin_title_o04_s00?ie=UTF8&psc=1
PCB Prototyping Board $10.00 1 https://www.amazon.com/gp/product/B072Z7Y19F/ref=ppx_od_dt_b_asin_title_s02?ie=UTF8&psc=1
Solder Gun $67.98 1 https://www.amazon.com/gp/product/B01MDTO6X7/ref=ppx_yo_dt_b_asin_title_o06_s00?ie=UTF8&psc=1
Desoldering Gun and Desoldering Wick $7.69 1 https://www.amazon.com/gp/product/B07BB8DGMP/ref=ppx_yo_dt_b_asin_title_o07_s00?ie=UTF8&psc=1
Battery Pack For Raspberry Pi 3 B+ $25.25 1 https://www.amazon.com/gp/product/B07BSG7V3J/ref=ppx_yo_dt_b_asin_title_o02_s00?ie=UTF8&psc=1


Project Post #2: Michael Leykin

Project Title: Penetration of Endpoints and Networks Infiltration System

Project Team: Me, myself and I.

Weekly Accomplishments:

  • Research into methodology for creating these tools
    • Mainly looking into a way to read and write RFID badges reliably without having to trust some sketchy manufacturer
      • I am having a lot of trouble with this, doesn’t seem to be a clean way to do this with established products
    • Found plenty of guides and parts lists for building a custom bash bunny
      • https://blog.hackster.io/build-an-affordable-bash-bunny-with-a-raspberry-pi-zero-w-11a4abf7bde5
      • https://www.cron.dk/poor-mans-bash-bunny/
    • Again lots of established guides for building rogue access points

Flow – Project Post 7

Project title: Flow

Team: Julia Kosier & Yiting Liu

Accomplishments

Julia:

  • Added code to integrate color sensor readings with current code
  • Debugged unstable color sensor code & rewrote sound sensor code for more visible results

Yiting:

  • Printed the 3d printing model
  • Finished sewing the sleeve and its extra part to attach the color sensor on
  • Glued the optic fibers to the skeleton of the wings
  • Worked on the stabilizing structure of the wings
  • Finished designing for the poster


images


  • material list copy your material list from last week. If you have added any new items, include them and highlight them in red. If you have removed items from last week, include them with an orange background.
Part/Material Price Quantity Link to a purchase location
1 Side Glow Fiber Optic Cable 1.5mm~8mm Optical Fiber For Lighting Decorations

[1.5mm for 15 meters]

$15.99 w/o tax 1 https://www.ebay.com/itm/Side-Glow-Fiber-Optic-Cable-1-5mm-8mm-Optical-Fiber-For-Lighting-Decorations/253189403496?ssPageName=STRK%3AMEBIDX%3AIT&var=552285229283&_trksid=p2057872.m2749.l2649
2 Color sensor $7.95 1 https://www.adafruit.com/product/1334
3 16 gauge floral wire $11.99 1 https://www.amazon.com/gp/product/B00T831TFA/ref=ppx_yo_dt_b_asin_title_o00_s00?ie=UTF8&psc=1
4 Fabrics $3.99/yd

Including shipping total is $14.18

2 yards https://www.fabricwholesaledirect.com/products/sheer-voile-fire-retardant-fabric?gclid=Cj0KCQiAk-7jBRD9ARIsAEy8mh7xxCRl9hFRSNDtoD39ELNlrFHEVmJTnGmABucK8v3UQuPzZhtuZJoaAgeFEALw_wcB&fbclid=IwAR34tdd2dbImfbFrF7y8HEeAAJFUZJpFmekLj1aYBwW7GRi0Cw8Gx2MD5G4
5 Cellophane $15.99 1 https://www.amazon.com/gp/product/B07GR4NCC9/ref=ppx_yo_dt_b_asin_title_o01_s00?ie=UTF8&psc=1
6 Heat spray $5.77 1 https://www.amazon.com/gp/product/B000PCWRMC/ref=ppx_yo_dt_b_asin_title_o02_s00?ie=UTF8&psc=1
7 Elastic $.60/foot 10 feet https://www.strapworks.com/Elastic_p/e.htm
8
9


  • areas of concern now you have gotten started on your project, write a paragraph to articulate the areas in which you are most concerned about for your project.  Highlight areas where you are looking from help.

Areas of concern:

  • We need better support system for the wings to make it stabilized [Maybe we could also use more elastic strap to stabilize the wings]
  • We also need to start working on the back circuit design right away

Project Post 6 – FLOW

Project title: Flow

Team: Julia Kosier & Yiting Liu

Accomplishments

Julia:

  • Wrote code to collect sound level from Circuit Playground microphone and map the results to the brightness level of the lights

Yiting:

  • Attached the optic fiber onto the wings
  • Redesigned the 3d printing to make the optic fiber stably attached to the microcontroller

Together

  • Reached a conclusion to attach the sleeve onto the elastic strap
  • Brainstormed the sleeve design and circuit design
  • Constructed the strap


images

Attached the optic fiber on the wings

  • material list copy your material list from last week. If you have added any new items, include them and highlight them in red. If you have removed items from last week, include them with an orange background.
Part/Material Price Quantity Link to a purchase location
1 Side Glow Fiber Optic Cable 1.5mm~8mm Optical Fiber For Lighting Decorations

[1.5mm for 15 meters]

$15.99 w/o tax 1 link
2 Color sensor $7.95 1 link
3 16 gauge floral wire $11.99 1 link
4 Fabrics $3.99/yd

Including shipping total is $14.18

2 yards link
5 Cellophane $15.99 1 link
6 Heat spray $5.77 1 link
7 Elastic $.60/foot 10 feet link
8


  • areas of concern now you have gotten started on your project, write a paragraph to articulate the areas in which you are most concerned about for your project.  Highlight areas where you are looking from help.

Areas of concern:

  • We need sleeve design support to make sure the movement of the right arm won’t affect the circuit attached on the back with the wings.
  • We need to ensure our strap design fully supports the wings
  • We need to also work on the functionality of optic fibers on the wings

Project Post #6: Michael Leykin

Project Title: Penetration of Endpoints and Networks Infiltration System

Project Team: Me, Myself and I

One Sentence: On-premises vulnerability assessment tool.

Weekly Accomplishments + Pics:

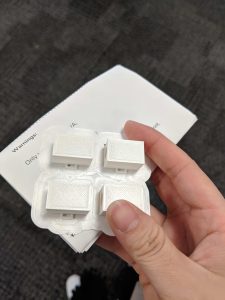
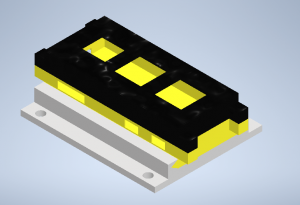
I have designed the parts for the covers for the first two parts and these are ready for printing. I have also taped down the RFID theif into one shape.

Material List:


Part

Price Quantity Link
wireless network adapter $28.50 1 https://www.amazon.com/gp/product/B0035OCVO6/ref=ppx_od_dt_b_asin_title_s01?ie=UTF8&psc=1
Ethernet cable $3 1 https://www.amazon.com/AmazonBasics-RJ45-Cat-6-Ethernet-Patch-Cable-5-Feet-1-5-Meters/dp/B00N2VILDM/?tag=whtnb-20
Raspberry Pi 3 or 3 B+ $38.10 1 https://www.amazon.com/ELEMENT-Element14-Raspberry-Pi-Motherboard/dp/B07BDR5PDW/?tag=whtnb-20
microSD card $6.85 1 https://www.amazon.com/SanDisk-microSDHC-Standard-Packaging-SDSQUNC-032G-GN6MA/dp/B010Q57T02/?tag=whtnb-20
power source (Enokay Power Supply for Raspberry Pi 5V 2.5A Micro USB Charger Adapter with On Off Switch) $8.59 1 https://www.amazon.com/Enokay-Supply-Raspberry-Charger-Adapter/dp/B01MZX466R/?tag=whtnb-20
USB keyboard/mouse interface (Rii Mini Wireless 2.4GHz Keyboard with Mouse Touchpad Remote Control, Black (mini X1)) $16.99 1 https://www.amazon.com/gp/product/B00I5SW8MC/?tag=whtnb-20
SD card adapter $7.99 1 https://www.amazon.com/Vanja-standard-Connector-Notebooks-Smartphones/dp/B00W02VHM6/?tag=whtnb-20
Raspberry Pi Zero Wifi $10.00 1 https://www.adafruit.com/category/933?src=raspberrypi
Pi Zero USB Stem $5.00 1 https://shop.pimoroni.com/products/zero-stem-usb-otg-connector
2 x Tactile Push Button Switch With LED lights $3.00 1 https://www.aliexpress.com/item/5PCS-1-set-12X12X7-3-Tactile-Push-Button-Switch-Momentary-Tact-LED-5-Color-12X12X7-3mm/32873551440.html?spm=2114.search0104.3.2.3b0241a0ILdgzL&ws_ab_test=searchweb0_0,searchweb201602_5_10065_10130_10068_10890_10547_319_10546_317_10548_10545_10696_453_10084_454_10083_10618_10307_537_536_10902_10059_10884_10887_321_322_10103,searchweb201603_58,ppcSwitch_0&algo_expid=0747bf75-f245-43c5-a0c1-4966ea4078a8-0&algo_pvid=0747bf75-f245-43c5-a0c1-4966ea4078a8&transAbTest=ae803_5
DIP switch with 4 switches $3.00 1 https://www.aliexpress.com/item/10pcs-lot-Slide-Type-SMT-SMD-Dip-Switch-2-54mm-Pitch-2-Row-4-Pin-2/32956815576.html?spm=2114.search0104.3.3.4c971641sXqPaV&ws_ab_test=searchweb0_0,searchweb201602_5_10065_10130_10068_10890_10547_319_10546_317_10548_10545_10696_453_10084_454_10083_10618_10307_537_536_10902_10059_10884_10887_321_322_10103,searchweb201603_58,ppcSwitch_0&algo_expid=60dfe6ec-dd9e-4db7-93f0-5f94aec30ef4-0&algo_pvid=60dfe6ec-dd9e-4db7-93f0-5f94aec30ef4&transAbTest=ae803_5
2 x 330R resistors HAVE 1
MFRC522 RFID reader module $5.49 1 https://www.amazon.com/gp/product/B01CSTW0IA/ref=ppx_od_dt_b_asin_title_s01?ie=UTF8&psc=1
MIFARE 1K RFID card (with changeable UID, 13.56Mhz) Included 1
some RFID card to copy (only 13.56Mhz cards can be read/written by this particular card reader module) Included 1
Tactile Touch Push Button Switch Tact Switches 6 X 6 X 5mm Included 1
LEDs (red, yellow, green) + resistors (1k ohm) $7.00 1 https://www.amazon.com/gp/product/B01ER728F6/ref=ppx_od_dt_b_asin_title_s02?ie=UTF8&psc=1
3 AA batteries (1.5V each) HAVE 1
2 zener diodes (3.7V) or (3.6V) $8.00 1 https://www.amazon.com/gp/product/B07BTKVRG8/ref=ppx_od_dt_b_asin_title_s01?ie=UTF8&psc=1
switch (3 Terminals ON/ON 2 Positions SPDT Electronic Push Button Sliding Switches) $5.00 1 https://www.amazon.com/gp/product/B0799R529Z/ref=ppx_od_dt_b_asin_title_s02?ie=UTF8&psc=1
cables, hot glue, tape (30AWG Insulated Silver Plated Single Core Copper PCB 0.25mm Kynar Wrapping Wire) $5.00 1 https://www.amazon.com/gp/product/B07M7BHKRV/ref=ppx_od_dt_b_asin_title_s01?ie=UTF8&psc=1
Arduino Pro Micro 5V $20.89 1 https://www.amazon.com/gp/product/B01MTU9GOB/ref=ppx_yo_dt_b_asin_title_o04_s00?ie=UTF8&psc=1
PCB Prototyping Board $10.00 1 https://www.amazon.com/gp/product/B072Z7Y19F/ref=ppx_od_dt_b_asin_title_s02?ie=UTF8&psc=1
Solder Gun $67.98 1 https://www.amazon.com/gp/product/B01MDTO6X7/ref=ppx_yo_dt_b_asin_title_o06_s00?ie=UTF8&psc=1
Desoldering Gun and Desoldering Wick $7.69 1 https://www.amazon.com/gp/product/B07BB8DGMP/ref=ppx_yo_dt_b_asin_title_o07_s00?ie=UTF8&psc=1
Battery Pack For Raspberry Pi 3 B+ $25.25 1 https://www.amazon.com/gp/product/B07BSG7V3J/ref=ppx_yo_dt_b_asin_title_o02_s00?ie=UTF8&psc=1

Areas of Concern: Still need to figure out a way to boost my wifi pumpkin to be more powerful and need to find a way to effectively demonstrate my tools, may be difficult without getting into technicalities. I am also concered about my covers fitting onto my parts. Everything is coming together but I am still having some last roadblocks.

Project Post #5 – Velcro MIDI Jacket

Project Post 5

Project Title

Velcro MIDI Jacket

Project Team

Junda Chen, Jeff Ma, Yudong Huang, William Black

Weekly Accomplishments

Note

  • Accomplished item: item
  • Major responsible men: (man1, man2, …)

List

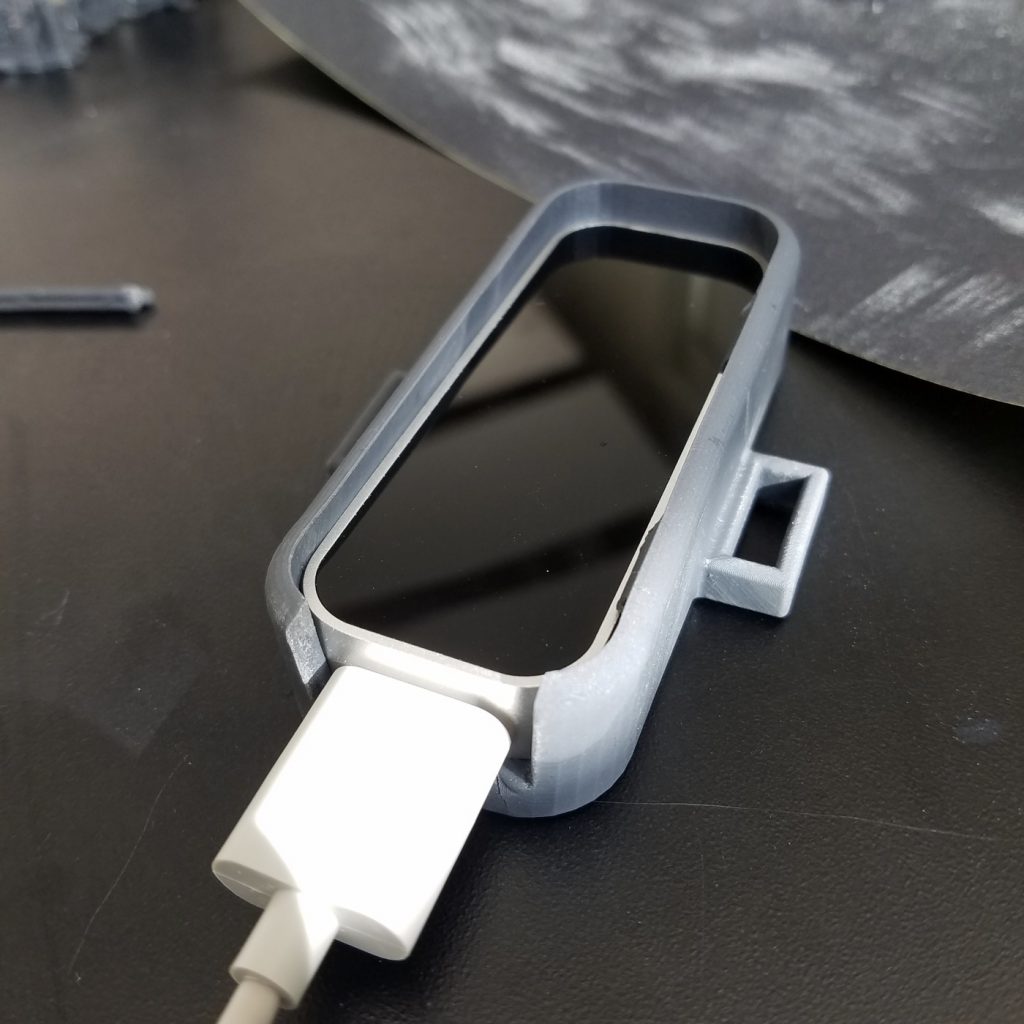
  • 3D Print Leap Motion case
    • Printed the model in Makerspace (Jeff, Yudong)
    • Integrate Leap  motion on jacket (Jeff, Yudong)
  • Theremin Software
    • Run on Raspberry Pi 3+ (Have a big trouble with Raspberry PI) (Junda, Jeff)
    • Java script to experiment/benchmark (Junda, William)
    • Python script to experiment/benchmark (Junda, William)
  • Jacket
    • Select and buy Velcro (Yudong, Jeff, William)
    • Select (and buy) a jacket. (Yudong, Jeff)
    • Integrate Velcro on Jacket (Yudong)
    • Re-Design the light effect of the jacket (Yudong, Jeff)

Image/Video

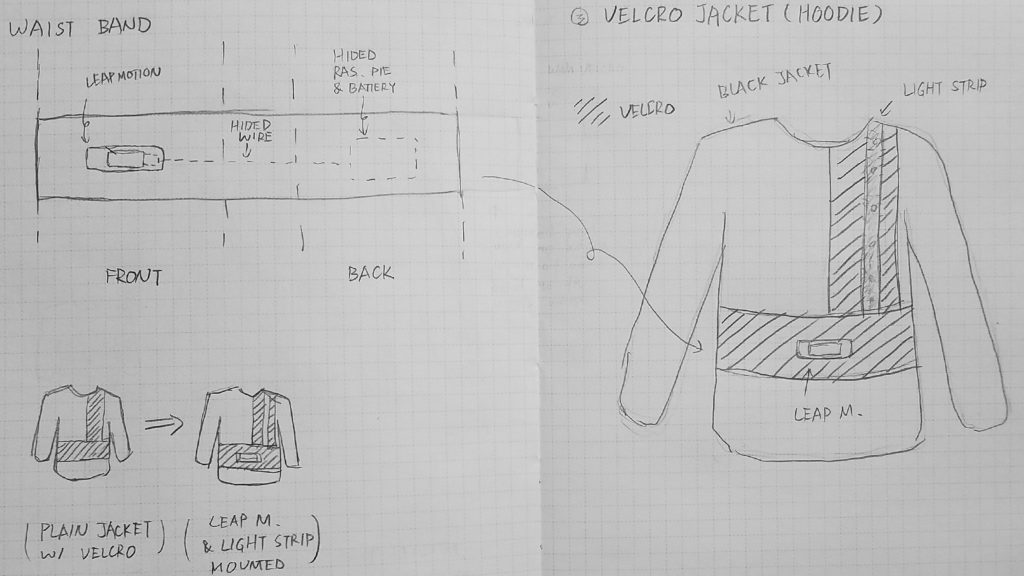
Figure 1. Velcro Jacket design. We attach the velcro to jacket and it looks like this. We will try to integrate it on the velcro if possible this week.

Figure 2,3. Leap Motion case. Using PVA we printed the case of Leap Motion, polished it and tried it on body. It seems great : )

Material list

  • Circuit Board: (Potentially) MIDI encode/decoder, Leap motion image processor,
    • Arduion (1):
    • Circuit Playground (1)22
    • Raspberry Pi 3B + (1, with toolkits): $30-50
  • Leap Motion (1): $96
  • LED Strip light (2, TBD)
  • Black velcro fabric (we have in the studio)
  • A Jacket (1, TBD)
  • (Safe) Infrared LED (20)
  • Long USB cable (x2) (for emergency and design)


Areas of Concern

  • Raspberry Pi Power Supply and Performance: We have a big headache. These are the approaches we tried to do — we might need some help
    • Change a PI — it’s on its way from Amazon.
    • Check Power Supply. — we tried to use Michael’s power adaptor (official), Mike’s  power adaptor (5V 2.4A), Mike’s roommate’s power adaptor (5V 2.5A and 9V 4A). None of them work. Our speculation is: the PI works, but the kernel might not be able to boot because of reason other than power adaptor (see below).
    • Check SD card image. — we tried the combination of the following methods — it does not work by far.
      • Change image (all newest from the official download website: https://www.raspberrypi.org/downloads/)
        • Noobs
        • Raspbien
        • Snappy Ubuntu kernel
        • Ubuntu Mate kernel
      • Change SD card format
        • FAT32: especially for TF card larger than 32G (https://www.sdcard.org/developers/overview/capacity/)
        • exFAT
      • Change TF card
        • Sony Micro TF 128G (Mike’s card — might be too large, but was bootable when using FAT32)
        • Samsum TF 32G
  • User Experience: How to let our users know how to operate without a screen?


Project Post #4 – Velcro MIDI Jacket

Project Post 4

Project Title

Velcro MIDI Jacket

Project Team

Junda Chen, Jeff Ma, Yudong Huang, William Black

Weekly Accomplishments

Note — This is an accomplished item: item

  • 3D Print Leap Motion case
  • Theremn Software
    • Motion trace: proximity and height change
    • Data Transfer
    • Theremin instrumental voice
    • (Optimize) Range Detection
      • Test how many Infra-ray LEDs are sufficient to optimize detection
        • on wrist
        • on Jacket
    • (Optimize) Position to put the Leap Motion on the Jacket
      • Waist band — with a tiled case the effect is good.
    • Run on Arduino (Don’t have to run on Arduino)
    • Run on Raspberry Pi 3+
  • Leap Motion Optimization
    • Add an infrared light source to
    • Determine where the light should be
      • On Jacket
  • User Experience Design: Tune the software to let user make sense of how to use it.
  • Jacket
    • Select a light
    • Select a material for diffusion
      • Sheer from underneath
    • Design the jacket: Finally Decide on Velcro Hoodie !!!!
      • Velcro Hoodie? — Have all the things in the velcro and stick waistband to the velcro on the Hoodie.
    • Select (and buy) a jacket.
    • Re-Design the light effect of the jacket

Image/Video

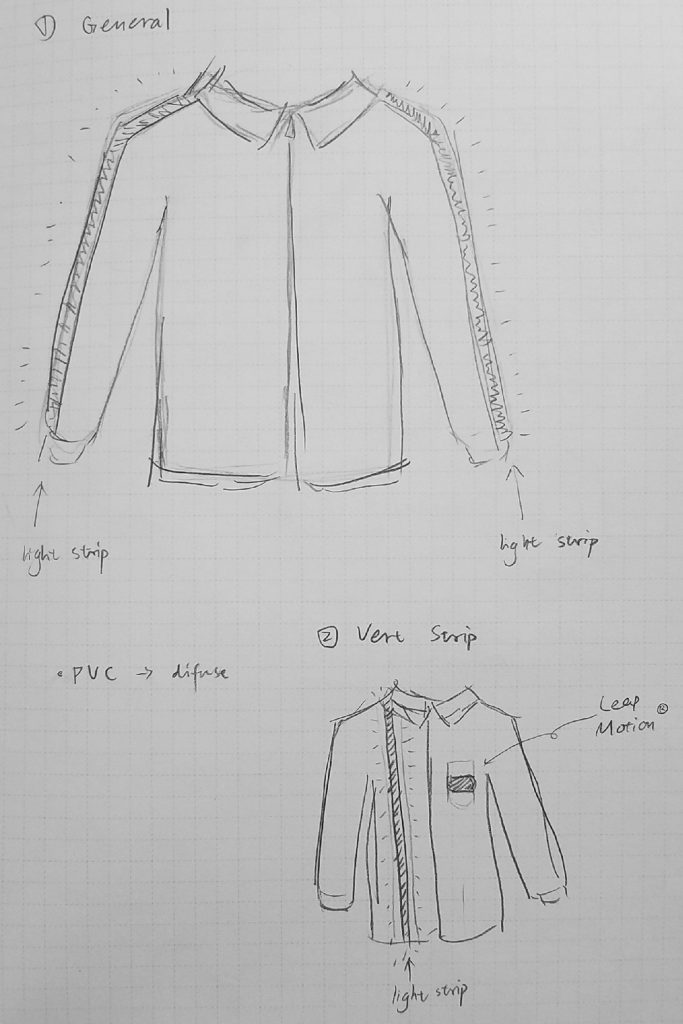
(Figure 1,2): Two implementations of light

(Figure 3): Current design using Velcro. This is a remarkable shift in our project development. To solve the conflict between the freedom of light design and the constrain of other hardware devices, we proposed the use of Velcro to decomposite the design of hardward components (on the waist band) and the design of light (on the jacket). From now, all the hardward-related design will be presented on the waistband, which can be attach/detach to the jacket using the Velcro. The light on jacket is also configurable using Velcro, and can be connected to the waistband for power supply.


Material list

  • Circuit Board: (Potentially) MIDI encode/decoder, Leap motion image processor,
  • Leap Motion (1): $96
  • LED Strip light (2, TBD)
  • Black velcro fabric (we have in the studio)
  • A Jacket (1, TBD)
  • (Safe) Infrared LED (20)
  • Long USB cable (x2) (for emergency and design)


Areas of Concern

  • Infrared LED Safety to eye: To design a better tracking of hand while not directly influence users’ eye is a design challenge, and that might require some research in the area.
    • With the current LED model, it is basically safe to the eye with all the possible implementations we want to make.
  • Raspberry Pi Power Supply and Performance: Have to benchmark on the Raspberry Pi how well the theremin work with external power supply. The fall-back for this project is to directly connect all things back to a MacBook.
  • User Experience: How to let our users know how to operate without a screen?


Past Development Log

Cylon.js: an Arduino API to control the leap motion

Adafruit strip LED : a $17.99

Leap Motion installation: Troubleshooting in Windows.


Project Post #4: Michael Leykin

Project Title: Penetration of Endpoints and Networks Infiltration System

Project Team: Me, myself and I

Weekly Accomplishments + Images:

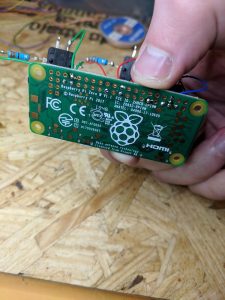
Finished Soldering For Bash Bunny:

All soldering DONE!

Spent time this weekend, building my rouge WiFi network and got it to work and have an idea to make it mobile:

Material List:


Part

Price Quantity Link
wireless network adapter $28.50 1 https://www.amazon.com/gp/product/B0035OCVO6/ref=ppx_od_dt_b_asin_title_s01?ie=UTF8&psc=1
Ethernet cable $3 1 https://www.amazon.com/AmazonBasics-RJ45-Cat-6-Ethernet-Patch-Cable-5-Feet-1-5-Meters/dp/B00N2VILDM/?tag=whtnb-20
Raspberry Pi 3 or 3 B+ $38.10 1 https://www.amazon.com/ELEMENT-Element14-Raspberry-Pi-Motherboard/dp/B07BDR5PDW/?tag=whtnb-20
microSD card $6.85 1 https://www.amazon.com/SanDisk-microSDHC-Standard-Packaging-SDSQUNC-032G-GN6MA/dp/B010Q57T02/?tag=whtnb-20
power source (Enokay Power Supply for Raspberry Pi 5V 2.5A Micro USB Charger Adapter with On Off Switch) $8.59 1 https://www.amazon.com/Enokay-Supply-Raspberry-Charger-Adapter/dp/B01MZX466R/?tag=whtnb-20
USB keyboard/mouse interface (Rii Mini Wireless 2.4GHz Keyboard with Mouse Touchpad Remote Control, Black (mini X1)) $16.99 1 https://www.amazon.com/gp/product/B00I5SW8MC/?tag=whtnb-20
SD card adapter $7.99 1 https://www.amazon.com/Vanja-standard-Connector-Notebooks-Smartphones/dp/B00W02VHM6/?tag=whtnb-20
Raspberry Pi Zero Wifi $10.00 1 https://www.adafruit.com/category/933?src=raspberrypi
Pi Zero USB Stem $5.00 1 https://shop.pimoroni.com/products/zero-stem-usb-otg-connector
2 x Tactile Push Button Switch With LED lights $3.00 1 https://www.aliexpress.com/item/5PCS-1-set-12X12X7-3-Tactile-Push-Button-Switch-Momentary-Tact-LED-5-Color-12X12X7-3mm/32873551440.html?spm=2114.search0104.3.2.3b0241a0ILdgzL&ws_ab_test=searchweb0_0,searchweb201602_5_10065_10130_10068_10890_10547_319_10546_317_10548_10545_10696_453_10084_454_10083_10618_10307_537_536_10902_10059_10884_10887_321_322_10103,searchweb201603_58,ppcSwitch_0&algo_expid=0747bf75-f245-43c5-a0c1-4966ea4078a8-0&algo_pvid=0747bf75-f245-43c5-a0c1-4966ea4078a8&transAbTest=ae803_5
DIP switch with 4 switches $3.00 1 https://www.aliexpress.com/item/10pcs-lot-Slide-Type-SMT-SMD-Dip-Switch-2-54mm-Pitch-2-Row-4-Pin-2/32956815576.html?spm=2114.search0104.3.3.4c971641sXqPaV&ws_ab_test=searchweb0_0,searchweb201602_5_10065_10130_10068_10890_10547_319_10546_317_10548_10545_10696_453_10084_454_10083_10618_10307_537_536_10902_10059_10884_10887_321_322_10103,searchweb201603_58,ppcSwitch_0&algo_expid=60dfe6ec-dd9e-4db7-93f0-5f94aec30ef4-0&algo_pvid=60dfe6ec-dd9e-4db7-93f0-5f94aec30ef4&transAbTest=ae803_5
2 x 330R resistors HAVE 1
MFRC522 RFID reader module $5.49 1 https://www.amazon.com/gp/product/B01CSTW0IA/ref=ppx_od_dt_b_asin_title_s01?ie=UTF8&psc=1
MIFARE 1K RFID card (with changeable UID, 13.56Mhz) Included 1
some RFID card to copy (only 13.56Mhz cards can be read/written by this particular card reader module) Included 1
Tactile Touch Push Button Switch Tact Switches 6 X 6 X 5mm Included 1
LEDs (red, yellow, green) + resistors (1k ohm) $7.00 1 https://www.amazon.com/gp/product/B01ER728F6/ref=ppx_od_dt_b_asin_title_s02?ie=UTF8&psc=1
3 AA batteries (1.5V each) HAVE 1
2 zener diodes (3.7V) or (3.6V) $8.00 1 https://www.amazon.com/gp/product/B07BTKVRG8/ref=ppx_od_dt_b_asin_title_s01?ie=UTF8&psc=1
switch (3 Terminals ON/ON 2 Positions SPDT Electronic Push Button Sliding Switches) $5.00 1 https://www.amazon.com/gp/product/B0799R529Z/ref=ppx_od_dt_b_asin_title_s02?ie=UTF8&psc=1
cables, hot glue, tape (30AWG Insulated Silver Plated Single Core Copper PCB 0.25mm Kynar Wrapping Wire) $5.00 1 https://www.amazon.com/gp/product/B07M7BHKRV/ref=ppx_od_dt_b_asin_title_s01?ie=UTF8&psc=1
Arduino Pro Micro 5V $20.89 1 https://www.amazon.com/gp/product/B01MTU9GOB/ref=ppx_yo_dt_b_asin_title_o04_s00?ie=UTF8&psc=1
PCB Prototyping Board $10.00 1 https://www.amazon.com/gp/product/B072Z7Y19F/ref=ppx_od_dt_b_asin_title_s02?ie=UTF8&psc=1
Solder Gun $67.98 1 https://www.amazon.com/gp/product/B01MDTO6X7/ref=ppx_yo_dt_b_asin_title_o06_s00?ie=UTF8&psc=1
Desoldering Gun and Desoldering Wick $7.69 1 https://www.amazon.com/gp/product/B07BB8DGMP/ref=ppx_yo_dt_b_asin_title_o07_s00?ie=UTF8&psc=1
Battery Pack For Raspberry Pi 3 B+ $25.25 1 https://www.amazon.com/gp/product/B07BSG7V3J/ref=ppx_yo_dt_b_asin_title_o02_s00?ie=UTF8&psc=1

Areas of Concern:

I am having trouble making my rouge wifi network fast enough to connect to with just the internal wifi adapter and external adapter alone, I am looking into solution but I could use some advice here. I will be doing the software for the rest of my devices this week so I am sure I will run into problems there as well.