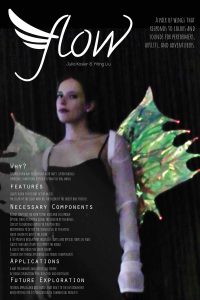
Final Project Post – Flow

Flow

Julia Kosier & Yiting Liu

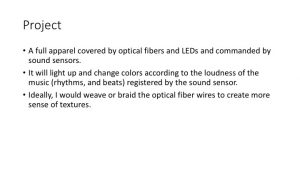
A pair of wings that responds to sounds and colors for artists, performers, and adventurers.

Video


Poster

Describe what your project does and how it works (2 points) (Min. one Paragraph)

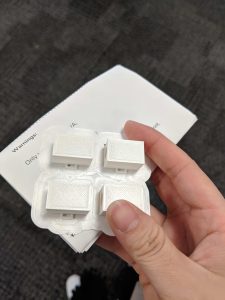
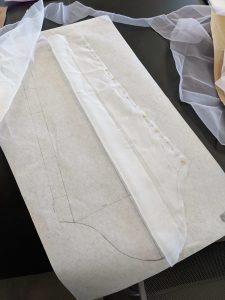
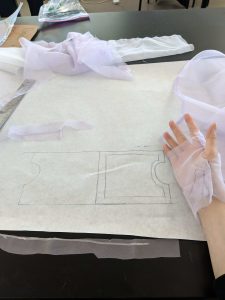
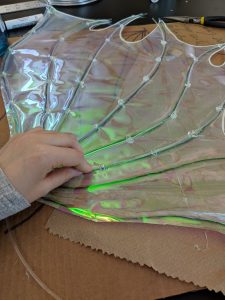
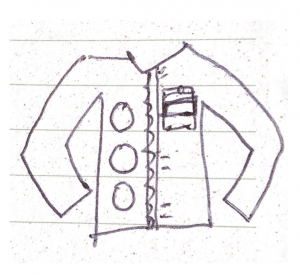
The project is a pair of light-up wings that reacts to external color and sound. The wings themselves are constructed with floral wire and cellophane. The light comes from four RGB LEDs that feed into 8 fiber optic cables on each wing. These LEDs are controlled by a Circuit Playground Express microcontroller. The color of the lights is determined by a color sensor attached to the sleeve of the project; the microcontroller collects the color data from the sensor and changes the LEDs to match. Meanwhile, the microcontroller’s microphone collects decibel level and maps it to the current LED brightness such that the LEDs will be brighter the louder the surroundings are.

Describe your overall feelings on your project. Are you pleased, disappointed, etc.? (2 points)(Min. one Paragraph)

We are very proud of our project overall. Through a lot of trial and error, we were able to get a functional product. Some pieces of our project could have been done better had we more time or another iteration – for example, the spray adhesive we used to attach the layers of cellophane ended up not securing as tightly as we could have liked and leaving visible splotches of glue – but for the time we were given and considering neither of us had made a project like this before we’re very proud of our work.

Describe how well did your project meet your original project description and goals.  (2 points)(Min. one Paragraph)

Our original goal was the incorporate reactions to both a color sensor and a microphone in an aesthetically pleasing way. We have accomplished this goal; our project correctly responds to that information and we made it aesthetically pleasing both in darkness and in light. Some details could be improved; for example, we originally wanted a material that would diffuse the light rather than making it clear where the light is emitted. In the final project, this doesn’t happen as well as we wanted: it can be seen clearly where the fiber optic cables the light runs through are placed. The light is also much dimmer than we may have wanted, requiring complete darkness to be properly seen. Overall, however, we think we properly accomplished our goals.

Describe the largest hurdles you encountered.  How did you overcome these challenges? (2 points)(Min. one Paragraph)

Yiting:

There are two hurdles I encountered. The first one is the difficulty of securing the optic fibers along the wires of the wings. Before I put my hands on the construction of the optic fibers, I thought the adhesive spray and the cellophane would make sure the optic fiber is aligned in place. Yet, it turned out to be more difficult than I expected since the fibers move around a lot. It would be very difficult to put cellophane on top of the wires and optic fiber while making sure they are placed neatly. In the end, I had to use hot glue to secure the optic fibers but the placement of the glue spots are not consistently placed, making it less aesthetically pleasing. If I were to make the wings better, I would have a 3d printing model to replace the wire and put optic fiber or Neopixel along with the printed model. Or, I would sew the optic fiber along the wire to make it less visible than the glue spots.

Another difficulty is to figure out the circuit design for the color sensor from the sleeve to the extended fabric attached to the cardboard panel while making sure there is enough space for the microcontroller and the soldering to the LEDs. If I have more time, I would 3d print the panel and make it a firm but flexible towards the back of the model so that the panel won’t appear downwards when being worn.

Julia:

The biggest struggle I encountered was in the coding. I used Arduino to write to the Circuit Playground, which introduced a couple of weird difficulties. For example, to change the color of the RGB LEDs, you need to be able to analog write to them; however, it took trial and error with Kevin to discover Arduino’s analog write function doesn’t work properly unless you refer to the pins by their digital numbers (6, 9, 10) rather than their analog numbers (A1, A2, A3). I also struggled with coding for the color sensor; there are few resources online for coding with it, and I spent a long time trying to debug why the code occasionally suddenly stopped working before realizing it’s not the fault of the code, but that the color sensor is very sensitive – if it loses connection with its SDA or SCL wire even momentarily, or if a short circuit occurs, even when it reconnects it will only read 0’s (thus turning off the lights) until the Circuit Playground is reset.

Describe what would you do next if you had more time (2 points) (Min. one Paragraph)

Yiting:

If I had more time, I would sew the optic fiber onto the floral wire rather than using hot glue to secure the optic fiber, create a more stable panel to hold the wings using 3D-printed model, design a better vest that is adjustable to everyone, and implement a better circuit design using conductive thread to connect from color sensor to the microcontroller.

Julia:

Given more time, I would try to fine-tune the code for more true color representation; the brightnesses of the red, green, and blue lights within the LED differ and even with different strength resistors connected to each pin the color is still slightly off. I’d also like to attempt sanding the sides of the fiber optic cables since we found even the side-emitting fiber optic cables are very dim unless in complete darkness.
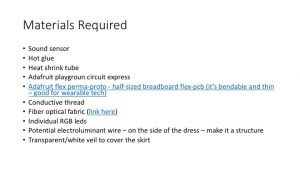
List of materials:

Side Glow Fiber Optic Cable 1.5mm~8mm Optical Fiber [1.5mm for 15 meters]
Color Sensor
16 Gauge Floral Wire
Fabrics
Cellophane
Heat Adhesive Spray
Elastic
3D Printing Model

Flow – Project Post 7

Project title: Flow

Team: Julia Kosier & Yiting Liu

Accomplishments

Julia:

  • Added code to integrate color sensor readings with current code
  • Debugged unstable color sensor code & rewrote sound sensor code for more visible results

Yiting:

  • Printed the 3d printing model
  • Finished sewing the sleeve and its extra part to attach the color sensor on
  • Glued the optic fibers to the skeleton of the wings
  • Worked on the stabilizing structure of the wings
  • Finished designing for the poster


images


  • material list copy your material list from last week. If you have added any new items, include them and highlight them in red. If you have removed items from last week, include them with an orange background.
Part/Material Price Quantity Link to a purchase location
1 Side Glow Fiber Optic Cable 1.5mm~8mm Optical Fiber For Lighting Decorations

[1.5mm for 15 meters]

$15.99 w/o tax 1 https://www.ebay.com/itm/Side-Glow-Fiber-Optic-Cable-1-5mm-8mm-Optical-Fiber-For-Lighting-Decorations/253189403496?ssPageName=STRK%3AMEBIDX%3AIT&var=552285229283&_trksid=p2057872.m2749.l2649
2 Color sensor $7.95 1 https://www.adafruit.com/product/1334
3 16 gauge floral wire $11.99 1 https://www.amazon.com/gp/product/B00T831TFA/ref=ppx_yo_dt_b_asin_title_o00_s00?ie=UTF8&psc=1
4 Fabrics $3.99/yd

Including shipping total is $14.18

2 yards https://www.fabricwholesaledirect.com/products/sheer-voile-fire-retardant-fabric?gclid=Cj0KCQiAk-7jBRD9ARIsAEy8mh7xxCRl9hFRSNDtoD39ELNlrFHEVmJTnGmABucK8v3UQuPzZhtuZJoaAgeFEALw_wcB&fbclid=IwAR34tdd2dbImfbFrF7y8HEeAAJFUZJpFmekLj1aYBwW7GRi0Cw8Gx2MD5G4
5 Cellophane $15.99 1 https://www.amazon.com/gp/product/B07GR4NCC9/ref=ppx_yo_dt_b_asin_title_o01_s00?ie=UTF8&psc=1
6 Heat spray $5.77 1 https://www.amazon.com/gp/product/B000PCWRMC/ref=ppx_yo_dt_b_asin_title_o02_s00?ie=UTF8&psc=1
7 Elastic $.60/foot 10 feet https://www.strapworks.com/Elastic_p/e.htm
8
9


  • areas of concern now you have gotten started on your project, write a paragraph to articulate the areas in which you are most concerned about for your project.  Highlight areas where you are looking from help.

Areas of concern:

  • We need better support system for the wings to make it stabilized [Maybe we could also use more elastic strap to stabilize the wings]
  • We also need to start working on the back circuit design right away

Project Post 6 – FLOW

Project title: Flow

Team: Julia Kosier & Yiting Liu

Accomplishments

Julia:

  • Wrote code to collect sound level from Circuit Playground microphone and map the results to the brightness level of the lights

Yiting:

  • Attached the optic fiber onto the wings
  • Redesigned the 3d printing to make the optic fiber stably attached to the microcontroller

Together

  • Reached a conclusion to attach the sleeve onto the elastic strap
  • Brainstormed the sleeve design and circuit design
  • Constructed the strap


images

Attached the optic fiber on the wings

  • material list copy your material list from last week. If you have added any new items, include them and highlight them in red. If you have removed items from last week, include them with an orange background.
Part/Material Price Quantity Link to a purchase location
1 Side Glow Fiber Optic Cable 1.5mm~8mm Optical Fiber For Lighting Decorations

[1.5mm for 15 meters]

$15.99 w/o tax 1 link
2 Color sensor $7.95 1 link
3 16 gauge floral wire $11.99 1 link
4 Fabrics $3.99/yd

Including shipping total is $14.18

2 yards link
5 Cellophane $15.99 1 link
6 Heat spray $5.77 1 link
7 Elastic $.60/foot 10 feet link
8


  • areas of concern now you have gotten started on your project, write a paragraph to articulate the areas in which you are most concerned about for your project.  Highlight areas where you are looking from help.

Areas of concern:

  • We need sleeve design support to make sure the movement of the right arm won’t affect the circuit attached on the back with the wings.
  • We need to ensure our strap design fully supports the wings
  • We need to also work on the functionality of optic fibers on the wings

Project Post #5 – Velcro MIDI Jacket

Project Post 5

Project Title

Velcro MIDI Jacket

Project Team

Junda Chen, Jeff Ma, Yudong Huang, William Black

Weekly Accomplishments

Note

  • Accomplished item: item
  • Major responsible men: (man1, man2, …)

List

  • 3D Print Leap Motion case
    • Printed the model in Makerspace (Jeff, Yudong)
    • Integrate Leap  motion on jacket (Jeff, Yudong)
  • Theremin Software
    • Run on Raspberry Pi 3+ (Have a big trouble with Raspberry PI) (Junda, Jeff)
    • Java script to experiment/benchmark (Junda, William)
    • Python script to experiment/benchmark (Junda, William)
  • Jacket
    • Select and buy Velcro (Yudong, Jeff, William)
    • Select (and buy) a jacket. (Yudong, Jeff)
    • Integrate Velcro on Jacket (Yudong)
    • Re-Design the light effect of the jacket (Yudong, Jeff)

Image/Video

Figure 1. Velcro Jacket design. We attach the velcro to jacket and it looks like this. We will try to integrate it on the velcro if possible this week.

Figure 2,3. Leap Motion case. Using PVA we printed the case of Leap Motion, polished it and tried it on body. It seems great : )

Material list

  • Circuit Board: (Potentially) MIDI encode/decoder, Leap motion image processor,
    • Arduion (1):
    • Circuit Playground (1)22
    • Raspberry Pi 3B + (1, with toolkits): $30-50
  • Leap Motion (1): $96
  • LED Strip light (2, TBD)
  • Black velcro fabric (we have in the studio)
  • A Jacket (1, TBD)
  • (Safe) Infrared LED (20)
  • Long USB cable (x2) (for emergency and design)


Areas of Concern

  • Raspberry Pi Power Supply and Performance: We have a big headache. These are the approaches we tried to do — we might need some help
    • Change a PI — it’s on its way from Amazon.
    • Check Power Supply. — we tried to use Michael’s power adaptor (official), Mike’s  power adaptor (5V 2.4A), Mike’s roommate’s power adaptor (5V 2.5A and 9V 4A). None of them work. Our speculation is: the PI works, but the kernel might not be able to boot because of reason other than power adaptor (see below).
    • Check SD card image. — we tried the combination of the following methods — it does not work by far.
      • Change image (all newest from the official download website: https://www.raspberrypi.org/downloads/)
        • Noobs
        • Raspbien
        • Snappy Ubuntu kernel
        • Ubuntu Mate kernel
      • Change SD card format
        • FAT32: especially for TF card larger than 32G (https://www.sdcard.org/developers/overview/capacity/)
        • exFAT
      • Change TF card
        • Sony Micro TF 128G (Mike’s card — might be too large, but was bootable when using FAT32)
        • Samsum TF 32G
  • User Experience: How to let our users know how to operate without a screen?


Project Post #4 – Velcro MIDI Jacket

Project Post 4

Project Title

Velcro MIDI Jacket

Project Team

Junda Chen, Jeff Ma, Yudong Huang, William Black

Weekly Accomplishments

Note — This is an accomplished item: item

  • 3D Print Leap Motion case
  • Theremn Software
    • Motion trace: proximity and height change
    • Data Transfer
    • Theremin instrumental voice
    • (Optimize) Range Detection
      • Test how many Infra-ray LEDs are sufficient to optimize detection
        • on wrist
        • on Jacket
    • (Optimize) Position to put the Leap Motion on the Jacket
      • Waist band — with a tiled case the effect is good.
    • Run on Arduino (Don’t have to run on Arduino)
    • Run on Raspberry Pi 3+
  • Leap Motion Optimization
    • Add an infrared light source to
    • Determine where the light should be
      • On Jacket
  • User Experience Design: Tune the software to let user make sense of how to use it.
  • Jacket
    • Select a light
    • Select a material for diffusion
      • Sheer from underneath
    • Design the jacket: Finally Decide on Velcro Hoodie !!!!
      • Velcro Hoodie? — Have all the things in the velcro and stick waistband to the velcro on the Hoodie.
    • Select (and buy) a jacket.
    • Re-Design the light effect of the jacket

Image/Video

(Figure 1,2): Two implementations of light

(Figure 3): Current design using Velcro. This is a remarkable shift in our project development. To solve the conflict between the freedom of light design and the constrain of other hardware devices, we proposed the use of Velcro to decomposite the design of hardward components (on the waist band) and the design of light (on the jacket). From now, all the hardward-related design will be presented on the waistband, which can be attach/detach to the jacket using the Velcro. The light on jacket is also configurable using Velcro, and can be connected to the waistband for power supply.


Material list

  • Circuit Board: (Potentially) MIDI encode/decoder, Leap motion image processor,
  • Leap Motion (1): $96
  • LED Strip light (2, TBD)
  • Black velcro fabric (we have in the studio)
  • A Jacket (1, TBD)
  • (Safe) Infrared LED (20)
  • Long USB cable (x2) (for emergency and design)


Areas of Concern

  • Infrared LED Safety to eye: To design a better tracking of hand while not directly influence users’ eye is a design challenge, and that might require some research in the area.
    • With the current LED model, it is basically safe to the eye with all the possible implementations we want to make.
  • Raspberry Pi Power Supply and Performance: Have to benchmark on the Raspberry Pi how well the theremin work with external power supply. The fall-back for this project is to directly connect all things back to a MacBook.
  • User Experience: How to let our users know how to operate without a screen?


Past Development Log

Cylon.js: an Arduino API to control the leap motion

Adafruit strip LED : a $17.99

Leap Motion installation: Troubleshooting in Windows.


Project Post #3: Theremin Jacket

Project Team

Junda Chen, Jeff Ma, Yudong Huang, William Black

Weekly Accomplishments

([x]: Finished Task)

  • 3D PrintLeap Motion case
  • [x] First software prototype for theremin
    • [x] Motion trace: proximity and height change
    • [x] Data Transfer and MIDI encode/decode
    • [x] Run on Arduino/Raspberry Pi
  • Leap Motion Optimization
    • [x] Add an infrared light source to
    • Determine where the light should be
      • Wrist
      • On Jacket
  • Jacket
    • [x] Jacket and light
    • Select a jacket.
    • [x] Design the jacket.
    • Design the light effect of the jacket

Image/Video

Material list

  • [x] Circuit Board: (Potentially) MIDI encode/decoder, Leap motion image processor,
  • [x] Leap Motion (1): $96
  • [x] LED Strip light (2, TBD)
  • A Jacket (1, TBD)
  • [x] (Safe) Infrared LED (20)

Areas of Concern

  • Infrared LED Safety to eye: To design a better tracking of hand while not directly influence users’ eye is a design challenge, and that might require some research in the area.

——

Development Log

Cylon.js: an Arduino API to control the leap motion

Adafruit strip LED : a $17.99

Leap Motion installation: Troubleshooting in Windows.

Project Post #2 – Theremin Jacket

Project Post 2

@Postdate: Mar 9th (Sat)

Project Title

Theremin Jacket

Project Team

Junda Chen, Jeff Ma, Yudong Huang, William Black

Major aspects for Development

  • Sensor

    • Sonar Sensor

    • Leap Motion

  • Arduino/Other interface & Software Design

    • MIDI Software

    • Storage

    • Data Transfer

  • Clothes Design

    • Sensor/Leapmotion embedding

    • Light Design

      • LED

      • Covering Material / Defussing material (Potentially)

    • Jacket

Weekly Accomplishments

  • Setup sonar sensor tracking in Arduino Mega.
  • Use sonar sensor to build a prototypical MIDI device.
  • Leap Motion Mechanism
    • How leap motion works, Accuracy, General application
    • HW and SW. Compatilibility to IoT Devicess
  • 3D PrintLeap Motion case
  • First software prototype for theremin
    • Motion trace: proximity and height change
    • Data Transfer and MIDI encode/decode
    • Run on Arduino/Raspberry pi
    • (Optimization) De-noise.
  • Select a jacket.
  • Design the jacket.

Image/Video

Changes to our approach

We originally want to design the primitive circuit and sensors to make the sensing work. William has just worked out the sonar in wednesday, and as a backup plan and primitive approach we will design a theremin using the sonar sensors and integrate it as a part of jacket.

In search for potential improvement of gesture recognition, we also focus our attention on Leap Motion. On leap motion, we’re able to capture richer and more sensive gesture information — able to grab, tremble, drastically move up and down, within its well-defined range of service.

Material list

  • Circuit Board: (Potentially) MIDI encode/decoder, Leap motion image processor,
  • Leap Motion (1): $96
  • LED Strip light (2, TBD)
  • A Jacket (1, TBD)

Development Log

Cylon.js: an arduino API to control the leap motion

Adafruit strip LED : a $17.99

Leap Motion installation: Trouble shooting in Windows.

Project Post #1: Theremin Jacket

Project Title

Theremin Jacket

Team Member

Jeff Ma, Junda Chen, William Black, Yudong Huang

Project Description

1) What does our project do?

The concept of Theremin Jacket comes from the Theremin, an electronic musical instrument that could be controlled without physical contact by the performer. Thus, the Theremin Jacket we want to make allows the wearer to control an external connected MIDI to play music without any physical contact.

2) Who is our project for?

Theremin Jacket is for people who are fans of music, or more specifically, fans of the electronic musical instrument Theremin. It could also provide a chance to those without any experience of playing musical instrument to play music.

3) Describe how someone would use the developed device. What are the steps that a user would go through to interface with the technology?

First, there will be a switch on the jacket that allows wearers to turn on/off the circuit. When circuit is on, sensors on the jacket will read positions of wearers’ hands and arms in real time. After that, those data will be transmitted to the external connected MIDI through bluetooth and the MIDI will receive and play corresponding tones.

Besides the features mentioned above, we might also want to allow wearers to play different type of sounds by moving different parts of body instead of just two arms (ex. Playing drum by moving one foot up and down). We could also try allowing user store customize MIDI instrumental sounds in an external device and display sounds by speaker or earphone.

4) What makes your project different from existing products?

As we have researched so far, we have not found a wearable technology that support Theremin and MIDI music that allows user to move and control  the flow of music. There are products that allow user to move but produce funny music (e.g. movement jacket), and products that allow user to control music but in a fixed, not fully interact-able way (e.g. arm MIDI keyboard, MIDI shirt, etc).

Our project aims to provide an easy to control interface to detect user hand movement. User adjust pitch by putting hands in different heights ( or different relative position from the other device ) and control music flow by the touch of buttons and proximity to body.

Inspirations

12th December 1927: Professor Leon Theremin demonstrating his theremin. The theremin was the world’s first electronic musical instrument. It is played without actually touching any part of the instrument. Film scores of the 40s and 50s used the instrument to eerie effect and it makes a famous appearance in the chorus of the Beach Boys hit ‘Good Vibrations’. (Photo by Topical Press Agency/Getty Images)

Sketch

Material/Tools Needed

  • Base Jacket
  • Accelerometers / Infrared Sensors / Sonars (for position detecting)
  • Arduino Board
  • Thread
  • Machine Needles
  • Battery

Skills/Concept to Master

  • Coding in Arduino
  • Connecting with MIDI
  • Making sensors work
  • Mounting sensors
  • Data transmit through Bluetooth

Timeline

Milestone 1 (March 25)

  • Try out different types of position detectors
  • Determine which type of position detectors to finally use

Milestone 2 (April 8)

  • Get the base jacket
  • Mount sensors on the jacket
  • Data transmit through Bluetooth
  • Connect with MIDI
  • Improve overall precision

Milestone 3 (April 22)

  • Improve overall precision
  • Aesthetic adjustments

Fallback Plan

We are planning to implement a jacket that allows wearers to control different parameters of music (i.e. pitch, amplitude or duration). If later in this semester we could determine that we have fallen behind what we have expected, we could: 1) Instead of having both arms to work, just implement and make sure one arm to work, and decrease the number of parameters of music we are going to control, or 2) Instead of making a Theremin Jacket, just simply make a position detector for parts of a body.

Project Pitch – Junda Chen

Musical Jacket

Summary

Musical Jacket that allows musician to freely play and record music is an attractive idea for me. For now I envision a realistic implementation that support the record, play and output of the music by MIDI keyboard-like structure attached on the front of the jacket.

I am open to idea that related to other idea under category “aesthetic, conceptual, data driven/AI, musical”. I think the musical jacket, though not a brand new idea, is quite useful and straight forward to implement (at least as it seems to be right now). I would therefore love to connect to other ideas that could make the jacket more pragmatic and aesthetic.

Slides for introduction