Project Post 5: Lit Lehenga

Individual: Jessica Fernandes

Weekly accomplishments:

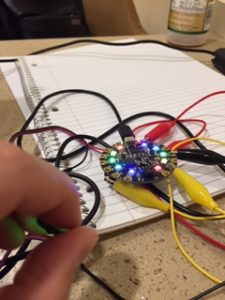
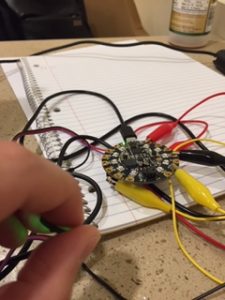
  • I tested and wrote the code for the light sensor on the Circuit to turn on its lights in darker surroundings. The lights brighten in proportion to the environment’s level of darkness.
  • Materials I have: Circuit Playground Express, light sensors, power source to test
  • Materials on the way: LEDs, Enclosure, power source for final stage
I worked out the code to trigger the lights on the circuit playground express to illuminate in a darker environment.

Linked below are my pictures of:

Materials

Areas of concern

  • Ensure that the additional LED sequins are triggered by the light sensor; it doesn’t function as planned currently. Connect the hardware in a wearable configuration to plan where they’ll ultimately be sewn. (The materials are expected to arrive this Monday, April 8th.)

Project Post #5

Safe Sleeve

Jake Cordover

Weekly Accomplishments:

I have finally received the two sensors this week, thus I have begun implementing the program to measure the actual knee data. Bluetooth seems to be a little finicky, so I have focused on developing the code on a wired basis at this point. I have gotten it to the point where the accuracy seems to be within 5-10 degrees of the desired value, however, there seems to be a lot of noise and/or drift. I plan on hopefully implementing some techniques or researching what can be done to reduce the drift or noise.

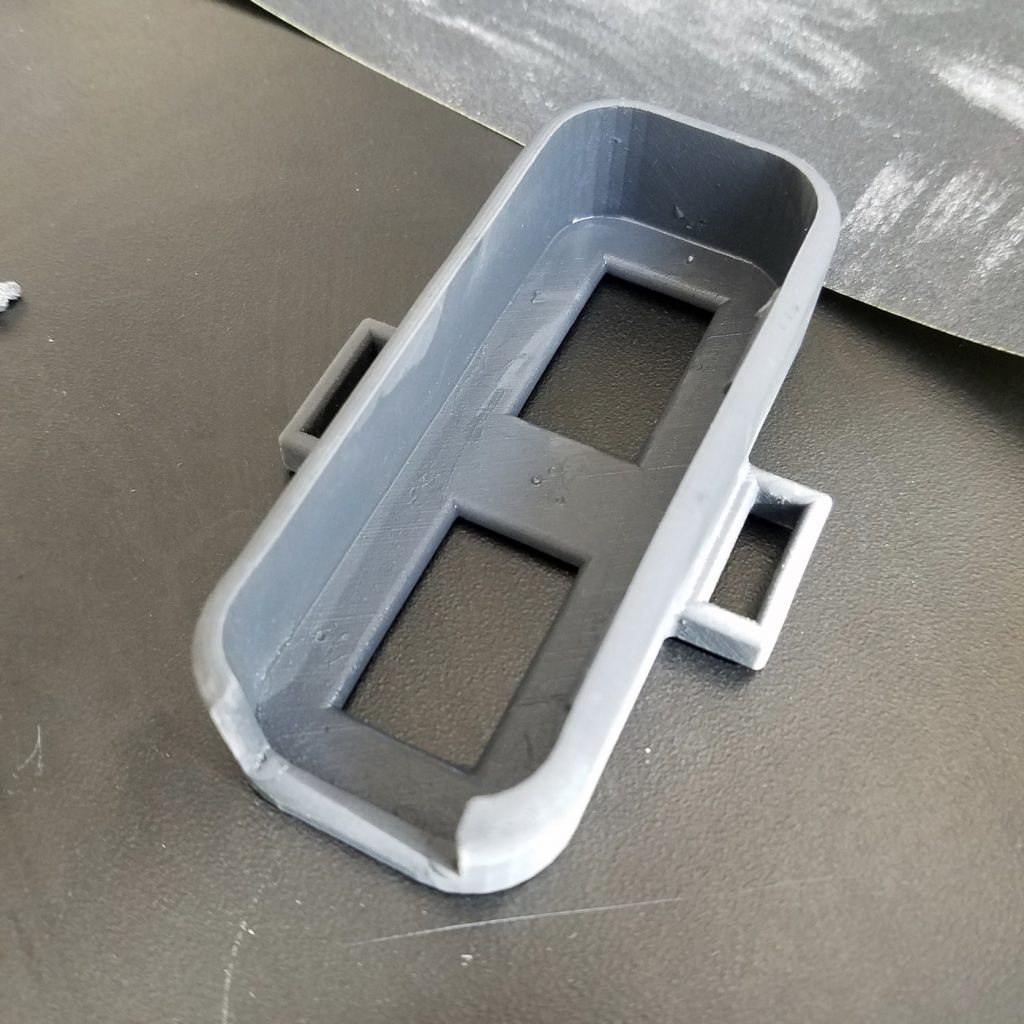
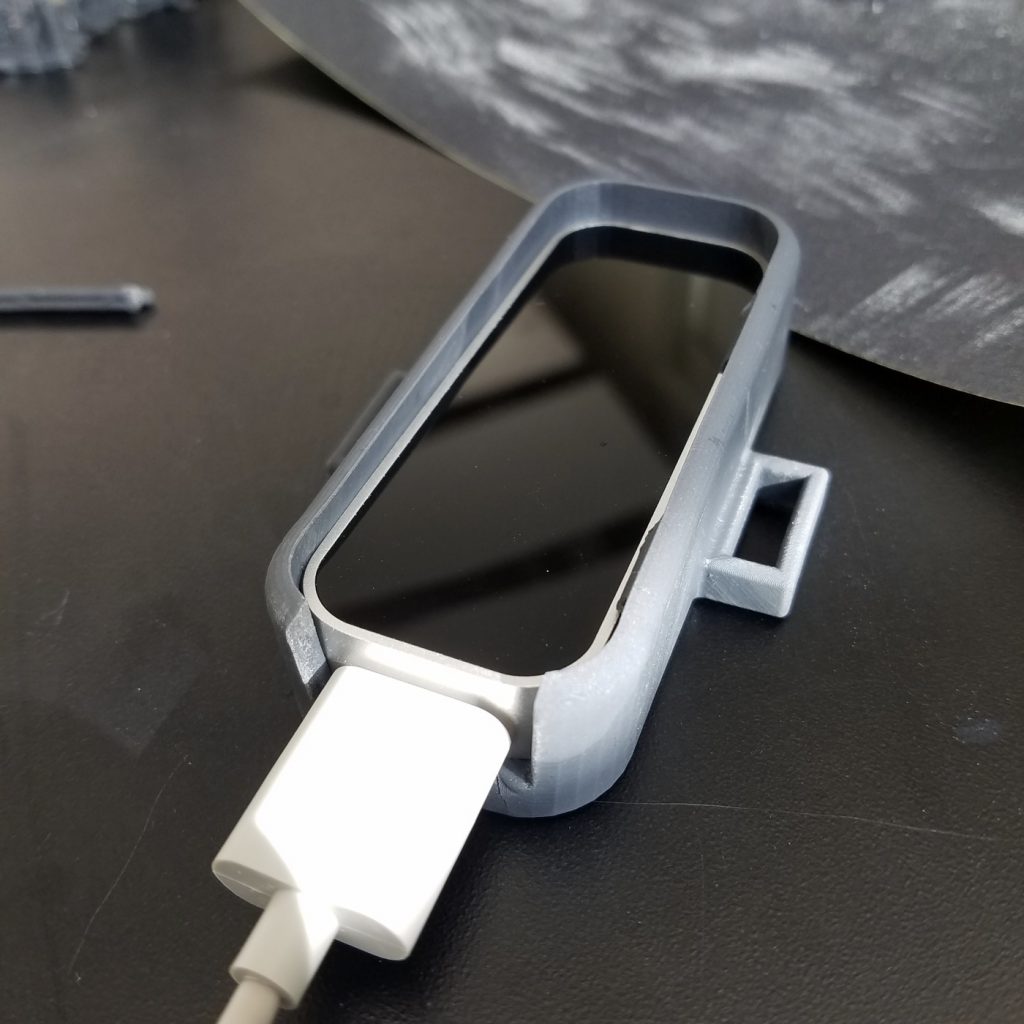
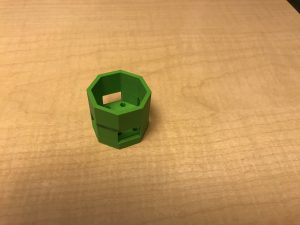
Otherwise, I have printed a prototype of the enclosure that I will be using to secure the sensors. Since I have the sensors, I can adjust the prototype’s dimensions and design, and hopefully have the enclosure pretty close to the final version.

Images:

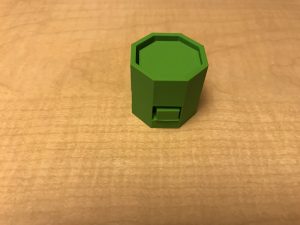
The images are of the 3D printed enclosure prototype.

Materials (no change):

Part/Material Price ($) Quantity Link
Potential IMU 1 117 with discount secured 1 https://yostlabs.com/product/bluetooth-mini/
Knee Sleeve 1 16.97 1 https://www.amazon.com/PowerLix-Compression-Knee-Sleeve-Basketball/dp/B01MQYADOT/ref=sr_1_5?keywords=powerlix+knee+sleeve&qid=1552264456&s=gateway&sr=8-5
Knee Sleeve 2 20 1 https://www.amazon.com/Zensah-Knee-Compression-Sleeve/dp/B00GPU7QRO/ref=sr_1_6?keywords=zensah+knee+sleeve&qid=1552264496&s=gateway&sr=8-6#customerReviews
3D printing and associated costs TBD TBD TBD

Areas of concern:

I’m a little concerned about the reliability and functionality of the Bluetooth, but at this point I am focusing on getting the best measurements using a wired approach.

Otherwise, the drift/noise issue is potentially very problematic. This may require a significant effort to smooth, otherwise I might need to start looking for a workaround.


Project Post #5: Michael Leykin

Project Title: Penetration of Endpoints and Networks Infiltration System

Project Team: Me, Myself and I

Weekly Accomplishments + Pics:

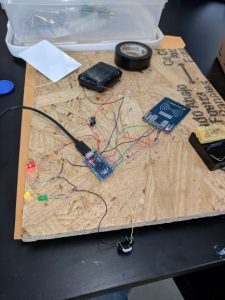
This week I got all my software working on the RFID thief and bash bunny, both are ready to go. Need to figure out a way to effectively demonstrate, will be packing these circuits up this week and designing neat “hats” to cover them to 3D print using autodesk inventor.

Material List:


Part

Price Quantity Link
wireless network adapter $28.50 1 https://www.amazon.com/gp/product/B0035OCVO6/ref=ppx_od_dt_b_asin_title_s01?ie=UTF8&psc=1
Ethernet cable $3 1 https://www.amazon.com/AmazonBasics-RJ45-Cat-6-Ethernet-Patch-Cable-5-Feet-1-5-Meters/dp/B00N2VILDM/?tag=whtnb-20
Raspberry Pi 3 or 3 B+ $38.10 1 https://www.amazon.com/ELEMENT-Element14-Raspberry-Pi-Motherboard/dp/B07BDR5PDW/?tag=whtnb-20
microSD card $6.85 1 https://www.amazon.com/SanDisk-microSDHC-Standard-Packaging-SDSQUNC-032G-GN6MA/dp/B010Q57T02/?tag=whtnb-20
power source (Enokay Power Supply for Raspberry Pi 5V 2.5A Micro USB Charger Adapter with On Off Switch) $8.59 1 https://www.amazon.com/Enokay-Supply-Raspberry-Charger-Adapter/dp/B01MZX466R/?tag=whtnb-20
USB keyboard/mouse interface (Rii Mini Wireless 2.4GHz Keyboard with Mouse Touchpad Remote Control, Black (mini X1)) $16.99 1 https://www.amazon.com/gp/product/B00I5SW8MC/?tag=whtnb-20
SD card adapter $7.99 1 https://www.amazon.com/Vanja-standard-Connector-Notebooks-Smartphones/dp/B00W02VHM6/?tag=whtnb-20
Raspberry Pi Zero Wifi $10.00 1 https://www.adafruit.com/category/933?src=raspberrypi
Pi Zero USB Stem $5.00 1 https://shop.pimoroni.com/products/zero-stem-usb-otg-connector
2 x Tactile Push Button Switch With LED lights $3.00 1 https://www.aliexpress.com/item/5PCS-1-set-12X12X7-3-Tactile-Push-Button-Switch-Momentary-Tact-LED-5-Color-12X12X7-3mm/32873551440.html?spm=2114.search0104.3.2.3b0241a0ILdgzL&ws_ab_test=searchweb0_0,searchweb201602_5_10065_10130_10068_10890_10547_319_10546_317_10548_10545_10696_453_10084_454_10083_10618_10307_537_536_10902_10059_10884_10887_321_322_10103,searchweb201603_58,ppcSwitch_0&algo_expid=0747bf75-f245-43c5-a0c1-4966ea4078a8-0&algo_pvid=0747bf75-f245-43c5-a0c1-4966ea4078a8&transAbTest=ae803_5
DIP switch with 4 switches $3.00 1 https://www.aliexpress.com/item/10pcs-lot-Slide-Type-SMT-SMD-Dip-Switch-2-54mm-Pitch-2-Row-4-Pin-2/32956815576.html?spm=2114.search0104.3.3.4c971641sXqPaV&ws_ab_test=searchweb0_0,searchweb201602_5_10065_10130_10068_10890_10547_319_10546_317_10548_10545_10696_453_10084_454_10083_10618_10307_537_536_10902_10059_10884_10887_321_322_10103,searchweb201603_58,ppcSwitch_0&algo_expid=60dfe6ec-dd9e-4db7-93f0-5f94aec30ef4-0&algo_pvid=60dfe6ec-dd9e-4db7-93f0-5f94aec30ef4&transAbTest=ae803_5
2 x 330R resistors HAVE 1
MFRC522 RFID reader module $5.49 1 https://www.amazon.com/gp/product/B01CSTW0IA/ref=ppx_od_dt_b_asin_title_s01?ie=UTF8&psc=1
MIFARE 1K RFID card (with changeable UID, 13.56Mhz) Included 1
some RFID card to copy (only 13.56Mhz cards can be read/written by this particular card reader module) Included 1
Tactile Touch Push Button Switch Tact Switches 6 X 6 X 5mm Included 1
LEDs (red, yellow, green) + resistors (1k ohm) $7.00 1 https://www.amazon.com/gp/product/B01ER728F6/ref=ppx_od_dt_b_asin_title_s02?ie=UTF8&psc=1
3 AA batteries (1.5V each) HAVE 1
2 zener diodes (3.7V) or (3.6V) $8.00 1 https://www.amazon.com/gp/product/B07BTKVRG8/ref=ppx_od_dt_b_asin_title_s01?ie=UTF8&psc=1
switch (3 Terminals ON/ON 2 Positions SPDT Electronic Push Button Sliding Switches) $5.00 1 https://www.amazon.com/gp/product/B0799R529Z/ref=ppx_od_dt_b_asin_title_s02?ie=UTF8&psc=1
cables, hot glue, tape (30AWG Insulated Silver Plated Single Core Copper PCB 0.25mm Kynar Wrapping Wire) $5.00 1 https://www.amazon.com/gp/product/B07M7BHKRV/ref=ppx_od_dt_b_asin_title_s01?ie=UTF8&psc=1
Arduino Pro Micro 5V $20.89 1 https://www.amazon.com/gp/product/B01MTU9GOB/ref=ppx_yo_dt_b_asin_title_o04_s00?ie=UTF8&psc=1
PCB Prototyping Board $10.00 1 https://www.amazon.com/gp/product/B072Z7Y19F/ref=ppx_od_dt_b_asin_title_s02?ie=UTF8&psc=1
Solder Gun $67.98 1 https://www.amazon.com/gp/product/B01MDTO6X7/ref=ppx_yo_dt_b_asin_title_o06_s00?ie=UTF8&psc=1
Desoldering Gun and Desoldering Wick $7.69 1 https://www.amazon.com/gp/product/B07BB8DGMP/ref=ppx_yo_dt_b_asin_title_o07_s00?ie=UTF8&psc=1
Battery Pack For Raspberry Pi 3 B+ $25.25 1 https://www.amazon.com/gp/product/B07BSG7V3J/ref=ppx_yo_dt_b_asin_title_o02_s00?ie=UTF8&psc=1

Areas of Concern: Still need to figure out a way to boost my wifi pumpkin to be more powerful and need to find a way to effectively demonstrate my tools, may be difficult without getting into technicalities.

Project Post #5: Virtual Vermin

Virtual Vermin

Jeff Brandt


Weekly Accomplishments:

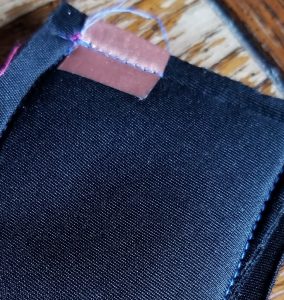
  • Completed manufacturing of soft switch to be placed in fingertips


Images:

Material List:

Wireless Mouse // Quantity: 1 // $9.99 // https://www.amazon.com/gp/product/B015X2OD52/ref=ppx_yo_dt_b_asin_title_o00_s00?ie=UTF8&psc=1

Conductive Fabric // Quantity: 1 sq. ft. // ? // Supplies in classroom

Conductive Thread // Quantity: 2 yds. // ? // Supplies in classroom

Negative Poisson Ratio Foam // Quantity: 1 sq. ft. // Free // Supplied by my research lab

Gloves // Quantity: 1 // $11.95 // https://www.amazon.com/Agloves-screen-gloves-texting-gloves/dp/B004A9FI2M/ref=sr_1_6?keywords=thin+glove&qid=1552266834&s=electronics&sr=1-6

3D printed cover for circuit board // Quantity: 1 // ? (Depends on final print) // creating in Solidworks


Areas of Concern:

The same as last week but my plan is to complete all parts before integrating them all at once.

After prototyping the connections to circuit board, the area I am most concerned with is actually integrating all components into the physical glove. It isn’t a major concern and will most likely just take some trial and error.


Project Post #5 Sungjin (SJ) Park

Project Title 

Heart Rater

Project  Team

Sungjin (SJ) Park

Weekly Accomplishments

  • Switched Arduino device and fixed code to make it work on circuit playground express.
  • Redesigned the form of glove.
  • Made it blink with the pulse.

Image


Material List 

Added List

  • Part/Material: Adafruit Circuit Playground Express
  • Price: Provided in class
  • Quantity: 1

Removed List

Kept List

  • Pulse Sensor (Heart-Rate Monitor)
  • Price: $24.99
  • Quantity: 1
  • Link to a purchase location:  https://shop.openbci.com/products/pulse-sensor?utm_medium=cpc&utm_source=googlepla&variant=22543672899&gclid=Cj0KCQjwjpjkBRDRARIsAKv-0O12qE-56tiH7XDqo-T9Cz1l4Yf1ybwdN9RlAyg_Nkxs_yUG0b9LqbsaAkcxEALw_wcB


Areas of Concern

  • It is necessary for me to do soldering on each pin to minimize extra wires such as alligator clips.
  • I also need to order small sized battery to fit on back of the glove.
  • With the design I intend to implement, I will start putting everything together this following week.

Project Post #5 – Velcro MIDI Jacket

Project Post 5

Project Title

Velcro MIDI Jacket

Project Team

Junda Chen, Jeff Ma, Yudong Huang, William Black

Weekly Accomplishments

Note

  • Accomplished item: item
  • Major responsible men: (man1, man2, …)

List

  • 3D Print Leap Motion case
    • Printed the model in Makerspace (Jeff, Yudong)
    • Integrate Leap  motion on jacket (Jeff, Yudong)
  • Theremin Software
    • Run on Raspberry Pi 3+ (Have a big trouble with Raspberry PI) (Junda, Jeff)
    • Java script to experiment/benchmark (Junda, William)
    • Python script to experiment/benchmark (Junda, William)
  • Jacket
    • Select and buy Velcro (Yudong, Jeff, William)
    • Select (and buy) a jacket. (Yudong, Jeff)
    • Integrate Velcro on Jacket (Yudong)
    • Re-Design the light effect of the jacket (Yudong, Jeff)

Image/Video

Figure 1. Velcro Jacket design. We attach the velcro to jacket and it looks like this. We will try to integrate it on the velcro if possible this week.

Figure 2,3. Leap Motion case. Using PVA we printed the case of Leap Motion, polished it and tried it on body. It seems great : )

Material list

  • Circuit Board: (Potentially) MIDI encode/decoder, Leap motion image processor,
    • Arduion (1):
    • Circuit Playground (1)22
    • Raspberry Pi 3B + (1, with toolkits): $30-50
  • Leap Motion (1): $96
  • LED Strip light (2, TBD)
  • Black velcro fabric (we have in the studio)
  • A Jacket (1, TBD)
  • (Safe) Infrared LED (20)
  • Long USB cable (x2) (for emergency and design)


Areas of Concern

  • Raspberry Pi Power Supply and Performance: We have a big headache. These are the approaches we tried to do — we might need some help
    • Change a PI — it’s on its way from Amazon.
    • Check Power Supply. — we tried to use Michael’s power adaptor (official), Mike’s  power adaptor (5V 2.4A), Mike’s roommate’s power adaptor (5V 2.5A and 9V 4A). None of them work. Our speculation is: the PI works, but the kernel might not be able to boot because of reason other than power adaptor (see below).
    • Check SD card image. — we tried the combination of the following methods — it does not work by far.
      • Change image (all newest from the official download website: https://www.raspberrypi.org/downloads/)
        • Noobs
        • Raspbien
        • Snappy Ubuntu kernel
        • Ubuntu Mate kernel
      • Change SD card format
        • FAT32: especially for TF card larger than 32G (https://www.sdcard.org/developers/overview/capacity/)
        • exFAT
      • Change TF card
        • Sony Micro TF 128G (Mike’s card — might be too large, but was bootable when using FAT32)
        • Samsum TF 32G
  • User Experience: How to let our users know how to operate without a screen?


Project Post #5: ROETE

Radio Outdoor Emergency Transmitter Electronic

Natalie Tack

Weekly Accomplishments:

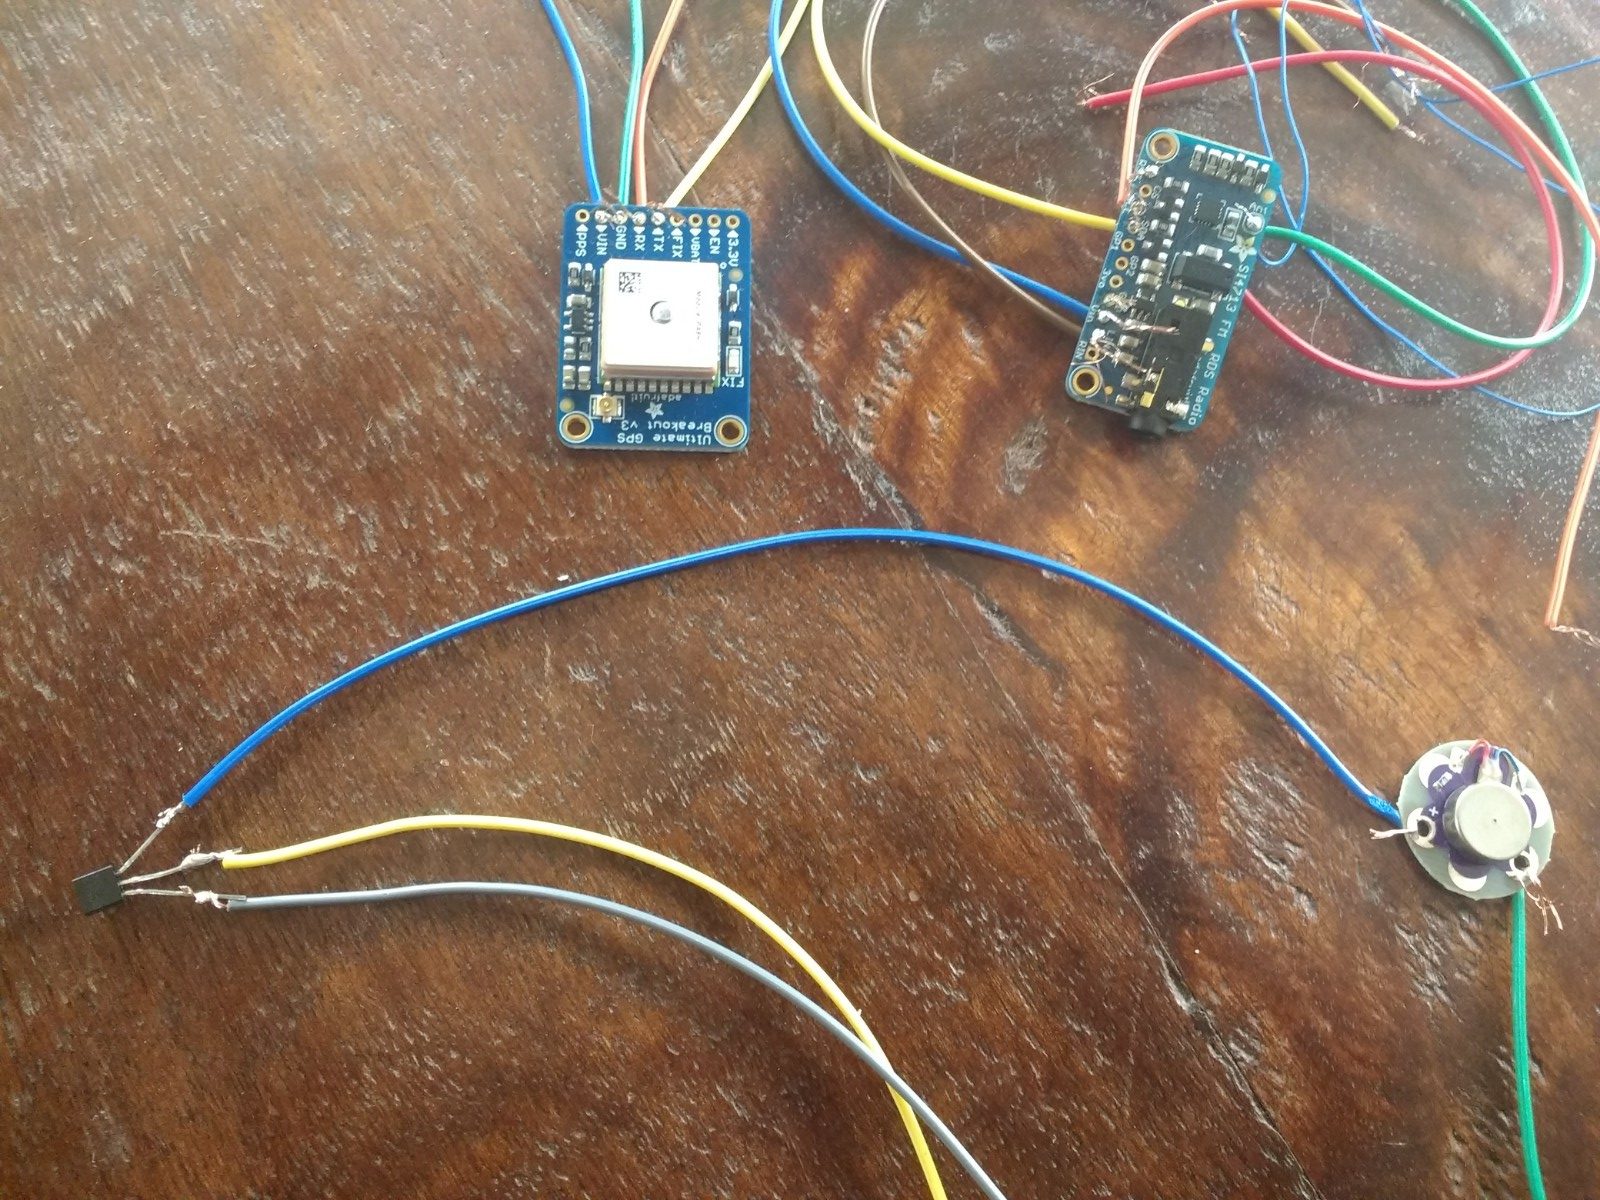
This week I got the GPS working, the vibrator working (with Kevin’s help), and ordered the patch from the embroidery shop (thank you Marianne for the fabric!).

I also soldered all the connections for each respective module. The only thing that is not yet soldered is all the connections to the Circuit Playground Express. I want to get all the modules working together on the Circuit Playground Express before soldering those connections.

Image:

Material List:

  1. FM Stereo Radio Transmitter
    1. Price: $20
    2. Quantity: 1
    3. Link: https://www.amazon.com/Adafruit-Stereo-Transmitter-RBDS-Breakout/dp/B00SK8ME4Y#
  2. GPS Module
    1. Price: $40
    2. Quantity: 1
    3. Link: https://www.adafruit.com/product/746
  3. Vibration Module
    1. Price: $6.95
    2. Quantity: 1
    3. Link: https://www.sparkfun.com/products/11008?_ga=2.218497438.624035456.1554576553-2048369341.1554576553
  4. Patch
    1. Price: $20
    2. Quantity: 1
    3. Link: http://eliteembroideryandscreenprinting.com/
  5. Transistor
    1. Price: $0.30
    2. Quantity: 1
    3. https://www.digikey.com/product-detail/en/on-semiconductor/PN2222ABU/PN2222AFS-ND/6534&?gclid=EAIaIQobChMIn9Kmo5G84QIV1LjACh2IEQZDEAQYAyABEgJoIfD_BwE

Areas of Concern:

I do not currently have any areas of concern for this week, I just want to get all the modules working together, so when the button is pressed three times, it should start the radio, then vibrate 3 times, then say the message on the radio, with the GPS coordinates.

I plan to get all the modules working together this week and then solder them together when they do.

Project Post #5

PROJECT POST #4

Project Title: Vis Hat  

Project Team: Lydia, Fu, Jay

Weekly Accomplishments:

Lydia:

  • Researched: visualization software and data transferring methods; existing data visualization; 3D printing materials
  • Visited maker-space and discussed 3D printing material specifications and properties to find best suited material for our project (we will be using elastic resin 3D printing material for the base and hard pva for the cover
  • Further drafted construction of 3D printed components and design of VisHat overall
  • Continued compiling experiment/testing procedures for data collection in response to different stimulus

Fu:

  • Finishing emitter and photodiode circuit connected to Arduino Due.
  • Test and complete Arduino Due analog read and pin out control.

Jay:

  • Completed emitter detector circuit and tested on head
  • Diagramed finished circuit
  • Fine tuning relating to current going to emitters, and sensitivity of the photodiode

Images:

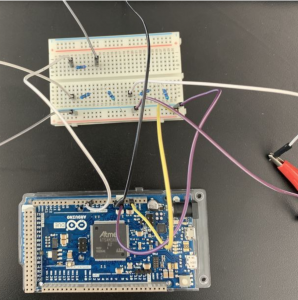
Image 1 is a photo of the circuit setup connected to the Arduino Due

Image 2 is a diagram of the VisHat headpiece construction

Material List:

title/link # needed price/unit notes shipping and tax TOTAL PRICE:
arduino due 1 34.43 34.43
NPN transistor 1 5.99 this one unit contains ~200 resistors 5.99
730nm emitter 2 8.61 9.54 26.76
850nm emitter 2 1.46 2.92
850 max nir detector/sensor 2 5.37 9.02 19.76
bluetooth 1 28.95 RN41XVC (with chip antenna) 8.81 37.76
850nm emitter 2 1.46 To account for trial and error hardware testing 7.99 9.45

Project Concerns:

Now that we’re getting to the point of proof of concept a concern we may face might be noise within the data. We’ve been able to get response from the detectors that seems consistent with actions but whether or not the data collected when the emitters and detectors are placed on the head is from actual refraction or just from external stimulus may be hard to detect. Hopefully when we get to the testing stage we’ll know more about the state of the data.

Additionally, the 3D printing material we’ll be using is clear/transparent and that, too, may affect the kind of data gathered. The material can be painted so this could be a good plan to reduce additional noise.

Finally, we’re coming up on the mounting stage where the soon-to-be 3D components are attached/positioned on a user’s head. Everyone’s head shape is slightly different, so finding a way to make these as universally-fitting as possible while still maintaining structural integrity to the degree we need for the channels to remain stable enough may be difficult. The plan for now is to print a version 1 of the model, test it and its fit, and see if additional material integration like firm foam or memory foam to fit the hardware more securely to someone’s head might be needed for this to work best.


Project post #5

project title: Qi Jeans

project team: Greggory Van Dycke

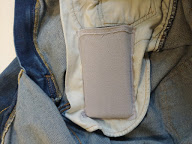
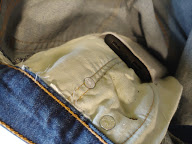
weekly accomplishments: This week I finished my integration of the wireless charger into the jean pocket of my new jeans. The internal pocket holds the wireless charger in position next to the phone. I also finished sewing the the pocket that hold the phone being charged. I wore the pants and confirmed that the phone charges via wireless charging.

images:

.

material list:

  • Wireless Portable Charger, 10,000 mAh Power Bank Qi Battery Charger. Link to charger
  • Men’s Lee Extreme Motion Stretch Straight Jeans. Link to jeans
  • Fabric from class that is used in pocket construction.

areas of concern: I do not have any concerns that this time about my project.

Post #4: Lit Lehenga

Individual: Jessica Fernandes

Weekly accomplishments:

  • Materials I have: Circuit Playground Express, light sensors, power source to test
  • Materials on the way: LEDs, Enclosure, power source for final stage

Image:

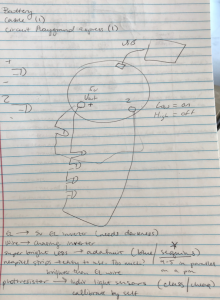
A sketch of the circuit

Linked below are my pictures of:

Materials

Areas of concern

  • Test light sensors and practice connecting the components so they function as desired.