Project Post #4

Wearable Circuits

John Compas

Circuit Testing
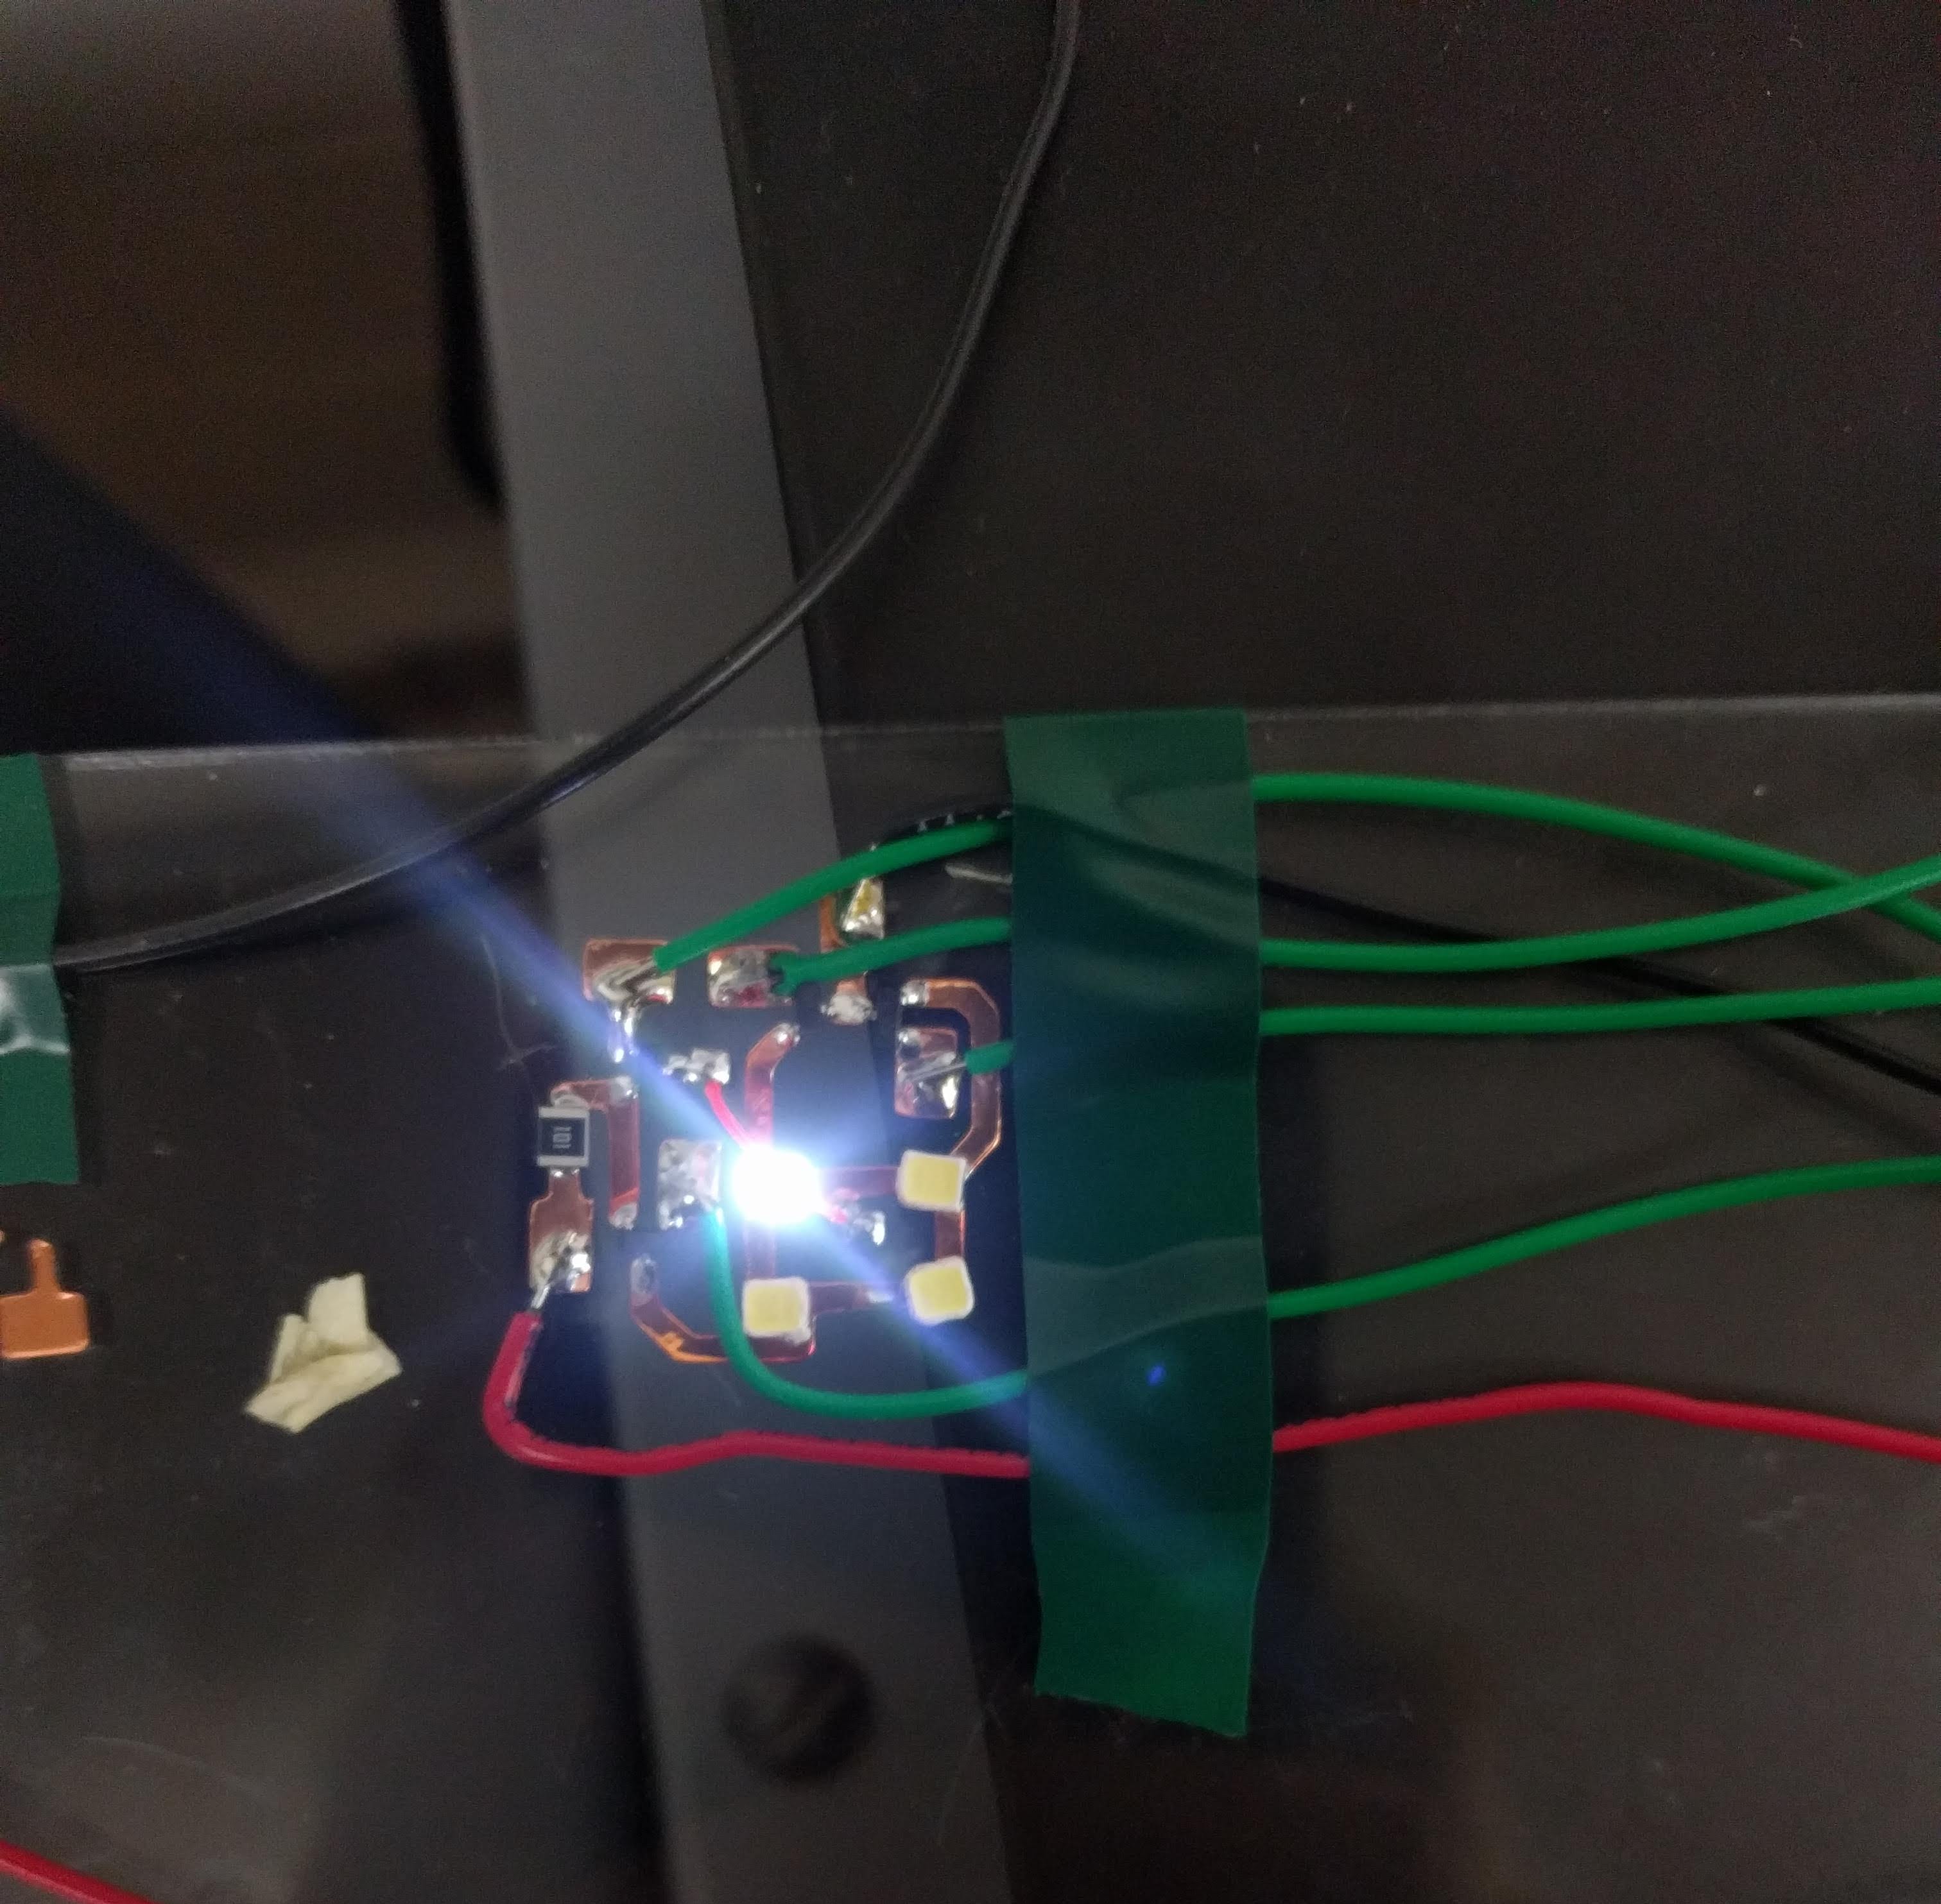
I successfully soldered my SMD components to the acrylic testbed and found some issues in the process.

  • Soldering the components with an iron is pretty ineffective and doesn’t work well
  • Soldering them with a heat gun works much better, but the adhesive melts easily and the copper starts peeling off of it’s backing
  • The LEDs I bought are incredibly bright, but have a nasty tendency to melt even under low heat
  • The MOSFETs cannot have floating gates, and were finicky even with their gates grounded

The acrylic actually stood up very well to the heat, which I didn’t expect.

Antennas and RFID


I received the UHF-RFID chips, but still don’t have an antenna to test them with.

I found a really cool piece of software called AntSym that, given a set of parameters, will design an antenna for you. As it uses some sort of genetic algorithm, it’s pretty slow but it can optimize the design way better than anything I can do by hand.

Above is one of the designs I’ve been playing around with. I still haven’t quite figured out AntSym, as the gain is lowest in the Z direction as shown by the gain pattern on the left. I’m trying to increase the gain in the Z as much as possible as it is the likely point where the receiver will be.

I’ve been talking to one of my professors about this project, and he has concerns with UHF RFID. At the ~900 Mhz that the chips I’m using are designed to operate at the human skin acts as a relatively good conductor. Thus, it will start reflecting waves away from itself and could create issues. I’m trying to figure out how to model the skin with AntSym, but modeling the dielectric properties of human skin is incredibly complicated. However, he gave me a few commercial UHF RFID tags to test next to skin to see if they work at all.

I also reached out to Alason Sample at UM, to see if his WISP project is still active at all. It’s an open source RFID-powered processing and sensing unit that seems highly applicable for my project.

Directions for Next Week

Circuits:

I think I have a good plan for the issues with soldering the circuits and have developed this process for fabrication:

  1. Layer copper tape in-between vinyl (to prevent tears in the copper layer)
  2. Vinyl cut the circuit
  3. Weed the circuit and fix any issues with the vinyl cutter’s cuts
  4. Transfer the copper layer to a resilient backing, such as acrylic, using transfer paper or another sheet of vinyl
  5. Place and solder components with solder paste and heat gun
  6. Use another sheet of vinyl or transfer paper to pick copper and components off of acrylic
  7. Spray the back of the copper layer and vinyl with adhesive
  8. Adhere circuit with vinyl top layer onto tattoo paper
  9. Done! Try it on a person

This method will result in a circuit layered on both sides with a non-conductive layer.

As for actual circuit designs, I’m very interested in trying to have these units be batteryless. At first, I was mainly thinking of passive power through RFID frequencies or simple induction.

However, I think something like a small solar cell would be interesting to experiment with and could potentially be more useful. I’m going to look into what I could power off of a small solar cell, and then base my design off of these power requirements.

Antennas:

It seems like it would be very easy to get lost trying to perfectly model the skin while designing the “perfect” antenna. So I will focus on creating an antenna from a standard design and seeing how well it works, if at all. In their DuoSkin paper, MIT didn’t seem to focus much on the antenna design at all, so I think the antenna will probably work although not well.


Materials List:

  1. Clear Covering Self-Adhesive 
    1. https://www.amazon.com/Magic-Cover-Adhesive-Contact-Projects/dp/B000BPF9QY/ref=sr_1_26?crid=QOW16D2H82TC&keywords=vinyl+adhesive+paper&qid=1551742619&s=gateway&sprefix=vinyl+ad%2Caps%2C195&sr=8-26
    2. Count: 1
    3. Cost: $5.50
  2. Silhouette Temporary Tattoo Paper
    1. https://www.amazon.com/Silhouette-MEDIA-TATTOO-Temporary-Tattoo-Paper/dp/B0043WJ3OA
    2. Count: 1
    3. Cost:  $8.99
  3. Spray Adhesive
    1. https://www.amazon.com/3M-General-Purpose-45-Adhesive/dp/B000PCWRMC
    2. Count: 1
    3. Cost: $5.77
  4. Speedball Gold Leaf
    1. https://www.amazon.com/Bememo-Imitation-Gilding-Crafting-Decoration/dp/B0722X91YR
    2. Count: 1
    3. Cost: $6.99
  5. SPMWH22286D5WAP0S2 (Samsung LEDs)
    1. Count: 100
  6. RC1210JR-07100RL (100 Ohm Resistor)
    1. Count: 100
  7. SL3S1203FTB0,115 (UHF RFID)
    1. Count: 10
  8. C1812C102KGRACAUTO (Capacitor)
    1. Count: 10
  9. NTR5105PT1G (Diode)
    1. Count: 10
  10.  Conductive Guitar Tape


Project Post 4


Circular Pleating

  • weekly accomplishments list what you accomplished for each team member

This week I worked on sample patterns for the first pleated garment. I am a bit behind in my timeline and am not sure if I will get to the experimental materials phase of this project. The reason that a circular material is ideologically important to future proceedings and iterations of circular pleated garments is that “the shape of the medium informs the constituent pieces and form of the garment”

I also ran some laser cutting tests.

This week I hope to pattern a dress in paper, and laser cut by Friday. This is the last week where I will not have new/ updated photos. Here is some related inspiration that I saw elsewhere.

I hope to go with a similar silhouette. This is 40’s sciap

Image result for elsa schiaparelli black dress


changes to your approach after presenting your work what changes have you made in your approach

I decided to do a smaller garment made of 2 yards of fabric before making a large gown with the remaining 10 yards.

  • material list For each material fill out the following information (a table may be a good way to do this)
    • Part/Material
      • Polyester
    • Price
      • 2.37 per yard
    • Quantity
      • 12 yards
    • Link to a purchase location
      • https://www.fabricwholesaledirect.com/products/chiffon-fabric


Project Post #4: Flow

Project title: Flow

Team: Julia Kosier & Yiting Liu

Accomplishments

Julia:

  • Researched coding for different types of LEDs

Yiting:

  • Finished the 3d design of the holder of led lights, optical fibers, and a microcontroller
  • Figured out that using heat shrink tube, one led light can hold up to 4 optical fibers for our project; hence, reducing the amount of led lights needed from 16 to 4.

Together:

  • Constructed wire frame for wings


images

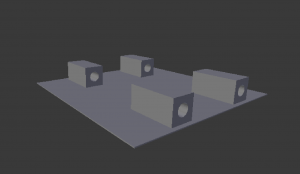
3d printing of the holder of led lights, optical fibers, and a microcontroller in Blender

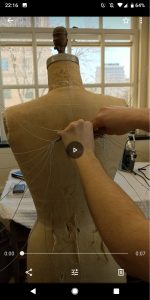
Process of constructed wings

Heat Shrink Tube to hold 4 optic fibers for one led light

Material list:

Part/Material Price Quantity Link to a purchase location
1 Side Glow Fiber Optic Cable 1.5mm~8mm Optical Fiber For Lighting Decorations

[1.5mm for 15 meters]

$15.99 w/o tax 1 https://www.ebay.com/itm/Side-Glow-Fiber-Optic-Cable-1-5mm-8mm-Optical-Fiber-For-Lighting-Decorations/253189403496?ssPageName=STRK%3AMEBIDX%3AIT&var=552285229283&_trksid=p2057872.m2749.l2649
2 Color sensor $7.95 1 https://www.adafruit.com/product/1334
3 16 gauge floral wire $11.99 1 https://www.amazon.com/gp/product/B00T831TFA/ref=ppx_yo_dt_b_asin_title_o00_s00?ie=UTF8&psc=1
4 Fabrics $3.99/yd

Including shipping total is $14.18

2 yards https://www.fabricwholesaledirect.com/products/sheer-voile-fire-retardant-fabric?gclid=Cj0KCQiAk-7jBRD9ARIsAEy8mh7xxCRl9hFRSNDtoD39ELNlrFHEVmJTnGmABucK8v3UQuPzZhtuZJoaAgeFEALw_wcB&fbclid=IwAR34tdd2dbImfbFrF7y8HEeAAJFUZJpFmekLj1aYBwW7GRi0Cw8Gx2MD5G4
5 Cellophane $15.99 1 https://www.amazon.com/gp/product/B07GR4NCC9/ref=ppx_yo_dt_b_asin_title_o01_s00?ie=UTF8&psc=1
6 Heat spray $5.77 1 https://www.amazon.com/gp/product/B000PCWRMC/ref=ppx_yo_dt_b_asin_title_o02_s00?ie=UTF8&psc=1
7
8
9

Areas of concern:

  • Not sure which types of LEDs are ideal; we have access to 4-pin RGB LEDs, but NeoPixels might be easier to work with. Or a 2-leg LEDs may be even better.

Project Post #4 – Velcro MIDI Jacket

Project Post 4

Project Title

Velcro MIDI Jacket

Project Team

Junda Chen, Jeff Ma, Yudong Huang, William Black

Weekly Accomplishments

Note — This is an accomplished item: item

  • 3D Print Leap Motion case
  • Theremn Software
    • Motion trace: proximity and height change
    • Data Transfer
    • Theremin instrumental voice
    • (Optimize) Range Detection
      • Test how many Infra-ray LEDs are sufficient to optimize detection
        • on wrist
        • on Jacket
    • (Optimize) Position to put the Leap Motion on the Jacket
      • Waist band — with a tiled case the effect is good.
    • Run on Arduino (Don’t have to run on Arduino)
    • Run on Raspberry Pi 3+
  • Leap Motion Optimization
    • Add an infrared light source to
    • Determine where the light should be
      • On Jacket
  • User Experience Design: Tune the software to let user make sense of how to use it.
  • Jacket
    • Select a light
    • Select a material for diffusion
      • Sheer from underneath
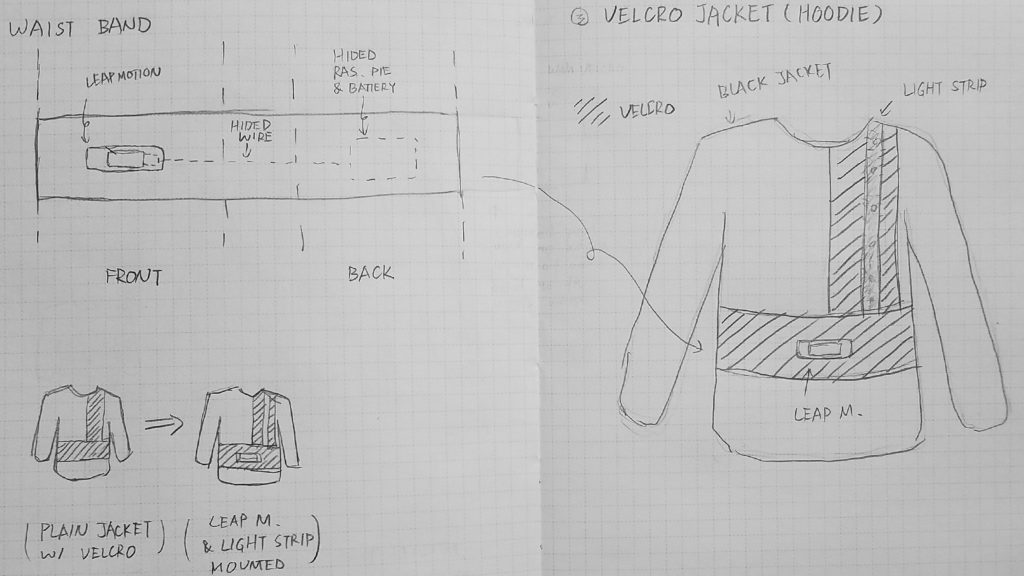
    • Design the jacket: Finally Decide on Velcro Hoodie !!!!
      • Velcro Hoodie? — Have all the things in the velcro and stick waistband to the velcro on the Hoodie.
    • Select (and buy) a jacket.
    • Re-Design the light effect of the jacket

Image/Video

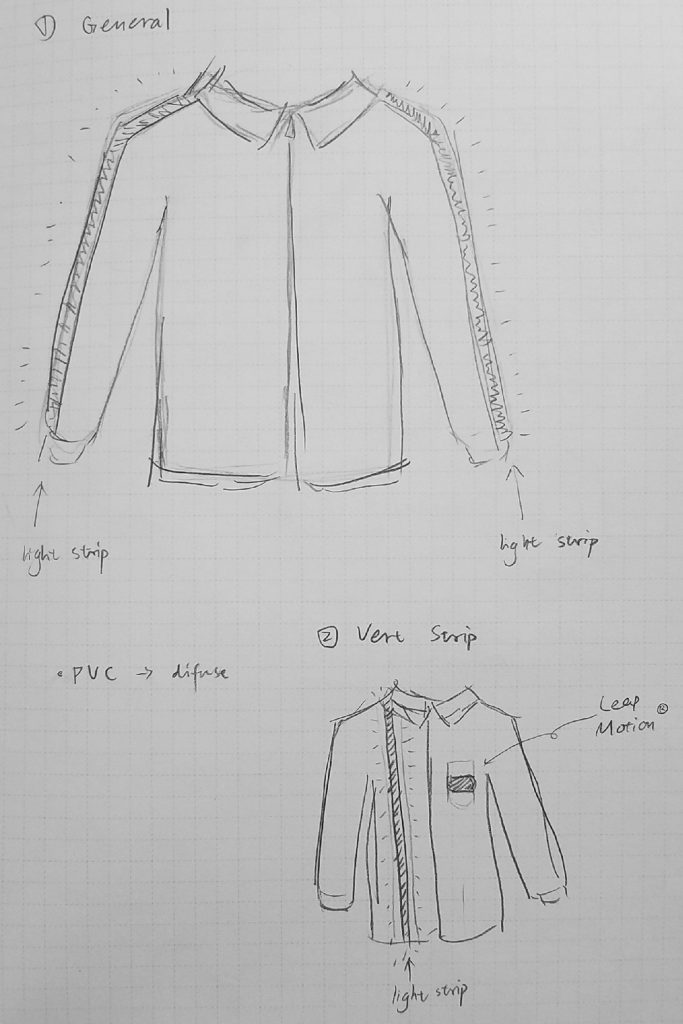
(Figure 1,2): Two implementations of light

(Figure 3): Current design using Velcro. This is a remarkable shift in our project development. To solve the conflict between the freedom of light design and the constrain of other hardware devices, we proposed the use of Velcro to decomposite the design of hardward components (on the waist band) and the design of light (on the jacket). From now, all the hardward-related design will be presented on the waistband, which can be attach/detach to the jacket using the Velcro. The light on jacket is also configurable using Velcro, and can be connected to the waistband for power supply.


Material list

  • Circuit Board: (Potentially) MIDI encode/decoder, Leap motion image processor,
  • Leap Motion (1): $96
  • LED Strip light (2, TBD)
  • Black velcro fabric (we have in the studio)
  • A Jacket (1, TBD)
  • (Safe) Infrared LED (20)
  • Long USB cable (x2) (for emergency and design)


Areas of Concern

  • Infrared LED Safety to eye: To design a better tracking of hand while not directly influence users’ eye is a design challenge, and that might require some research in the area.
    • With the current LED model, it is basically safe to the eye with all the possible implementations we want to make.
  • Raspberry Pi Power Supply and Performance: Have to benchmark on the Raspberry Pi how well the theremin work with external power supply. The fall-back for this project is to directly connect all things back to a MacBook.
  • User Experience: How to let our users know how to operate without a screen?


Past Development Log

Cylon.js: an Arduino API to control the leap motion

Adafruit strip LED : a $17.99

Leap Motion installation: Troubleshooting in Windows.


Project Post 4: Light up Jacket

Project Title: Light Up Jacket (“You are hot but you are cool”)

Project Team: Obasi, Jack

Weekly Accomplishment:

Obasi:

Worked on the sample jacket.

Search for materials and fabrics.

Design pattern for the jacket.

Jack:

Searched for ways to light.

Wrote basic code for Playground Express.

Purchased lights for the jacket. 

Worked on ways to detect jumping motion through code.

Found a way to light up the wires and circles. 

Images

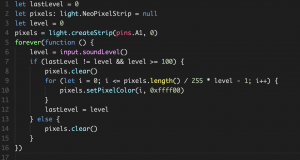
Code function: if the more pixels light up when the sound is louder (only if the sound is above threshold)

Changes to our approach

  1. We will try to make a light jacket (perhaps with less stuffing), so people can wear it indoor
  2. We will try to make it with transparent fabric so that the lights can have a glowing effect
  3. For now, instead of detecting the bass, we will detect loud sound since bass can be very tricky to detect
  4. We will add a “bounce” feature so that when the performer jump on stage the color changes as well
  5. We decide to make a vest instead of a jacket since a vest can be worn indoor and look cool at the same time.
  6. We bought different wires to test one which one works the best

Material List (Bought few wires to test them out)

El Wire:

Blue, Green, Orange & Yellow colorways

$1.35 Each

6 wires in total

https://www.ellumiglow.com/electroluminescence/electroluminescent-wire

Neon Pixel Strip

LED light

$12.5 Each

0.5m – 2m

https://www.adafruit.com/product/3811?gclid=CjwKCAiAiJPkBRAuEiwAEDXZZdN0k6gopEcaCGBKvVWR_YBFFRyOOqmAiFx3_1TthxETDxXecGo_ZhoCfAwQAvD_BwE

Mini Skinny Neon Pixel Strip

mini LED light

$24.95 Each

1m – 2m

https://www.adafruit.com/product/2964?length=1

Lighting Tape Strip

Tape Strip

$8.95 Each

2 – 3?

https://www.adafruit.com/product/415?gclid=CjwKCAiAiJPkBRAuEiwAEDXZZQ3VhhcbDMvufS2GybwBge1zBLfJYWrOkZuZkYsYJYpU8I2vnJNpxRoCb5oQAvD_BwE

Lithium Ion Polymer Battery

Battery

$10 Each

2

https://www.adafruit.com/product/258

Areas of concern

We are stilling working on how to light up the wires the way according to Playground Express


Project Post #4

Safe Sleeve

Jake Cordover

Weekly Accomplishments:

Unfortunately, the shipment of the sensors continue to cause delay into the programming aspect of the project. I have been in touch with Yost Labs (the supplier), and the reason for the delay was that they ran out of casings for the sensor, so supposedly they were shipped midweek. This is frustrating, especially considering how much was spent, nonetheless hopefully they will be here soon.

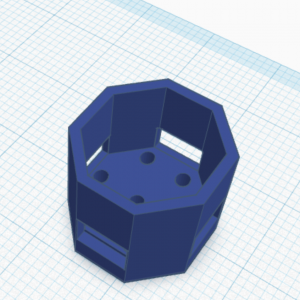
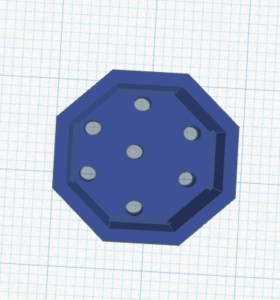
Otherwise, I have begun to prototype the 3D printed enclosures in CAD. My enclosure includes sew tabs on the bottom and a top that “snaps” into the bottom, therefore the sensor into place. I am attempting to emulate the annular cantilever snap fits as seen here: https://www.sculpteo.com/blog/2018/04/25/how-to-connect-two-parts-with-3d-printed-joints-and-snap-fits/.

The next step in the process is to print the prototype and make sure the design works, before trying it on the real sensors, and then finally sewing it down to the sleeve. I have included images of the design below.

Images:

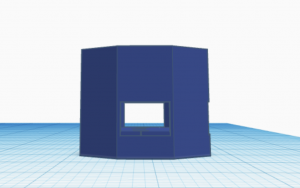
The first three images represent the bottom of the enclosure. This sensor will be placed into this sewn down piece( see sew tabs in the bottom). Additionally, the cutouts will be where the top piece “snaps” into place

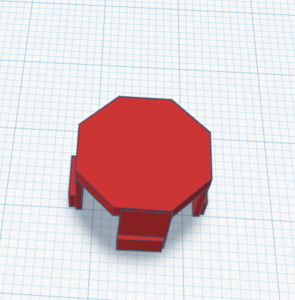
The next piece is the top that snaps into the bottom, securing the sensor into place.

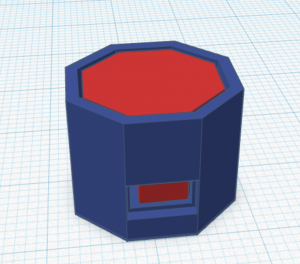
And the two pieces fitted together:


Materials (no change):

Part/Material Price ($) Quantity Link
Potential IMU 1 117 with discount secured 1 https://yostlabs.com/product/bluetooth-mini/
Knee Sleeve 1 16.97 1 https://www.amazon.com/PowerLix-Compression-Knee-Sleeve-Basketball/dp/B01MQYADOT/ref=sr_1_5?keywords=powerlix+knee+sleeve&qid=1552264456&s=gateway&sr=8-5
Knee Sleeve 2 20 1 https://www.amazon.com/Zensah-Knee-Compression-Sleeve/dp/B00GPU7QRO/ref=sr_1_6?keywords=zensah+knee+sleeve&qid=1552264496&s=gateway&sr=8-6#customerReviews
3D printingand associated costs TBD TBD TBD

Areas of concern:

At this point, I would like to be able to start work on the sensor, theres not too much to do without it. Hopefully this issue resolves itself soon…

Otherwise, I’m still undecided on the method of attachment of the enclosure to the sleeve. I talked with Professor Fairbanks about potentially cutting a hole in the sleeve, which I think may look the best, however, I’m not sure if that will degrade the integrity of the sleeve too much.

I have never 3D printed before, so if I go this route, I’m not sure if the material will flex enough (without breaking) for my design. Additionally, I’m not sure of the type of margins I need to build in for the print to be successful.

Project Post #4

  • project title : Qi Jeans
  • project team: Gregg Van Dycke
  • weekly accomplishments: This week I was able to incorporate my wireless charging battery pack into my jeans, and get it to charge my phone wirelessly while it sat in the pocket. Next week I will trying it on another pair of jeans that should give more space for both the phone and the charger.
  • images:
  •   
  • material list: Wireless Portable Charger,10000mAh Power Bank QI Battery Charger.  Link to charger
  • areas of concern: I feel pretty good about my project, since I am now using a prebuilt wireless charger. Also I changed how I will be adding the phone to my pants pockets. I will just altering the existing pocket. This will give the cleanest final product and I can show that it is easy for other people to do it to their own jeans.

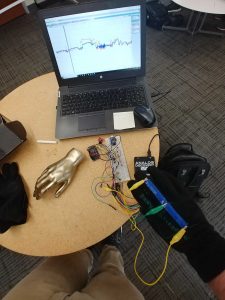
Project Post #4- InGlove

Weekly accomplishments:


Curt:

This week I started 3D printing the finger. The servo mountings were printed along with the fingertip. However, the printer broke so I was unable to print the hinges and finger interconnect pieces. I am going to be reaching out to the library for printing if the 3D printer I was using is still broken. On another note, the finger construction is proceeding with fair results for a first prototype. I have been working on preparing the parts to screw into each other. In the next week I plan on printing the rest of the finger and get the initial prototype constructed. I will also be shopping for a wrist / hand brace that I can use for the purposes of providing a soft yet sound base for the finger.

I have also pursued the custom flex sensor that Shruthi and Vedant worked on last week. Specifically, I have produced two flex sensors joined by a central node in order to capture flex for two different joints in a finger. My next steps on this portion are to purchase a glove liner, construct flex sensors for fingers, sew on flex sensors, and start capturing hand data.
For the algorithm to convert gesture into finger joint position, I still need to work out the specifics. To discuss this, I first must detail the two applications of the finger that I have in mind. The two applications are an assistive grasping device and a hand-remapping device. For an assistive grasping device, as labeled cluster may be enough to understand what the intention is, then using that as a look up for rough location of the thumb. For example, open hand will cause full open of finger, full close will result in finger being fully bent. It is not entirely clear on the mapping for other gestures but using Asada’s previous work, I would constrain the clustering to the thumb and first two fingers on the user’s hand. An alternate approach is to attempt full hand clustering and augment the predicted values with the artificial synergies from Asada’s work. As for hand remapping this, whereby the thumb and first two fingers are considered a distinct hand from the last two fingers and SRF thumb, I plan on using artificial synergies as a direct signal to the SRF digit.

Future work using human computation to help define the gesture to finger data and future work on a physical therapy procedure for hand remapping is needed but will not be explored by end of course.

Vedanth:

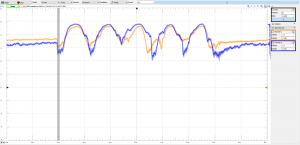
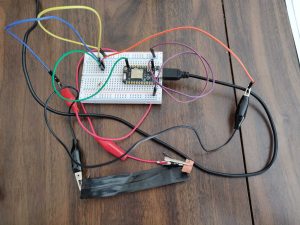
This week we did some more testing with the DIY and the Adafruit flex sensors. We realized the two have very different resistances, so we needed different resistors in our circuit to test them. I was also able to use the Particle and connect it to the IFTTT app (which connects to smart switches). We were able to write a program that publishes an ‘event’ when the flex sensor is bent, which is then read by IFTTT, which then indicated the smart plug app turn the smart plug on. However, there was a large delay during this process, as the IFTTT app checks for the published event only once every minute. So we are starting to look into other options, such as making our own Android app which transmits the information from the published event to the smart plug app. I am looking into how the Particle will send/receive information from the Android app directly.


Shruthi:

This week me and Vedant worked on trying to build a pipeline from the flex sensor to end devices using IFTTT. We did manage to successfully connect sensor data to a smart plug via IFTTT and a smart plug app. However, what we noticed was that this pipeline requires multiple reads and pings to the server and there was no guarantee of immediate service. This implied that the latency between a flex and the task was high. We went ahead to debug the what is causing the lag and realized that although particle photon uploads data to the cloud pretty quickly, IFTTT was slow in reading data from the particle servers. Another constraint was that IFTTT does not allow communicating to the google assitant, however it allows communication from the google assistant(Which is not what we want). Customization on IFTTT is very restricttive and hence we plan to use the cloud API exposed by particle photon and to build our own android application. This maybe involve bit of a learning curve and I am looking into it.

Materials List

Home Assistant Sub-Project

  1. Particle Photon – $19.00 (1)
  2. Flex sensor – 4.5 inches – $12.95 (1)
  3. Flex sensor – 2.5 inches – $7.95 (1)

*We decided to go ahead with more of the DIY flex sensors. So we might possibly need more velostat and copper sheets and conducting thread.

SRF Sub-Project

Already purchased / owned

  1. Glove for prototype [final version subject to change based on prototype]
  2. Sparkfun IMU – $14.95 (1)
  3. Flex Sensor – 4.5 inches  – $15.95 (1)
  4. ESP32 Dev Board – $15.00 (1)
  5. High Torque Micro Servo – $9.95 (3)
  6. Resistive Force Sensor – $7.00 (1)
  7. Flex sensor – 4.5 inches – $12.95 (1)

Future / After initial prototype

  1. Resistive Force Sensor – $7.00 (5)
  2. Flex sensor – 4.5 inches – $12.95 (3) and/or Flex Sensor 2.5 inches – $7.95 (8)

Areas of concern:

For areas of concern, the only major concern right now is time to get everything complete but mainly the algorithm, as I need to understand the signal to noise ratio in my data, the precision of the finger, etc. before I can determine the best course of action

Project Post #4: Michael Leykin

Project Title: Penetration of Endpoints and Networks Infiltration System

Project Team: Me, myself and I

Weekly Accomplishments + Images:

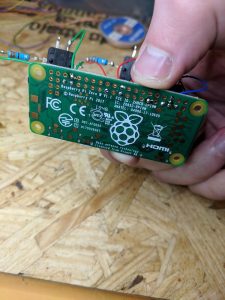
Finished Soldering For Bash Bunny:

All soldering DONE!

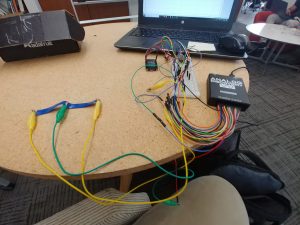
Spent time this weekend, building my rouge WiFi network and got it to work and have an idea to make it mobile:

Material List:


Part

Price Quantity Link
wireless network adapter $28.50 1 https://www.amazon.com/gp/product/B0035OCVO6/ref=ppx_od_dt_b_asin_title_s01?ie=UTF8&psc=1
Ethernet cable $3 1 https://www.amazon.com/AmazonBasics-RJ45-Cat-6-Ethernet-Patch-Cable-5-Feet-1-5-Meters/dp/B00N2VILDM/?tag=whtnb-20
Raspberry Pi 3 or 3 B+ $38.10 1 https://www.amazon.com/ELEMENT-Element14-Raspberry-Pi-Motherboard/dp/B07BDR5PDW/?tag=whtnb-20
microSD card $6.85 1 https://www.amazon.com/SanDisk-microSDHC-Standard-Packaging-SDSQUNC-032G-GN6MA/dp/B010Q57T02/?tag=whtnb-20
power source (Enokay Power Supply for Raspberry Pi 5V 2.5A Micro USB Charger Adapter with On Off Switch) $8.59 1 https://www.amazon.com/Enokay-Supply-Raspberry-Charger-Adapter/dp/B01MZX466R/?tag=whtnb-20
USB keyboard/mouse interface (Rii Mini Wireless 2.4GHz Keyboard with Mouse Touchpad Remote Control, Black (mini X1)) $16.99 1 https://www.amazon.com/gp/product/B00I5SW8MC/?tag=whtnb-20
SD card adapter $7.99 1 https://www.amazon.com/Vanja-standard-Connector-Notebooks-Smartphones/dp/B00W02VHM6/?tag=whtnb-20
Raspberry Pi Zero Wifi $10.00 1 https://www.adafruit.com/category/933?src=raspberrypi
Pi Zero USB Stem $5.00 1 https://shop.pimoroni.com/products/zero-stem-usb-otg-connector
2 x Tactile Push Button Switch With LED lights $3.00 1 https://www.aliexpress.com/item/5PCS-1-set-12X12X7-3-Tactile-Push-Button-Switch-Momentary-Tact-LED-5-Color-12X12X7-3mm/32873551440.html?spm=2114.search0104.3.2.3b0241a0ILdgzL&ws_ab_test=searchweb0_0,searchweb201602_5_10065_10130_10068_10890_10547_319_10546_317_10548_10545_10696_453_10084_454_10083_10618_10307_537_536_10902_10059_10884_10887_321_322_10103,searchweb201603_58,ppcSwitch_0&algo_expid=0747bf75-f245-43c5-a0c1-4966ea4078a8-0&algo_pvid=0747bf75-f245-43c5-a0c1-4966ea4078a8&transAbTest=ae803_5
DIP switch with 4 switches $3.00 1 https://www.aliexpress.com/item/10pcs-lot-Slide-Type-SMT-SMD-Dip-Switch-2-54mm-Pitch-2-Row-4-Pin-2/32956815576.html?spm=2114.search0104.3.3.4c971641sXqPaV&ws_ab_test=searchweb0_0,searchweb201602_5_10065_10130_10068_10890_10547_319_10546_317_10548_10545_10696_453_10084_454_10083_10618_10307_537_536_10902_10059_10884_10887_321_322_10103,searchweb201603_58,ppcSwitch_0&algo_expid=60dfe6ec-dd9e-4db7-93f0-5f94aec30ef4-0&algo_pvid=60dfe6ec-dd9e-4db7-93f0-5f94aec30ef4&transAbTest=ae803_5
2 x 330R resistors HAVE 1
MFRC522 RFID reader module $5.49 1 https://www.amazon.com/gp/product/B01CSTW0IA/ref=ppx_od_dt_b_asin_title_s01?ie=UTF8&psc=1
MIFARE 1K RFID card (with changeable UID, 13.56Mhz) Included 1
some RFID card to copy (only 13.56Mhz cards can be read/written by this particular card reader module) Included 1
Tactile Touch Push Button Switch Tact Switches 6 X 6 X 5mm Included 1
LEDs (red, yellow, green) + resistors (1k ohm) $7.00 1 https://www.amazon.com/gp/product/B01ER728F6/ref=ppx_od_dt_b_asin_title_s02?ie=UTF8&psc=1
3 AA batteries (1.5V each) HAVE 1
2 zener diodes (3.7V) or (3.6V) $8.00 1 https://www.amazon.com/gp/product/B07BTKVRG8/ref=ppx_od_dt_b_asin_title_s01?ie=UTF8&psc=1
switch (3 Terminals ON/ON 2 Positions SPDT Electronic Push Button Sliding Switches) $5.00 1 https://www.amazon.com/gp/product/B0799R529Z/ref=ppx_od_dt_b_asin_title_s02?ie=UTF8&psc=1
cables, hot glue, tape (30AWG Insulated Silver Plated Single Core Copper PCB 0.25mm Kynar Wrapping Wire) $5.00 1 https://www.amazon.com/gp/product/B07M7BHKRV/ref=ppx_od_dt_b_asin_title_s01?ie=UTF8&psc=1
Arduino Pro Micro 5V $20.89 1 https://www.amazon.com/gp/product/B01MTU9GOB/ref=ppx_yo_dt_b_asin_title_o04_s00?ie=UTF8&psc=1
PCB Prototyping Board $10.00 1 https://www.amazon.com/gp/product/B072Z7Y19F/ref=ppx_od_dt_b_asin_title_s02?ie=UTF8&psc=1
Solder Gun $67.98 1 https://www.amazon.com/gp/product/B01MDTO6X7/ref=ppx_yo_dt_b_asin_title_o06_s00?ie=UTF8&psc=1
Desoldering Gun and Desoldering Wick $7.69 1 https://www.amazon.com/gp/product/B07BB8DGMP/ref=ppx_yo_dt_b_asin_title_o07_s00?ie=UTF8&psc=1
Battery Pack For Raspberry Pi 3 B+ $25.25 1 https://www.amazon.com/gp/product/B07BSG7V3J/ref=ppx_yo_dt_b_asin_title_o02_s00?ie=UTF8&psc=1

Areas of Concern:

I am having trouble making my rouge wifi network fast enough to connect to with just the internal wifi adapter and external adapter alone, I am looking into solution but I could use some advice here. I will be doing the software for the rest of my devices this week so I am sure I will run into problems there as well.

Project Post #4: Virtual Vermin

Virtual Vermin

Jeff Brandt


Weekly Accomplishments:

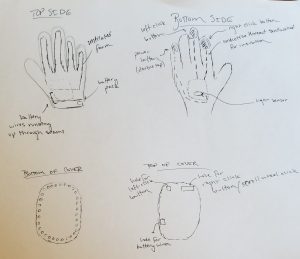
  • Planned out integration of all components in more detailed drawing
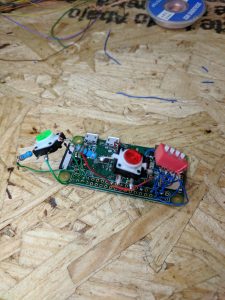
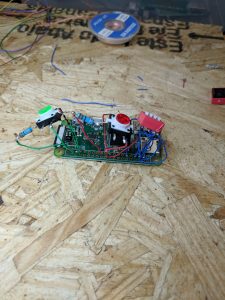
  • Prototyped connections for fingertip buttons to existing circuit board


Images:

Material List:

Wireless Mouse // Quantity: 1 // $9.99 // https://www.amazon.com/gp/product/B015X2OD52/ref=ppx_yo_dt_b_asin_title_o00_s00?ie=UTF8&psc=1

Conductive Fabric // Quantity: 1 sq. ft. // ? // Supplies in classroom

Conductive Thread // Quantity: 2 yds. // ? // Supplies in classroom

Negative Poisson Ratio Foam // Quantity: 1 sq. ft. // Free // Supplied by my research lab

Gloves // Quantity: 1 // $11.95 // https://www.amazon.com/Agloves-screen-gloves-texting-gloves/dp/B004A9FI2M/ref=sr_1_6?keywords=thin+glove&qid=1552266834&s=electronics&sr=1-6

Adafruit Circuit Playground // Quantity: 1 // Supplied // Already given in class

Short Flex Sensor // Quantity: 1 // $7.95 // https://www.adafruit.com/product/1070

Membrane LED Keypad // Quantity: 1 // $2.95 // https://www.adafruit.com/product/1333

Round Force Sensitive Resistor // Quantity: 3 // $7.00 // https://www.adafruit.com/product/166

Small Piezo Touchpad // Quantity: 3 // $0.95 // https://www.adafruit.com/product/1740

3D printed cover for circuit board // Quantity: 1 // ? (Depends on final print) // creating in Solidworks


Areas of Concern:

After prototyping the connections to circuit board, the area I am most concerned with is actually integrating all components into the physical glove. It isn’t a major concern and will most likely just take some trial and error.