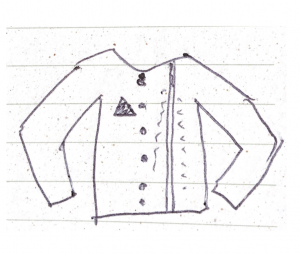
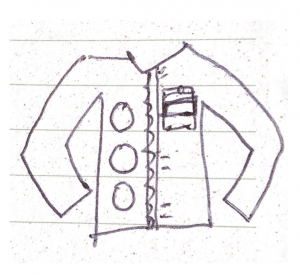
Project Post #4: ROETE

Radio Outdoor Emergency Transmitter Electronic (ROETE)

Natalie Tack

Image:

Weekly Accomplishments:

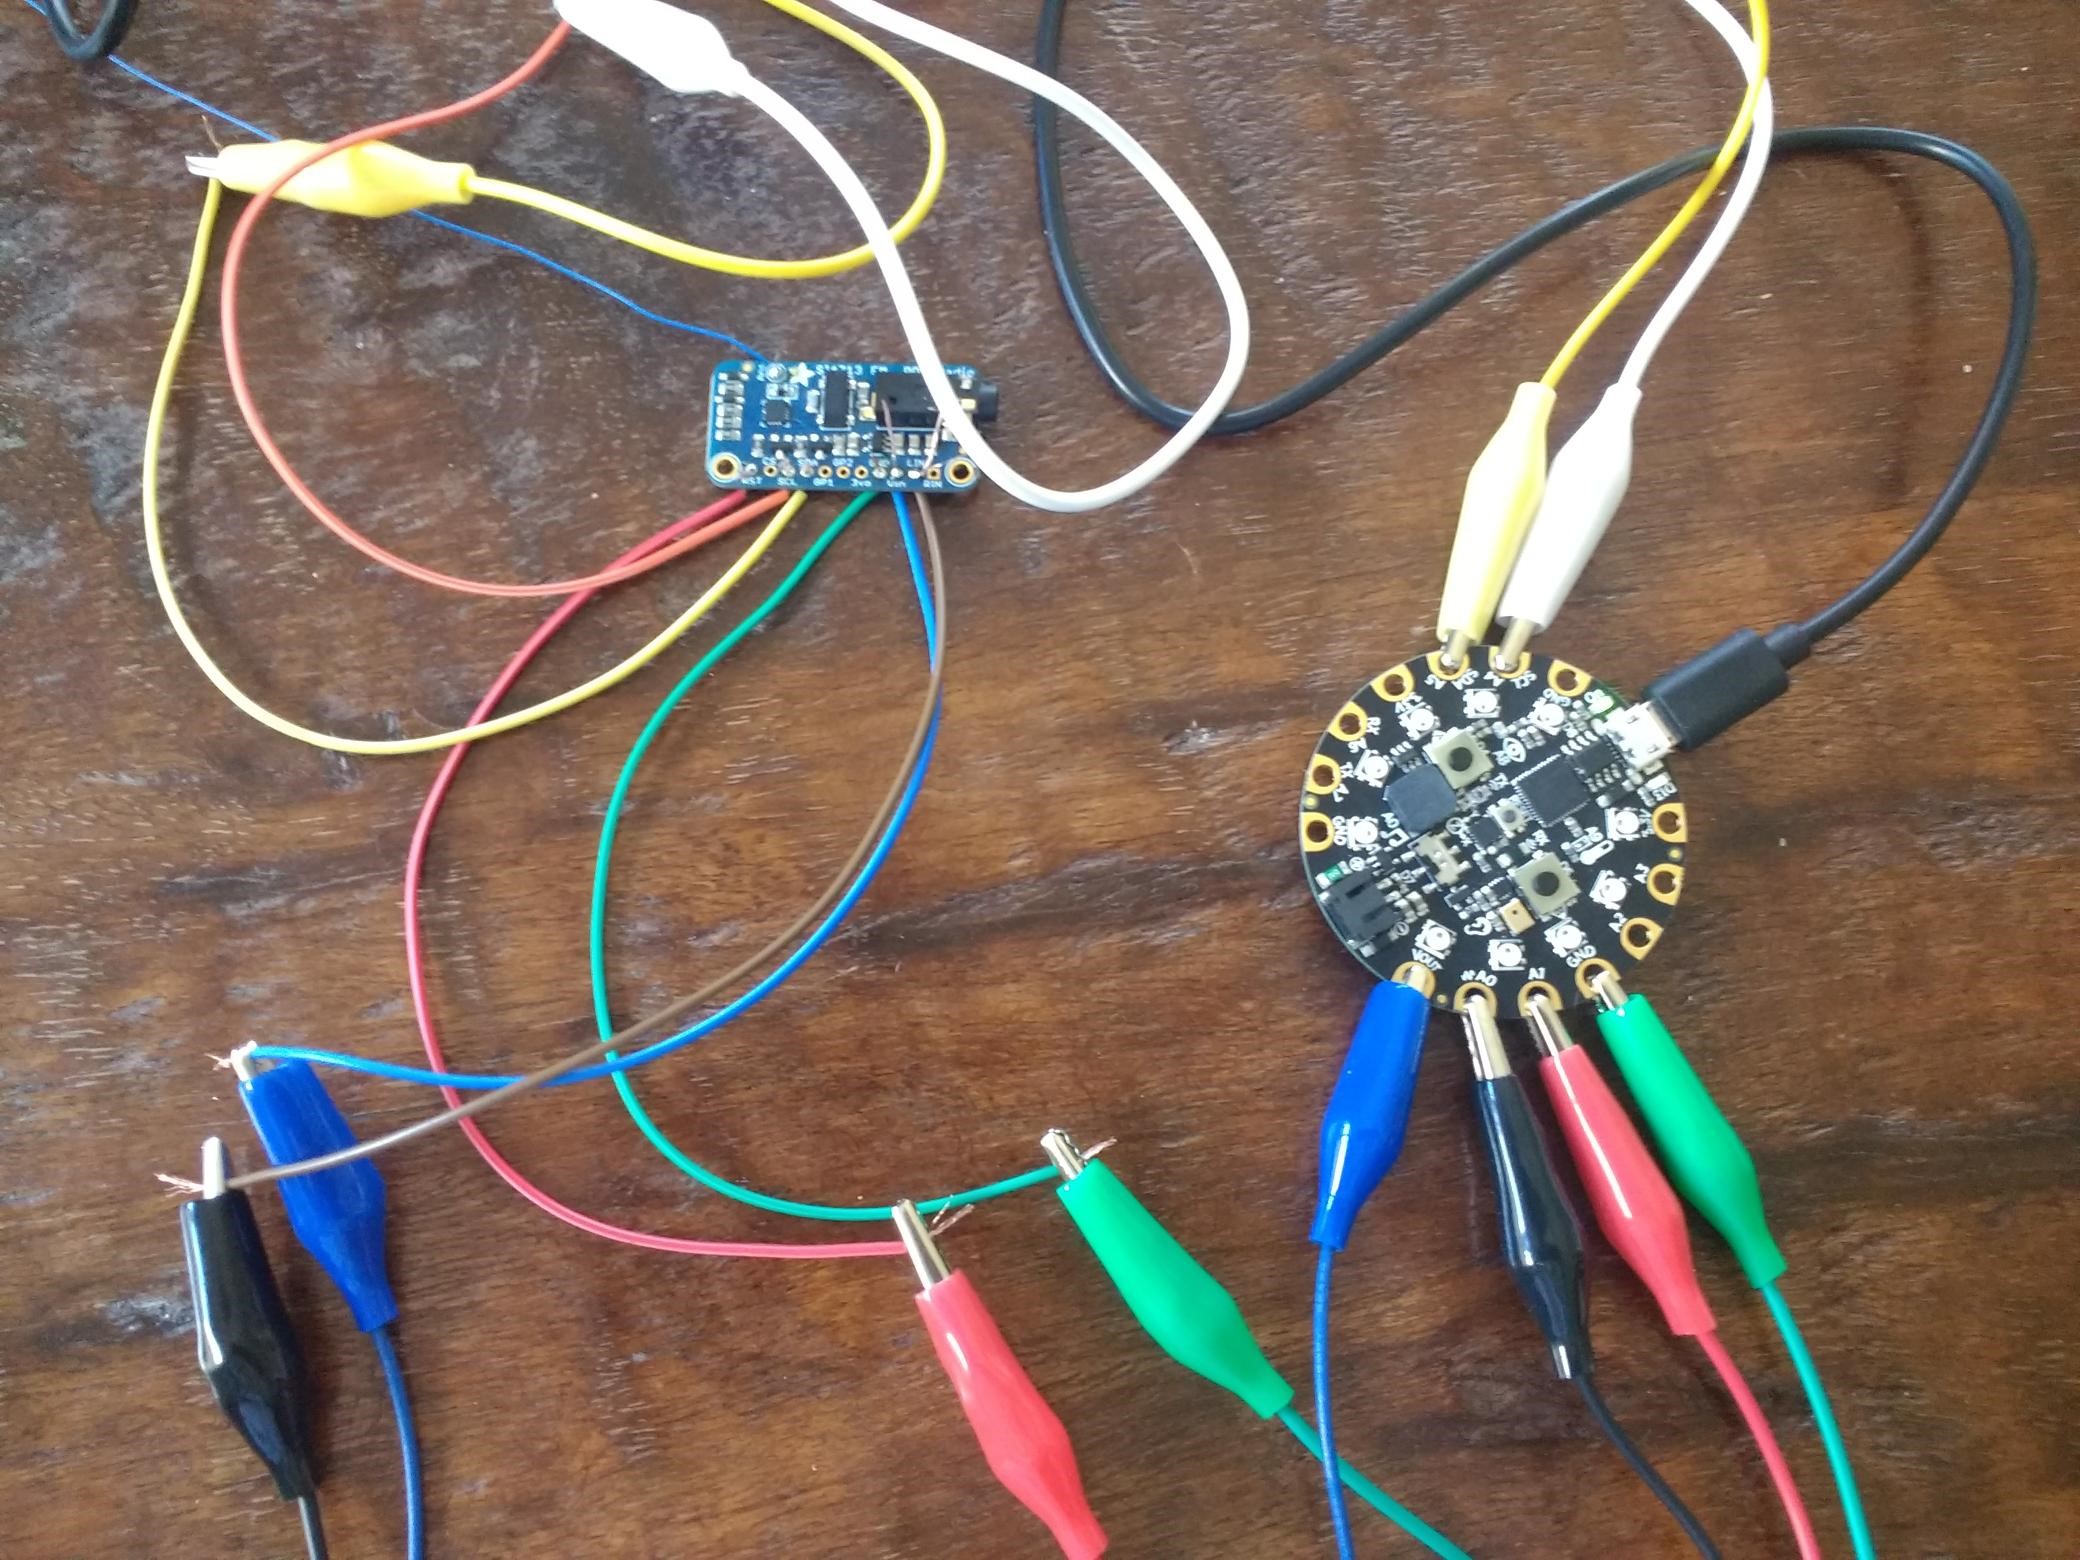
I soldered the inputs on the radio module. Kevin suggested that this may help the connection, as the audio was only playing out the speaker and not over the radio. This did help a lot, so thank you Kevin! The audio now comes out both the speakers and over the radio. This really is not a big concern that it comes out of two places, at the end of this project, if I have time I figure out how to disable the speaker.

I also got in contact with a company located in Sun Prairie who say that I can bring in my patch design and they can make it for me for $10. They just say it is not going to be a traditional patch and I have to bring in my own piece of fabric. I might have some questions about this.

Material List:

    1. FM Stereo Radio Transmitter (already purchased and in use)
      1. Price: $20
      2. Quantity: 1
      3. Link: https://www.amazon.com/Adafruit-Stereo-Transmitter-RBDS-Breakout/dp/B00SK8ME4Y#
    2. GPS Module
      1. Price: $40
      2. Quantity: 1
      3. Link: https://www.adafruit.com/product/746
    3. Vibration Module
      1. Price: $2
      2. Quantity: 1
      3. Link: https://www.adafruit.com/product/1201?gclid=EAIaIQobChMI36npo8Hz4AIVDYdpCh2TdwvHEA
    1. Patch
      1. Price: $10
      2. Quantity: 1
      3. Link: http://eliteembroideryandscreenprinting.com/


  1. Concerns:

    Mentioned above, I just have one question. What type of fabric should I bring in to get the patch sewn on (at the Sun Prairie company)? I also don’t know how long it will take for them to sew the patch, so I should get my design to them as soon as possible.

Project Post #4

Project Title 

Heart Rater

Project  Team

Sungjin (SJ) Park

Weekly Accomplishments

  • code for functionality is completed
  • tested if the sensor works as I intended

Image

Material List 

  • Pulse Sensor (Heart-Rate Monitor)
  • Price: $24.99
  • Quantity: 1
  • Link to a purchase location:  https://shop.openbci.com/products/pulse-sensor?utm_medium=cpc&utm_source=googlepla&variant=22543672899&gclid=Cj0KCQjwjpjkBRDRARIsAKv-0O12qE-56tiH7XDqo-T9Cz1l4Yf1ybwdN9RlAyg_Nkxs_yUG0b9LqbsaAkcxEALw_wcB


Areas of Concern

  • I need extra Bluetooth device for the sensor to indicate heart bpm on the phone. With the Bluetooth device, however, the glove would get much bulkier than I intend it to be. So I am thinking about making built-in led in the Arduino to blink on the beat of heart rate, instead of displaying on the phone.

Project Post #4

PROJECT POST #4

Project Title: Vis Hat  

Project Team: Lydia, Fu, Jay, Sharon

Weekly Accomplishments:

Lydia:

  • Researched: data collection tests/experiments to detect data quality and collection; fNIRS data collection and analysis software; prefrontal cortex data and emotional correlation; applications for fNIRS testing to come up with other possible applications for the final project presentation
  • Started drafting a testing experiment procedure
  • Downloaded brain data analysis and gathering software, researching this and how to use it
  • Starting to draft prototype designs for 3D printed component

Fu:

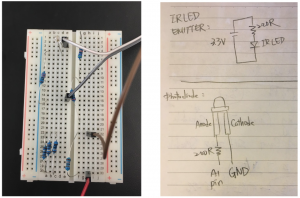
  • Hardware testing, both emitters and photodiodes.
  • Wiring through breadboard, debugging and checking circuit design.
  • Checking the photodiode analog reading works.

Jay:

  • Power to both emitter and sensor
  • Started on code for analog reading from the sensor
  • Read signal through finger to complete proof of concept (detect signal passing through skin, blood and bone)

Sharon:

Images:

The following images show the actual testing circuit for the emitters and sensor, with a quick note about the diagram of the testing circuit.


Material List:

title/link # needed price/unit notes shipping and tax TOTAL PRICE:
arduino due 1 34.43 34.43
NPN transistor 1 5.99 this one unit contains ~200 resistors 5.99
730nm emitter 2 8.61 9.54 26.76
850nm emitter 2 1.46 2.92
850 max nir detector/sensor 2 5.37 9.02 19.76
bluetooth 1 28.95 RN41XVC (with chip antenna) 8.81 37.76
850nm emitter 2 1.46 To account for trial and error hardware testing 7.99 9.45

Project Concerns:

One potential concern might account for how much troubleshooting we will have to do with planning out and executing hardware and software. Considering we only have 5 weeks left, we might want to come up with additional plans for the application of the final project presentation. Below are a few initial ideas, but we may add to this list in the future. This concern isn’t too pressing now, as we have a few more initial technical aspects to develop, but initializing these ideas now could be a good idea and as our project continues to progress, the ideas could help how we navigate things in the future.

A folder in our group’s shared google drive has been created to come up with additional potential backup plans. So far, we are on track and excited about our progress so we are planning on following through with our plan as is.


Post 3: Lit Lehenga

Individual: Jessica Fernandes

Weekly accomplishments:

  • ordered materials (except light sensors)
  • brought final garment to Madison (36 medallions in pattern)
  • updated plan for how to integrate hardware into garment

Image:

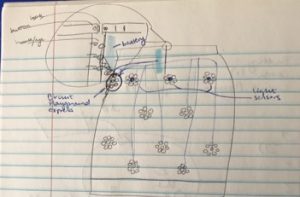
Updated Sketch of design

Materials

Areas of concern

  • Calibrating the photoresistors
    • practice and see if I prefer photoresistor or additional light sensors

Project Post #3

Safe Sleeve

Jake Cordover

Weekly Accomplishments:

All materials have been sourced and ordered. I have received the knee sleeves, just waiting on the sensors. I had been debating on whether to go with the all in one Yost sensors, or to go with less expensive IMU’s with microcontrollers, batteries, and wires, and I have decided to go with the Yost integrated sensors. While significantly more expensive, I believe they will be much more conducive in realizing the vision of this project, to create a seamless, functional knee sleeve.

While I don’t have the sensors on hand yet (hopefully early this week), I have looked at the manuals and read up on how I will interface with the sensors. It looks to be a fairly straight forward process and there is some source code available for this that I have located.

Additionally, I have continued to study vector mathematics. While there is a straight forward way to calculate the flexion/extension angle from the vectors the sensors return, quaternions potentially provide a means of more accurate data, thus I have continued to look at using these.

Images:

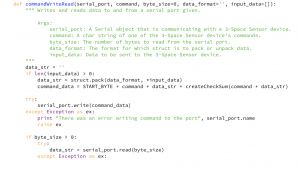
Below is some source code I found that will be of use when it comes to connecting to the sensors and reading/writing.

Materials:

Part/Material Price ($) Quantity Link
Potential IMU 1 117 with discount secured 1 https://yostlabs.com/product/bluetooth-mini/
Potential IMU 2 76 1 https://mbientlab.com/store/metamotionc/
Knee Sleeve 1 16.97 1 https://www.amazon.com/PowerLix-Compression-Knee-Sleeve-Basketball/dp/B01MQYADOT/ref=sr_1_5?keywords=powerlix+knee+sleeve&qid=1552264456&s=gateway&sr=8-5
Knee Sleeve 2 20 1 https://www.amazon.com/Zensah-Knee-Compression-Sleeve/dp/B00GPU7QRO/ref=sr_1_6?keywords=zensah+knee+sleeve&qid=1552264496&s=gateway&sr=8-6#customerReviews
3D printing

and associated costs

TBD TBD TBD

Areas of concern:

An area of concern regards anchoring the 3d printed housing to the sleeve. As the sleeves are compression and stretchy, I’m not sure how this will affect the anchoring stitching when the sleeve is being worn and stretched out. I need to make sure it will still be structurally sound enough, or I will need to start pursuing other methods of attachment, like a pocket. I have two sleeves to choose from, so hopefully one will offer a viable solution.

Otherwise, my understanding of quaternions is not sufficient if I choose to go this route, however I will continue to study up on this matter.

Project Post 3

Circular Pleating

  • weekly accomplishments list what you accomplished for each team member

This week, I acquired the Polyester fabric for the first circular garments. I also drafted a digital pattern for a skirt, and did research into laser cutting polyester.


  • changes to your approach after presenting your work what changes have you made in your approach

I decided to do a smaller garment made of 2 yards of fabric before making a large gown with the remaining 10 yards.

  • material list For each material fill out the following information (a table may be a good way to do this)
    • Part/Material
      • Polyester
    • Price
      • 2.37 per yard
    • Quantity
      • 12 yards
    • Link to a purchase location
      • https://www.fabricwholesaledirect.com/products/chiffon-fabric

Nothing has changed since the last project post. I have done a little research into nonwoven silks etc. but I have alot of handwork to do to do pleating

InGlove – Project Post #3

Curt, Shruthi, Vedant

Weekly Accomplishments

Curt

In the week before spring break I primarily worked on designing the robotic finger and experimenting with mounting locations for the finger. In the images section I will cover the limited prototype that I constructed to see if the mounting location made sense and a couple of screen captures of the current finger design. My next step is to focus on 3D printing the finger and to work on a custom flex sensor that can measure two joints in the glove. I also need to explore a mounting mechanism for the finger that is comfortable yet secure.

Vedant

The week before spring break, we were able to make a DIY flex sensor using some duct tape, conductive thread and a few pieces of Velostat (pressure-sensitive fabric). We tested that out using a voltage divider circuit and got some promising results in the changing voltage. I was able to connect that voltage divider circuit with a Circuit Playground and use the serial plotter in the Arduino IDE and found that there actually wasn’t very much noise from the DIY flex sensor.

In addition to that, the Photon Particle and flex sensors came in, and we got stared with how to use the Particle and get started with some basic circuits connected to it and how to use the Particle cloud IDE. We were also trying to get some readings from the flex sensors on the Particle cloud over WiFi, but we were not being able to, so I helped diagnose the problem and found that one of the sensors we ordered was defective. However, trying the same code and circuit with the other sensor, we were able to get some promising readings.

Shruthi

Over the past week me and Vedanth worked together on trying out different kinds of flex sensors. We ordered a batch of long and short ones from adafruit as well as tried making one one our own using velostat and conductive threads. We built voltage divider circuits to measure the change in voltage drop with the varying resistance of the flex sensor. Both of us were fairly new to hardware debugging, but we eventually figured out that one of the flex sensors we ordered was defective. We were successfully able to get the readings on the other one. However, in this whole process we found that our DIY flex sensor had comparable results in flex detection as the store-bought one. We might consider using DIY sensors for the remaining fingers as they are more affordable.

Images

SRF Sub-Project

In Figures 1 and 2 I am presenting the physical mockup to get a sense of the hand and how the finger takes up space around it. The goal of this is to make the design process more concrete.
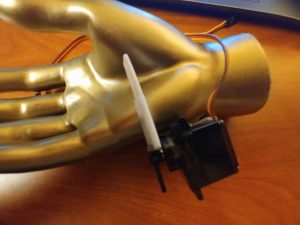
Figure 1: Simple mockup of the finger to get a sense of how the technology interacts with hand in 3D space.
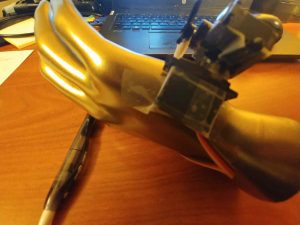
Figure 2: Mockup of finger constructed with the servo motors, tape and a piece of plastic.

Figures 3  and 4 depict the current CAD (using Fusion 360) for the finger. Note that I am still thinking about the mounting to the hand. While it should be rigid it must also be comfortable (though the finger is worn over the glove so there is some cushioning already on the hand.
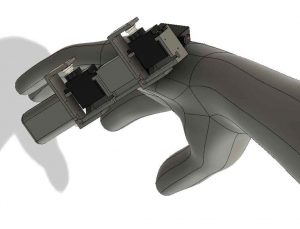
Figure 3:  View of finger backside.
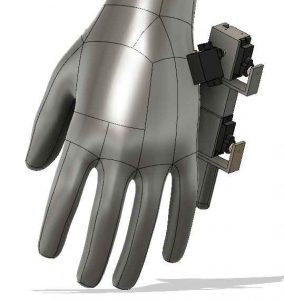
Figure 4:  View of back of hand, note the finger mounting location that I am considering.

Materials List

Home Assistant Sub-Project

  1. Particle Photon – $19.00 (1)
  2. Flex sensor – 4.5 inches – $12.95 (1)
  3. Flex sensor – 2.5 inches – $7.95 (1)

*After initial prototype, purchase more flex sensors.

SRF Sub-Project

Already purchased / owned

  1. Glove for prototype [final version subject to change based on prototype]
  2. Sparkfun IMU – $14.95 (1)
  3. Flex Sensor – 4.5 inches  – $15.95 (1)
  4. ESP32 Dev Board – $15.00 (1)
  5. High Torque Micro Servo – $9.95 (3)
  6. Resistive Force Sensor – $7.00 (1)
  7. Flex sensor – 4.5 inches – $12.95 (1)

Future / After initial prototype

  1. Resistive Force Sensor – $7.00 (5)
  2. Flex sensor – 4.5 inches – $12.95 (3) and/or Flex Sensor 2.5 inches – $7.95 (8)

Areas of Concern

For the glove we will continue to explore the mounting strategies for the flex sensor. Once we complete this we will need to capture gesture data. Currently there is no concern with this aspect however feedback and suggestions for mounting are welcome.

In regards to the SRF subproject, Curt still needs to figure out how to mount the finger. The original idea was to modify a skateboard / snowboard arm brace but a suggestion that was brought up was to modify a soft-support brace to allow full wrist movement. Again suggestions and feedback is welcome.
Project Post #3: Theremin Jacket

Project Team

Junda Chen, Jeff Ma, Yudong Huang, William Black

Weekly Accomplishments

([x]: Finished Task)

  • 3D PrintLeap Motion case
  • [x] First software prototype for theremin
    • [x] Motion trace: proximity and height change
    • [x] Data Transfer and MIDI encode/decode
    • [x] Run on Arduino/Raspberry Pi
  • Leap Motion Optimization
    • [x] Add an infrared light source to
    • Determine where the light should be
      • Wrist
      • On Jacket
  • Jacket
    • [x] Jacket and light
    • Select a jacket.
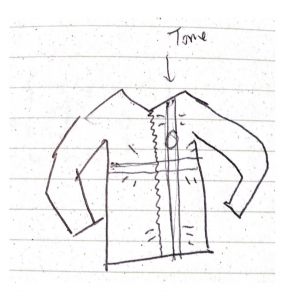
    • [x] Design the jacket.
    • Design the light effect of the jacket

Image/Video

Material list

  • [x] Circuit Board: (Potentially) MIDI encode/decoder, Leap motion image processor,
  • [x] Leap Motion (1): $96
  • [x] LED Strip light (2, TBD)
  • A Jacket (1, TBD)
  • [x] (Safe) Infrared LED (20)

Areas of Concern

  • Infrared LED Safety to eye: To design a better tracking of hand while not directly influence users’ eye is a design challenge, and that might require some research in the area.

——

Development Log

Cylon.js: an Arduino API to control the leap motion

Adafruit strip LED : a $17.99

Leap Motion installation: Troubleshooting in Windows.

Flow – PP3

project title  Flow

project team Julia and Yiting

weekly accomplishments

  • Yiting’s accomplishments
    • I have watched the Lynda course suggested by Makerspace on 3d printing (Additive Manufacturing: Materials for 3D Printing) as well as 3d modeling and repairing on Course: Learning 3D Printing
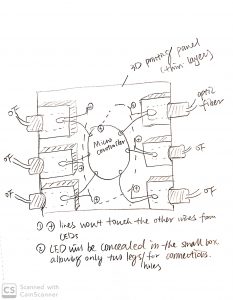
    • I am planning to use AutoCAD to work on a 3d printing design for the support for optical fiber as well as microcontroller
    • I have found two similar designs (here and here) and would love to adapt some of the design in it and create a suitable design.
  • Julia’s accomplishments
    • Researched and began working on code for the light sensor and lights
    • Came to the conclusion to adapt the Arduino code from Adafruit’s Chameleon Scarf project and began tweaking it

images 

3D Printing Modeling Design Draft

Pinterest board of wings

Changes to our approach 

  • We came into conclusion that the sleeve will be better to be connected the straps which will support the wings
  • We were brainstorming about the easiness of putting on the sleeve if we can use a zipper or other tools – still debating

Material list

Part/Material Price Quantity Link to a purchase location
1 Side Glow Fiber Optic Cable 1.5mm~8mm Optical Fiber For Lighting Decorations

[1.5mm for 15 meters]

$15.99 w/o tax 1 here
2 Color sensor $7.95 1 here
16 gauge floral wire $11.99 1 here
4 Fabrics $3.99/yd

Including shipping total is $14.18

2 yards here
5 Cellophane $15.99 1 here
6 Straps to support wings
7
8
9


Areas of concern

  1. We are still thinking about the easiness of wearing the wings if they are attached to the sleeve. We have found different ways to connect the strap attached to the wings and the sleeves here: https://www.kobakant.at/DIY/?p=1272
  2. We are not sure about the design for the sleeves to create the fantasy sense we want with the wings.
  3. Where can I use the 3d printing software without paying? I tried the designlab on the 6th floor of Humanities but couldn’t find one.

Project Post#3: Michael Leykin

Project Title: Penetration of Endpoints and Network Infiltration System

Project Team: Me, Myself and I

Weekly Accomplishments:

GOT ALL MY PARTS!!!!!!!!!

Learned the ways of the solder gun.

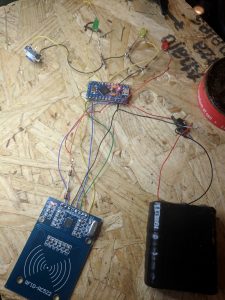
Finished soldering tool number 1: RFID cloner!

OBSERVE THE FINE CRAFTSMANSHIP!

Materials List:

Part Price Quantity Link
wireless network adapter $28.50 1 https://www.amazon.com/gp/product/B0035OCVO6/ref=ppx_od_dt_b_asin_title_s01?ie=UTF8&psc=1
Ethernet cable $3 1 https://www.amazon.com/AmazonBasics-RJ45-Cat-6-Ethernet-Patch-Cable-5-Feet-1-5-Meters/dp/B00N2VILDM/?tag=whtnb-20
Raspberry Pi 3 or 3 B+ $38.10 1 https://www.amazon.com/ELEMENT-Element14-Raspberry-Pi-Motherboard/dp/B07BDR5PDW/?tag=whtnb-20
microSD card $6.85 1 https://www.amazon.com/SanDisk-microSDHC-Standard-Packaging-SDSQUNC-032G-GN6MA/dp/B010Q57T02/?tag=whtnb-20
power source (Enokay Power Supply for Raspberry Pi 5V 2.5A Micro USB Charger Adapter with On Off Switch) $8.59 1 https://www.amazon.com/Enokay-Supply-Raspberry-Charger-Adapter/dp/B01MZX466R/?tag=whtnb-20
USB keyboard/mouse interface (Rii Mini Wireless 2.4GHz Keyboard with Mouse Touchpad Remote Control, Black (mini X1)) $16.99 1 https://www.amazon.com/gp/product/B00I5SW8MC/?tag=whtnb-20
SD card adapter $7.99 1 https://www.amazon.com/Vanja-standard-Connector-Notebooks-Smartphones/dp/B00W02VHM6/?tag=whtnb-20
Raspberry Pi Zero Wifi $10.00 1 https://www.adafruit.com/category/933?src=raspberrypi
Pi Zero USB Stem $5.00 1 https://shop.pimoroni.com/products/zero-stem-usb-otg-connector
2 x Tactile Push Button Switch With LED lights $3.00 1 https://www.aliexpress.com/item/5PCS-1-set-12X12X7-3-Tactile-Push-Button-Switch-Momentary-Tact-LED-5-Color-12X12X7-3mm/32873551440.html?spm=2114.search0104.3.2.3b0241a0ILdgzL&ws_ab_test=searchweb0_0,searchweb201602_5_10065_10130_10068_10890_10547_319_10546_317_10548_10545_10696_453_10084_454_10083_10618_10307_537_536_10902_10059_10884_10887_321_322_10103,searchweb201603_58,ppcSwitch_0&algo_expid=0747bf75-f245-43c5-a0c1-4966ea4078a8-0&algo_pvid=0747bf75-f245-43c5-a0c1-4966ea4078a8&transAbTest=ae803_5
DIP switch with 4 switches $3.00 1 https://www.aliexpress.com/item/10pcs-lot-Slide-Type-SMT-SMD-Dip-Switch-2-54mm-Pitch-2-Row-4-Pin-2/32956815576.html?spm=2114.search0104.3.3.4c971641sXqPaV&ws_ab_test=searchweb0_0,searchweb201602_5_10065_10130_10068_10890_10547_319_10546_317_10548_10545_10696_453_10084_454_10083_10618_10307_537_536_10902_10059_10884_10887_321_322_10103,searchweb201603_58,ppcSwitch_0&algo_expid=60dfe6ec-dd9e-4db7-93f0-5f94aec30ef4-0&algo_pvid=60dfe6ec-dd9e-4db7-93f0-5f94aec30ef4&transAbTest=ae803_5
2 x 330R resistors HAVE 1
MFRC522 RFID reader module $5.49 1 https://www.amazon.com/gp/product/B01CSTW0IA/ref=ppx_od_dt_b_asin_title_s01?ie=UTF8&psc=1
MIFARE 1K RFID card (with changeable UID, 13.56Mhz) Included 1
some RFID card to copy (only 13.56Mhz cards can be read/written by this particular card reader module) Included 1
Tactile Touch Push Button Switch Tact Switches 6 X 6 X 5mm Included 1
LEDs (red, yellow, green) + resistors (1k ohm) $7.00 1 https://www.amazon.com/gp/product/B01ER728F6/ref=ppx_od_dt_b_asin_title_s02?ie=UTF8&psc=1
3 AA batteries (1.5V each) HAVE 1
2 zener diodes (3.7V) or (3.6V) $8.00 1 https://www.amazon.com/gp/product/B07BTKVRG8/ref=ppx_od_dt_b_asin_title_s01?ie=UTF8&psc=1
switch (3 Terminals ON/ON 2 Positions SPDT Electronic Push Button Sliding Switches) $5.00 1 https://www.amazon.com/gp/product/B0799R529Z/ref=ppx_od_dt_b_asin_title_s02?ie=UTF8&psc=1
cables, hot glue, tape (30AWG Insulated Silver Plated Single Core Copper PCB 0.25mm Kynar Wrapping Wire) $5.00 1 https://www.amazon.com/gp/product/B07M7BHKRV/ref=ppx_od_dt_b_asin_title_s01?ie=UTF8&psc=1
Arduino Pro Micro 5V $20.89 1 https://www.amazon.com/gp/product/B01MTU9GOB/ref=ppx_yo_dt_b_asin_title_o04_s00?ie=UTF8&psc=1
PCB Prototyping Board $10.00 1 https://www.amazon.com/gp/product/B072Z7Y19F/ref=ppx_od_dt_b_asin_title_s02?ie=UTF8&psc=1
Solder Gun $67.98 1 https://www.amazon.com/gp/product/B01MDTO6X7/ref=ppx_yo_dt_b_asin_title_o06_s00?ie=UTF8&psc=1
Desoldering Gun and Desoldering Wick $7.69 1 https://www.amazon.com/gp/product/B07BB8DGMP/ref=ppx_yo_dt_b_asin_title_o07_s00?ie=UTF8&psc=1

Areas of Concern: Learning how to solder turned out to be a bigger challenge then I initially thought, however I believe I have become competent in this enough for the rest of the tools. I have completed the most intensive project first to get the most practice, installing the software and solving for bugs will be a even bigger challenge. As the semester continues I will probably need assistance with my circuits and debugging, but this is normal. I look forward to tackling these challenges.