Final Project Post: Velcro MIDI Jacket

Project Title

Velcro MIDI Jacket

Project Team

Junda Chen, Jeff Ma, Yudong Huang, William Black

One sentence that describes your project

A MIDI(Theremin) jacket that allows you to create, record and demonstrate your music idea as an instrument for synchronized acoustic and visual performances.

Video

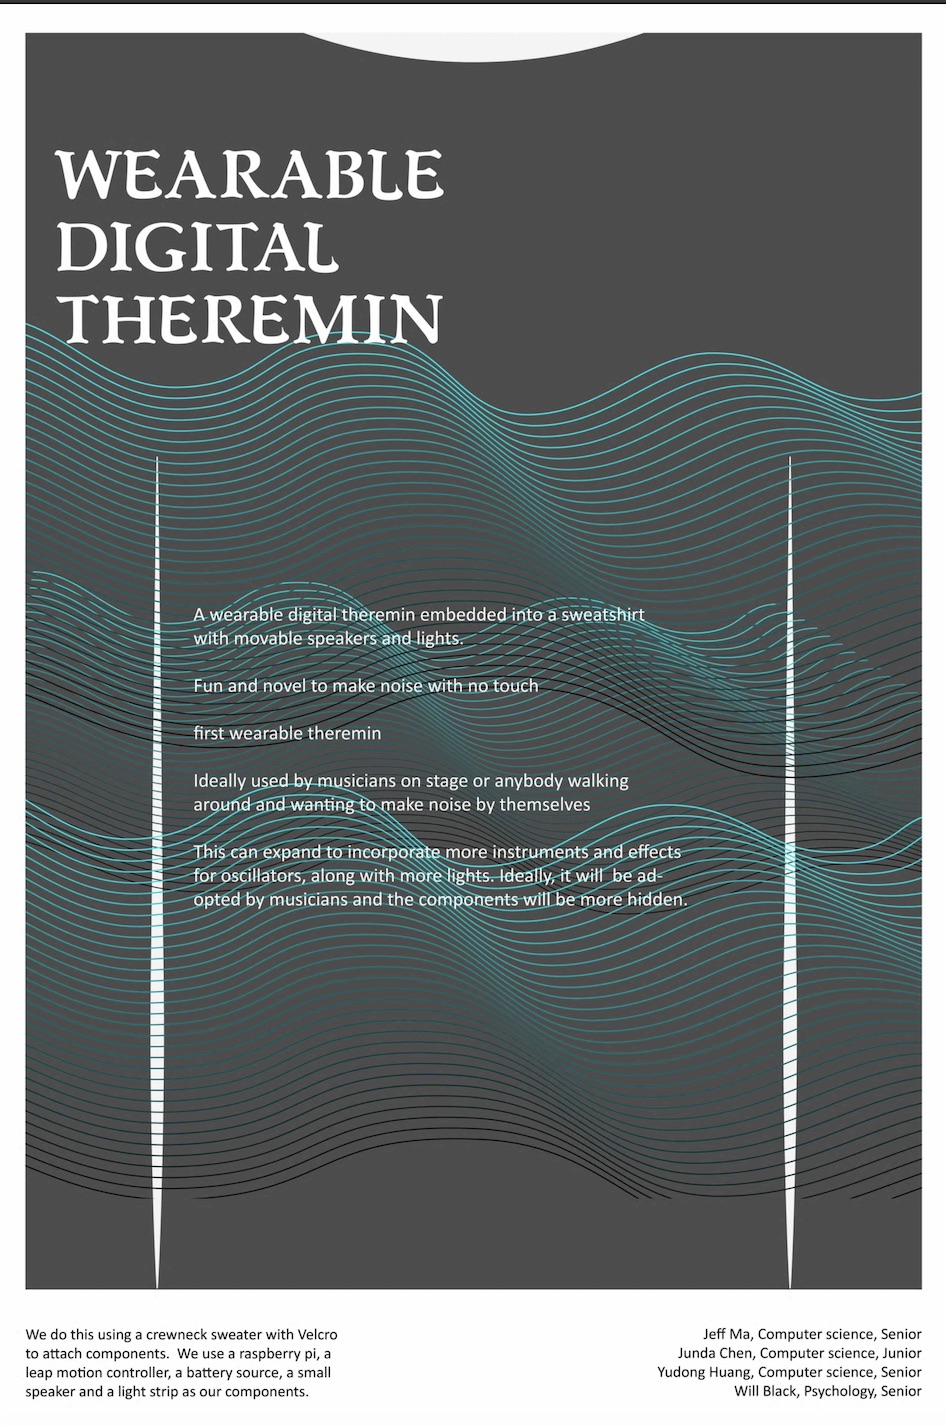
Poster Image
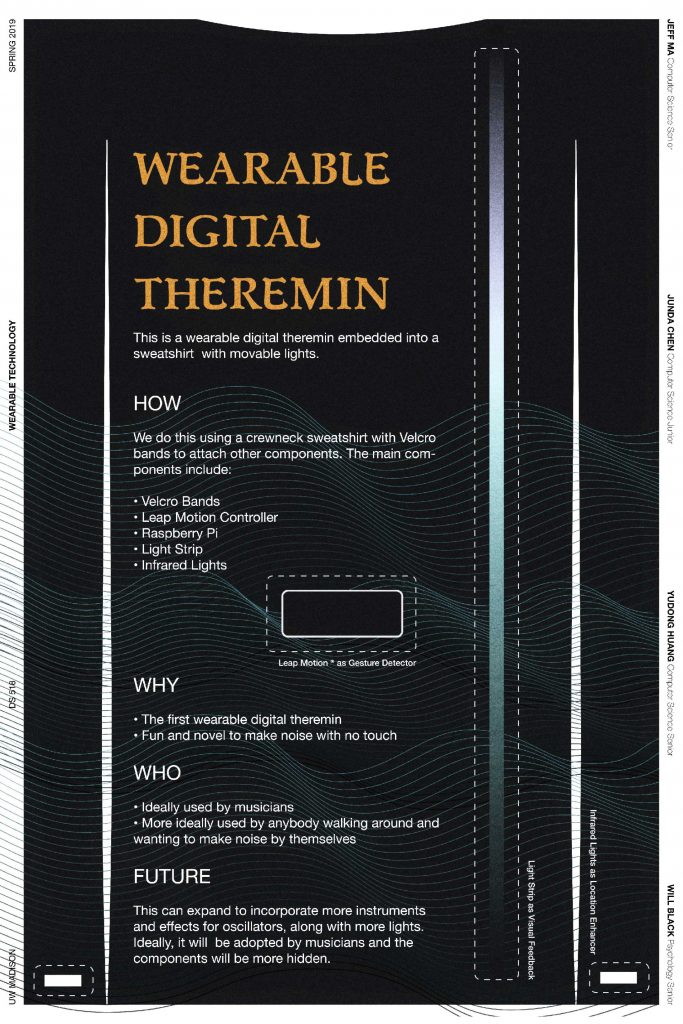
What can you do with it?

When you have a sudden flash of music idea walking down the street, turn on the jacket and start recording the idea with the theremin attached in the front of the velcro jacket. The piece of music will be stored, and you can recreate the music when you came back home. You can also turn on the light strip and show off your music to the public.

How it works?

The jacket has three components: theremin, light strip, and the mini computer. The theremin is built on the Leap Motion, a gesture recognizer, that tracks the hand motion of your hands. The data will be transmitted to and stored at the mini computer (a raspberry pi) attached at the back of the jacket. When the light strip is on, the mini computer will also control the light strip to move in accordance with the hand motion. The higher the note it plays, the higher the active light will be on the strip, and vice versa.

Development Experience

Overall, the group works collaboratively and efficiently. We embrace each other’s ideas, cherish the time of development, and have good intra-group communication. All fantastic idea came after heated discussion (using velcro to modularize works, light strips with dynamic designs, etc.), and we all felt engaged in the discussion and pleased about the fantastic ideas and outcome.

Do we meet our goals?

Overall, the project meets our original goal to create this prototypical wearable theremin that allows the user to play with. The core functionality, theremin light strip, and programs, meet what we would like the theremin to do. There are certainly a few things we have tried and failed to deliver during the short period of time, including its wearability (raspberry pi), stability (connection between light strip and circuit playground), user experience (accuracy of leap motion sensing, software interface, instrument types). But we still think as a course project, we had a good prototype that people embrace and excite about.

Hurdles and Resolution

Challenge 1: Modularization. There was a period that we found it hard to separate our work because of the design of jacket, and that directly influence the progress in the visual effect development parts. After a heated discussion, we found that it was a good idea to use Velcro to modularize the jacket into different components, all flexible to attach and remove.

Challenge 2: Leap Motion on Raspberry Pi. Running Leap Motion on Raspberry Pi is a headache. We encountered hardware problem that burned out both of our available Pis. After getting standard hardwares and equipments, we limited system support, not to say huge power consumption. At the last moment, we give up on the wearable functionality and used a computer for the showcase.

Challenge 3: Light Strip and Data Transfer. Light strip and circuit playground turns out to be pretty hard to integrate. We spent a chunk of time to get the light strip work with the circuit playground, and a significant chunk of time to get the proper data transfer working alongside with the application.

Next Step

  • Spend more time developing the Theremin Software Interface
  • Develop our own infrared sender/receiver instead of using Leap Motion
  • Improve the hardware connection of the light strip

Final Materials

  • Velcro
  • Amazon Sweat Shirt
  • Leap Motion
  • Ada Fruit NeoPixel
  • USB Cables
  • Computer (a Macbook Pro, since we did not get the Raspberry Pi running)

Theremin Jacket – Project Post 7

Project Post 7

Project Title

Velcro MIDI Jacket

Project Team

Junda Chen, Jeff Ma, Yudong Huang, William Black

One Sentence that describes your project

A MIDI(Theremin) jacket that can be worn and played as an instrument for synchronized acoustic and visual performances.

Weekly Accomplishments

  • Jacket
    • Waistband velcro strip for the back is sewed on and ready to go (Yudong)
    • Front and back waistband velcro strip sewed and enclosed to the side (Yudong)
    • Vertical velcro strip cut and ready to be sewed (Yudong)
    • Leap motion case attached to jacket (Yudong)
  • Leap Motion Case
    • Sewed on and ready for leap motion to be put in (Yudong)
  • Light Strip
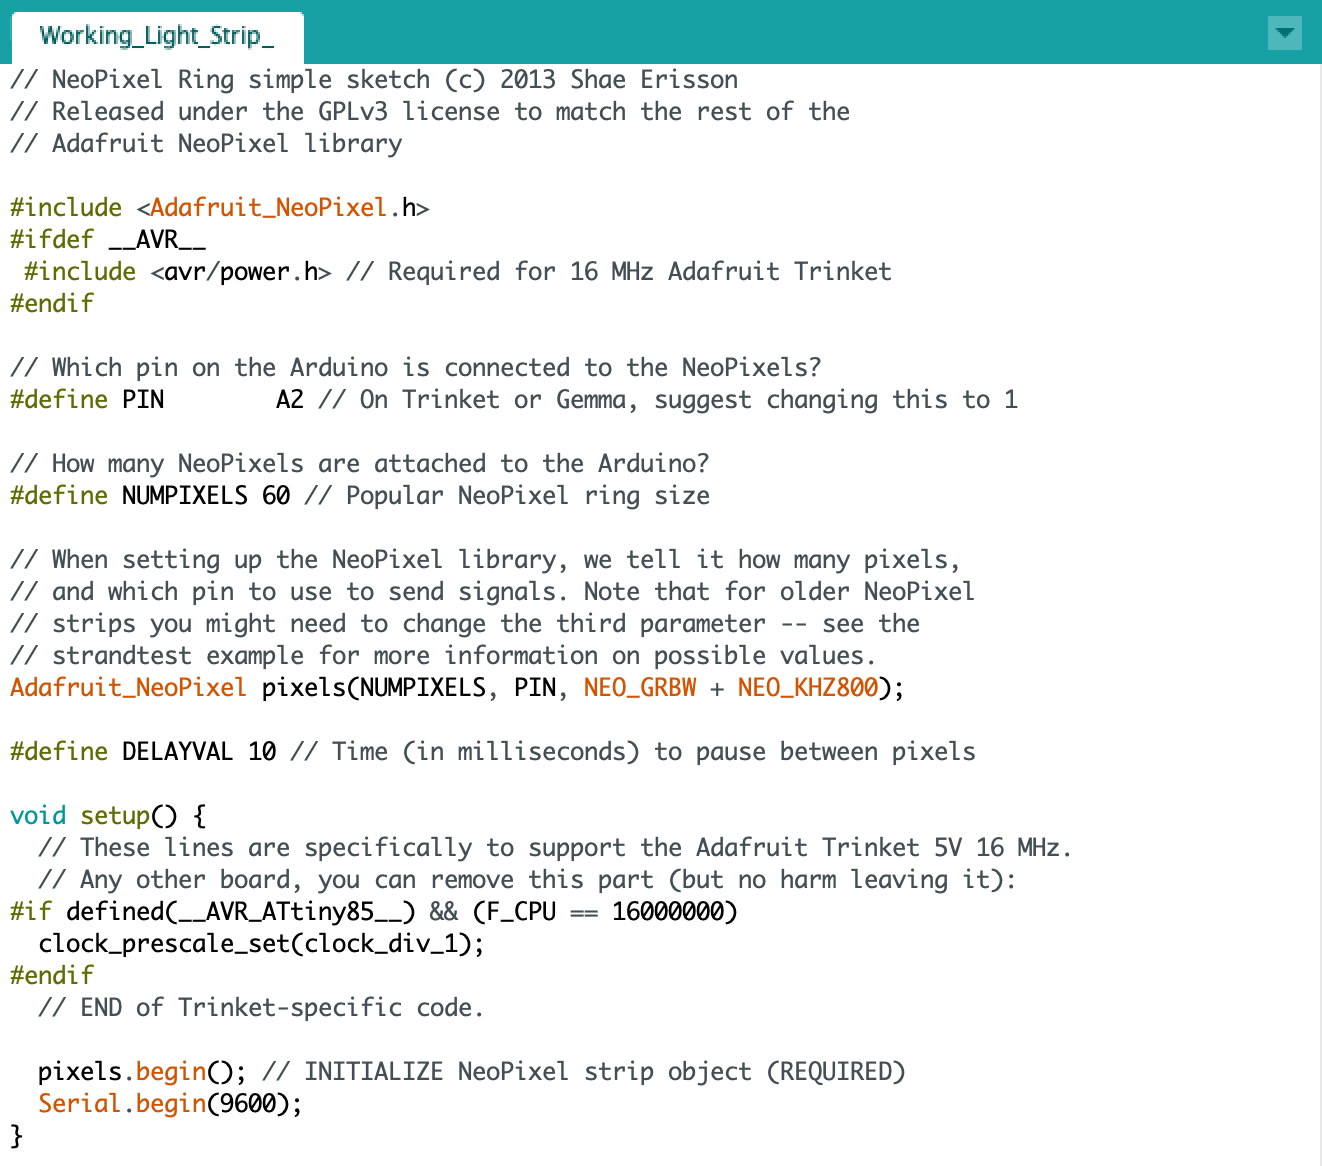
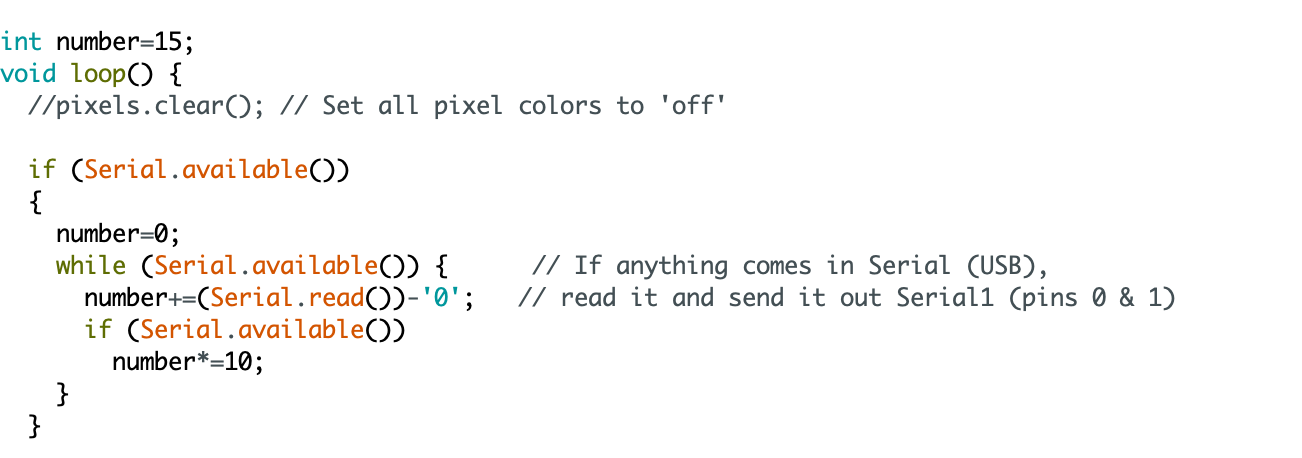
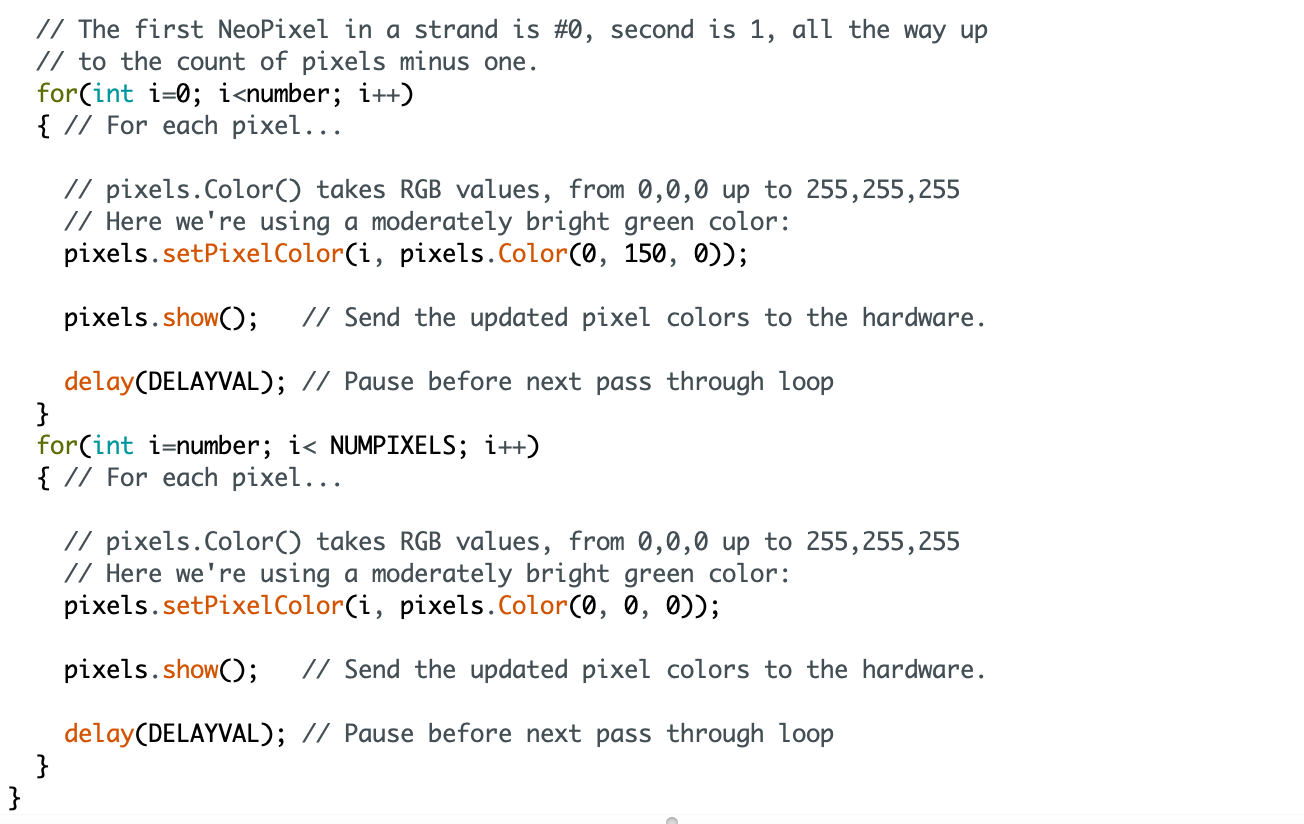
    • Switch to Arduino code rather than MakeCode and JavaScript for data transfer (Jeff)
    • Able to get data feed through Arduino code and slide to certain positions with assistance from Kevin (Jeff)
  • Raspberry PI Power supply
    • Reimaging Raspberry PI with a proper system (Junda)
    • Test connectivity and data transmission through the PI (Junda)
  • Leap Motion Device
    • Modified MIDI sound and shared code for data transmission among the team (William)
  • Poster
    • Constructed rough draft for poster design (Yudong, William)
    • Added a background of visualizations representing spacial sound effects for better delivery and integration based on suggestions from Marianne (Yudong, William)

Image/Video

Image 1 Poster draft picture

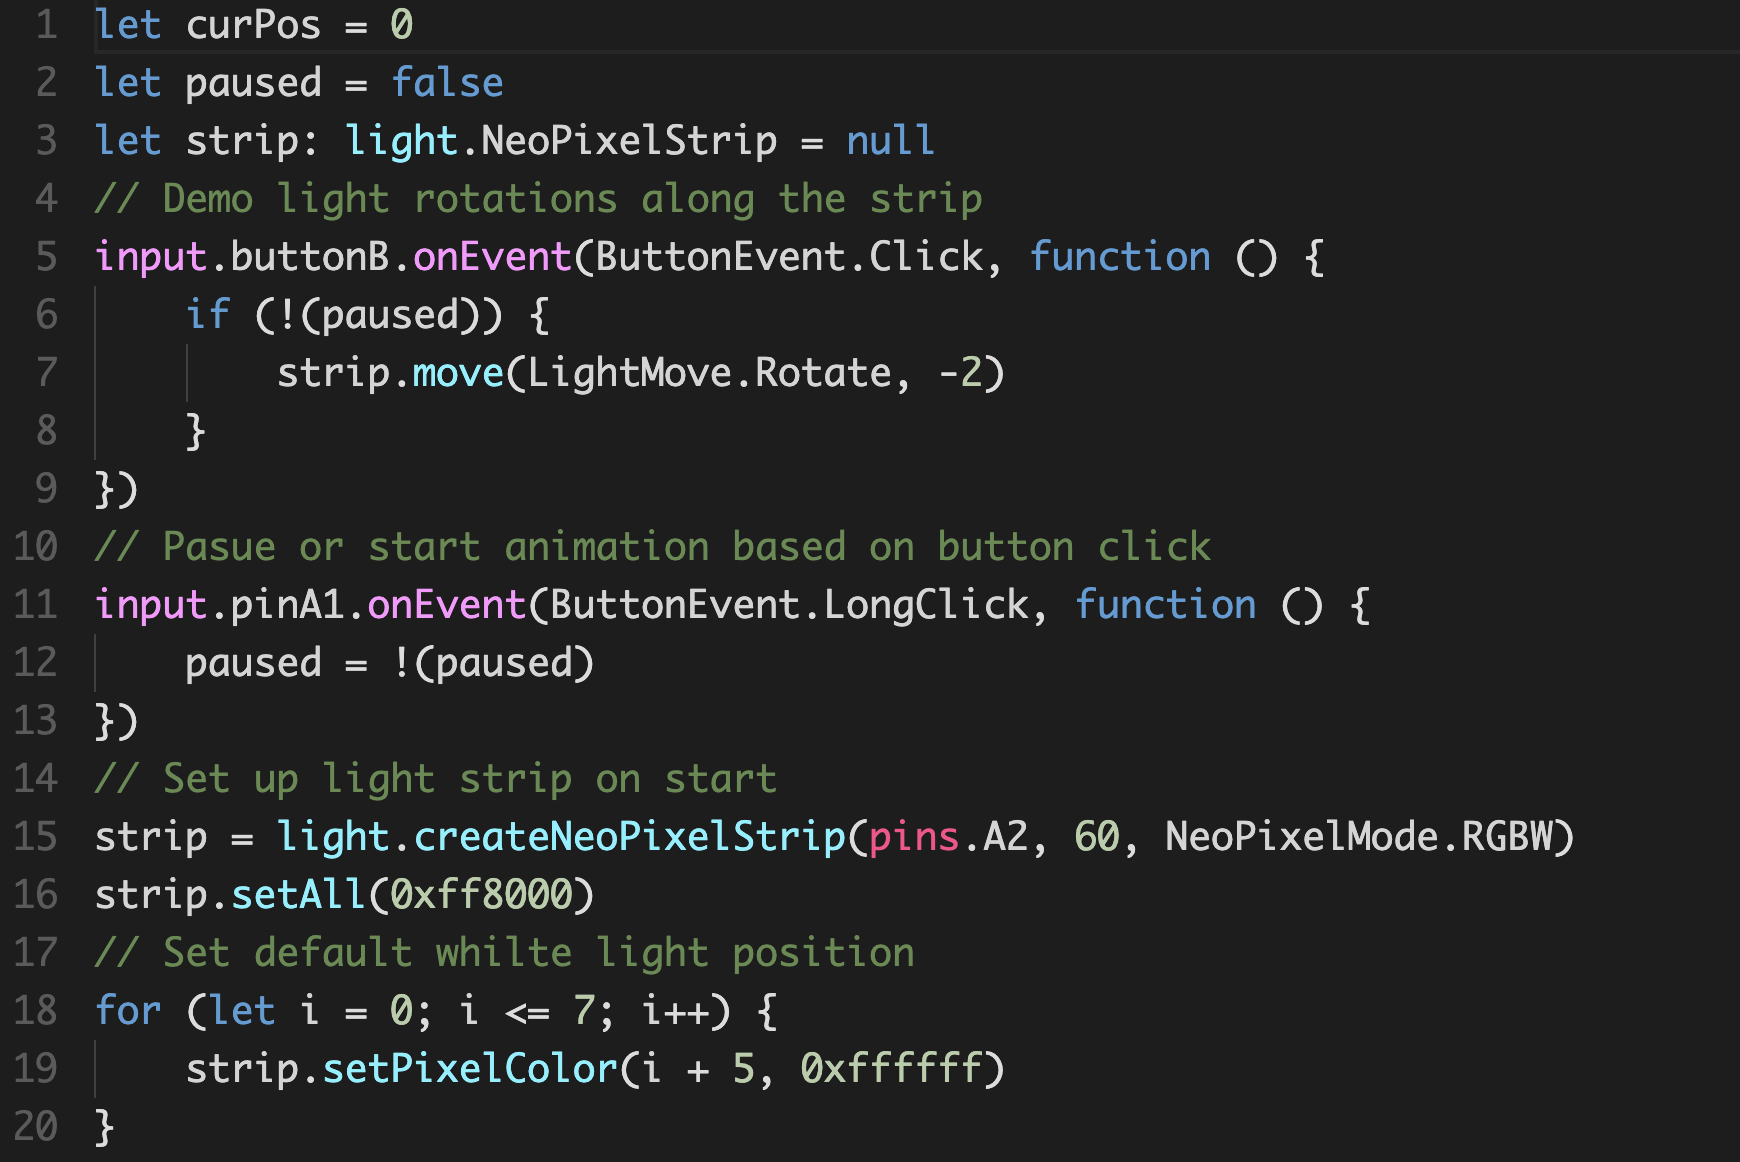
Image 2 Light strip Arduino demo Arduino code

Material list

  • Circuit Board: (Potentially) MIDI encode/decoder, Leap motion image processor,
    • Arduino (1):
    • Circuit Playground (1)22
    • Raspberry Pi 3B + (1, with toolkits): $30-50
  • Leap Motion (1): $96
  • LED Striplight (2, TBD)
  • Black velcro fabric (we have in the studio)
  • A Jacket (1, TBD)
  • (Safe) Infrared LED (20)
  • A long USB cable (x2) (for emergency and design)
  • Portable speaker for sound display

Areas of Concern

  • The material and technique we need to cover the hardware
  • The power source used to power leap motion and transfer data needs to be determined and started testing
  • Deliver streams of data consistently from leap motion
  • Offer proper data transfer medium for leap motion to feed to Neopixel light strip
  • Change Arduino code so the light strip slides as designed for the project

Project Post #6 – Velcro MIDI Jacket

Project Post 6

Project Title

Velcro MIDI Jacket

Project Team

Junda Chen, Jeff Ma, Yudong Huang, William Black

Weekly Accomplishments

A MIDI(Theremin) jacket that can be worn and played as an instrument for synchronized acoustic and visual performances.

Weekly Accomplishments

  • Jacket
    • Adjust Velcro sheet to appropriate width for attachment (Yudong)
    • Velcro sewed and attached to the horizontal waist area (Yudong)
  • Leap Motion Case
    • More polished to be sewing ready (Yudong)
  • Light Strip
    • Able to light up the strip through circuit playground (Jeff)
    • Briefly decided to use 35 LED lights based on jacket implementation(Jeff)
    • Able to rotate white light by a certain range through control (Jeff)
    • We still need to test out if the circuit playground will respond correctly with Analog input data from the output of the Raspberry PI GPIO port in controlling the light strip to move synchronously through Raspberry PI. (Jeff)
  • Raspberry PI Power supply
    • Reimaging Raspberry PI with a proper system (Junda)
    • Test connectivity and data transmission through the PI (Junda)
  • Leap Motion Device
    • Modified MIDI sound and shared code for data transmission among the team (William)
  • Speaker
    • Purchasing an outside speaker for enhanced sound delivery (William)

Image/Video

Video Light strip with its current functionality working

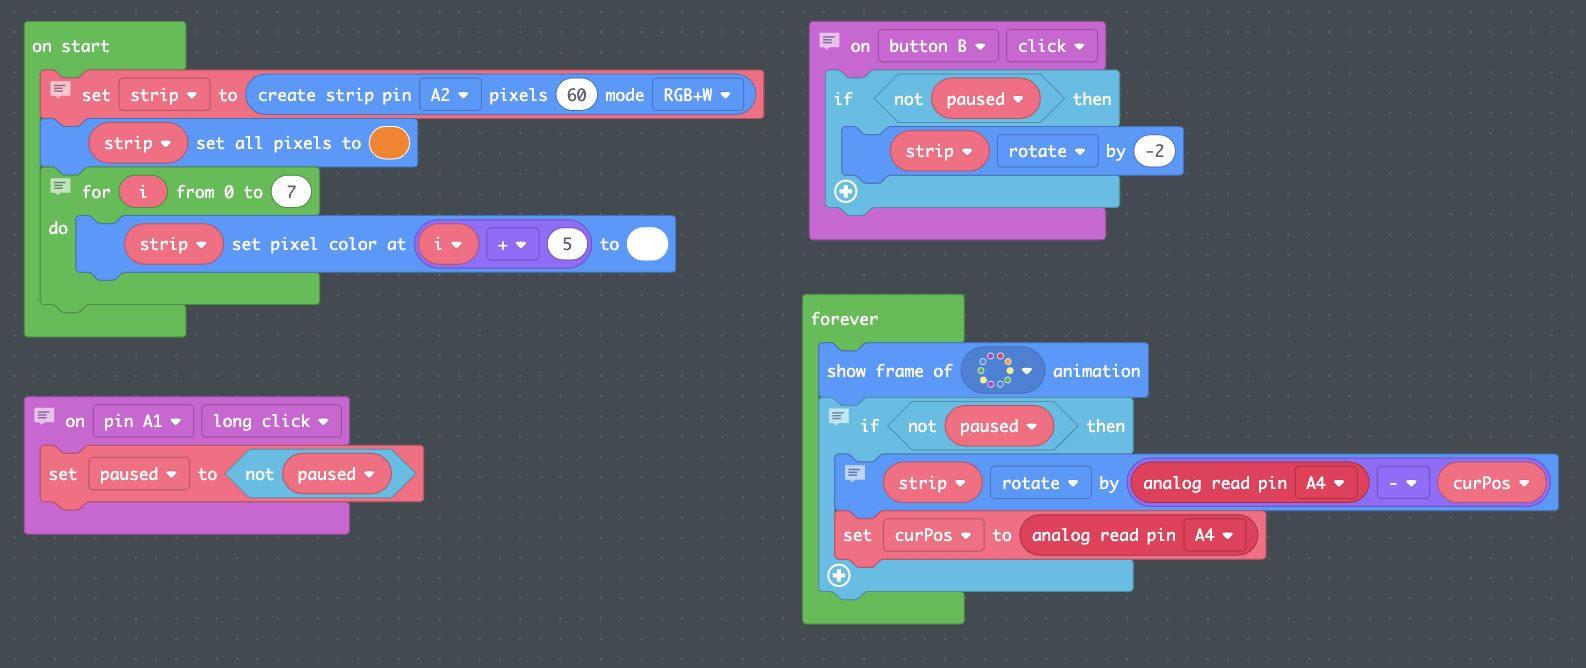
Light strip with analog inputs on A4(not connected to PI)

Light strip with white light rotations based on clicking

Image 2 Current JavaScript code(with analog input on A4) and demo from MakeCode

https://makecode.com/_iye9ed6AmHLw

Material list

  • Circuit Board: (Potentially) MIDI encode/decoder, Leap motion image processor,
    • Arduino (1):
    • Circuit Playground (1)22
    • Raspberry Pi 3B + (1, with toolkits): $30-50
  • Leap Motion (1): $96
  • LED Strip light (2, TBD)
  • Black velcro fabric (we have in the studio)
  • A Jacket (1, TBD)
  • (Safe) Infrared LED (20)
  • A long USB cable (x2) (for emergency and design)
  • Portable speaker for sound display

Areas of Concern

  • We need to speed up the process of integration with basic functionalities
  • The light strip needs to be properly covered with sewing
  • The hardware needs to be sewed on for further integrated design
  • The theremin sound for the leap motion needs fine-tuning
  • The data flow from the leap motion scripts to the circuit playground analog read through the GPIO  needs to be handled as soon as possible

Project Post #5 – Velcro MIDI Jacket

Project Post 5

Project Title

Velcro MIDI Jacket

Project Team

Junda Chen, Jeff Ma, Yudong Huang, William Black

Weekly Accomplishments

Note

  • Accomplished item: item
  • Major responsible men: (man1, man2, …)

List

  • 3D Print Leap Motion case
    • Printed the model in Makerspace (Jeff, Yudong)
    • Integrate Leap  motion on jacket (Jeff, Yudong)
  • Theremin Software
    • Run on Raspberry Pi 3+ (Have a big trouble with Raspberry PI) (Junda, Jeff)
    • Java script to experiment/benchmark (Junda, William)
    • Python script to experiment/benchmark (Junda, William)
  • Jacket
    • Select and buy Velcro (Yudong, Jeff, William)
    • Select (and buy) a jacket. (Yudong, Jeff)
    • Integrate Velcro on Jacket (Yudong)
    • Re-Design the light effect of the jacket (Yudong, Jeff)

Image/Video

Figure 1. Velcro Jacket design. We attach the velcro to jacket and it looks like this. We will try to integrate it on the velcro if possible this week.

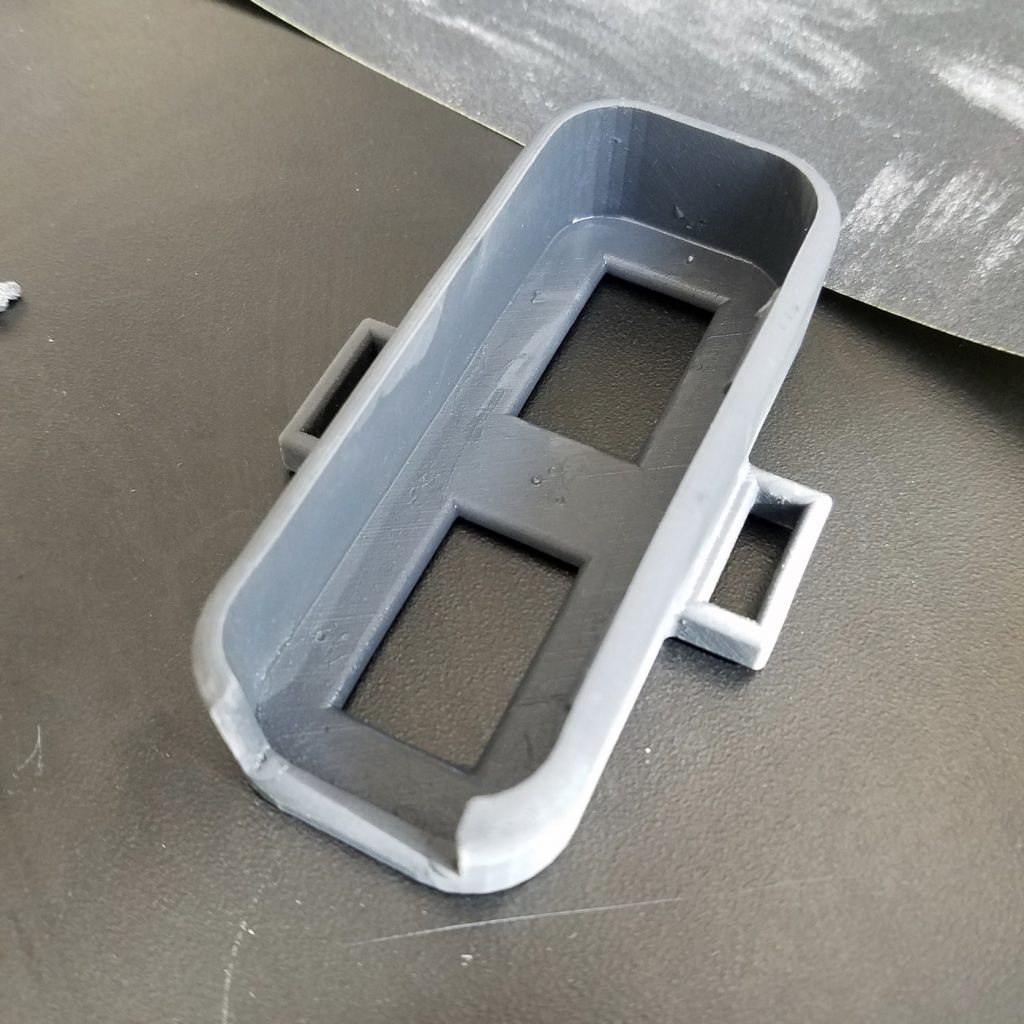
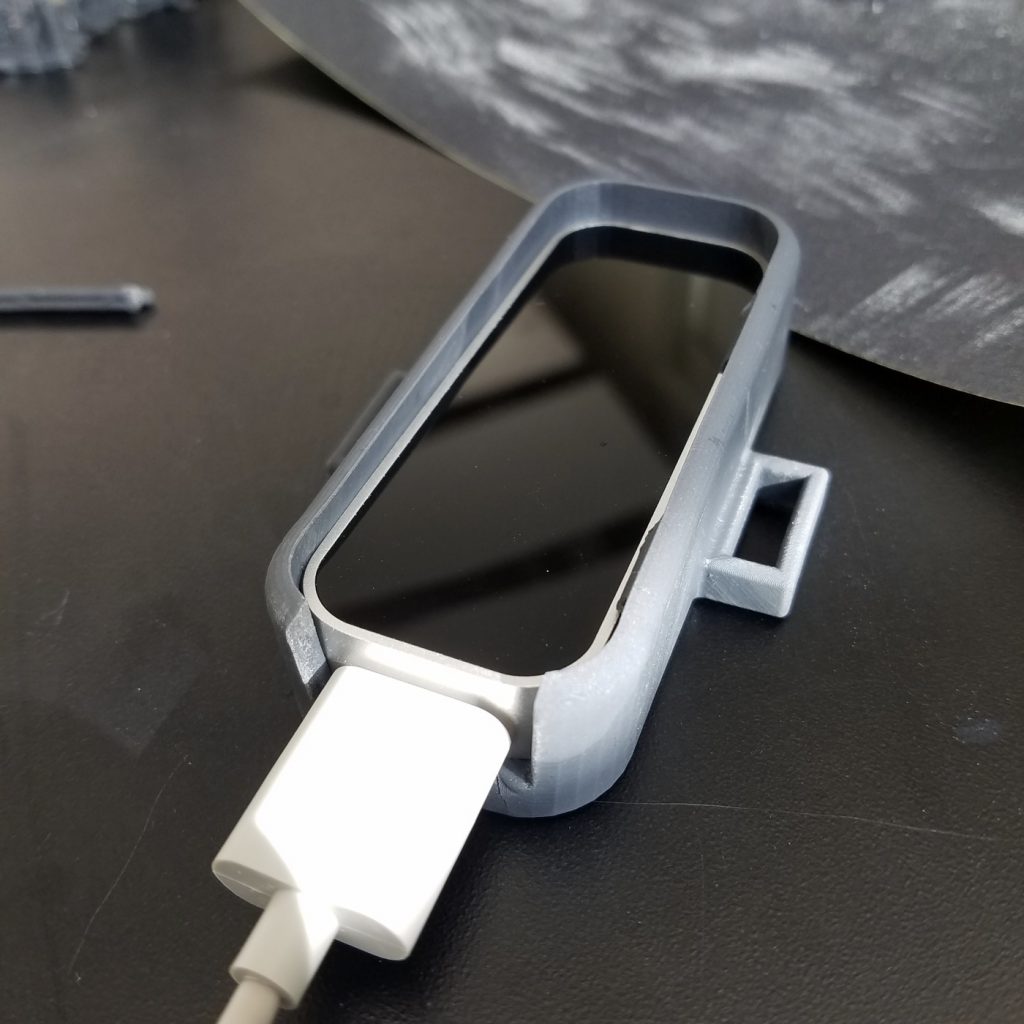
Figure 2,3. Leap Motion case. Using PVA we printed the case of Leap Motion, polished it and tried it on body. It seems great : )

Material list

  • Circuit Board: (Potentially) MIDI encode/decoder, Leap motion image processor,
    • Arduion (1):
    • Circuit Playground (1)22
    • Raspberry Pi 3B + (1, with toolkits): $30-50
  • Leap Motion (1): $96
  • LED Strip light (2, TBD)
  • Black velcro fabric (we have in the studio)
  • A Jacket (1, TBD)
  • (Safe) Infrared LED (20)
  • Long USB cable (x2) (for emergency and design)


Areas of Concern

  • Raspberry Pi Power Supply and Performance: We have a big headache. These are the approaches we tried to do — we might need some help
    • Change a PI — it’s on its way from Amazon.
    • Check Power Supply. — we tried to use Michael’s power adaptor (official), Mike’s  power adaptor (5V 2.4A), Mike’s roommate’s power adaptor (5V 2.5A and 9V 4A). None of them work. Our speculation is: the PI works, but the kernel might not be able to boot because of reason other than power adaptor (see below).
    • Check SD card image. — we tried the combination of the following methods — it does not work by far.
      • Change image (all newest from the official download website: https://www.raspberrypi.org/downloads/)
        • Noobs
        • Raspbien
        • Snappy Ubuntu kernel
        • Ubuntu Mate kernel
      • Change SD card format
        • FAT32: especially for TF card larger than 32G (https://www.sdcard.org/developers/overview/capacity/)
        • exFAT
      • Change TF card
        • Sony Micro TF 128G (Mike’s card — might be too large, but was bootable when using FAT32)
        • Samsum TF 32G
  • User Experience: How to let our users know how to operate without a screen?


Project Post #4 – Velcro MIDI Jacket

Project Post 4

Project Title

Velcro MIDI Jacket

Project Team

Junda Chen, Jeff Ma, Yudong Huang, William Black

Weekly Accomplishments

Note — This is an accomplished item: item

  • 3D Print Leap Motion case
  • Theremn Software
    • Motion trace: proximity and height change
    • Data Transfer
    • Theremin instrumental voice
    • (Optimize) Range Detection
      • Test how many Infra-ray LEDs are sufficient to optimize detection
        • on wrist
        • on Jacket
    • (Optimize) Position to put the Leap Motion on the Jacket
      • Waist band — with a tiled case the effect is good.
    • Run on Arduino (Don’t have to run on Arduino)
    • Run on Raspberry Pi 3+
  • Leap Motion Optimization
    • Add an infrared light source to
    • Determine where the light should be
      • On Jacket
  • User Experience Design: Tune the software to let user make sense of how to use it.
  • Jacket
    • Select a light
    • Select a material for diffusion
      • Sheer from underneath
    • Design the jacket: Finally Decide on Velcro Hoodie !!!!
      • Velcro Hoodie? — Have all the things in the velcro and stick waistband to the velcro on the Hoodie.
    • Select (and buy) a jacket.
    • Re-Design the light effect of the jacket

Image/Video

(Figure 1,2): Two implementations of light

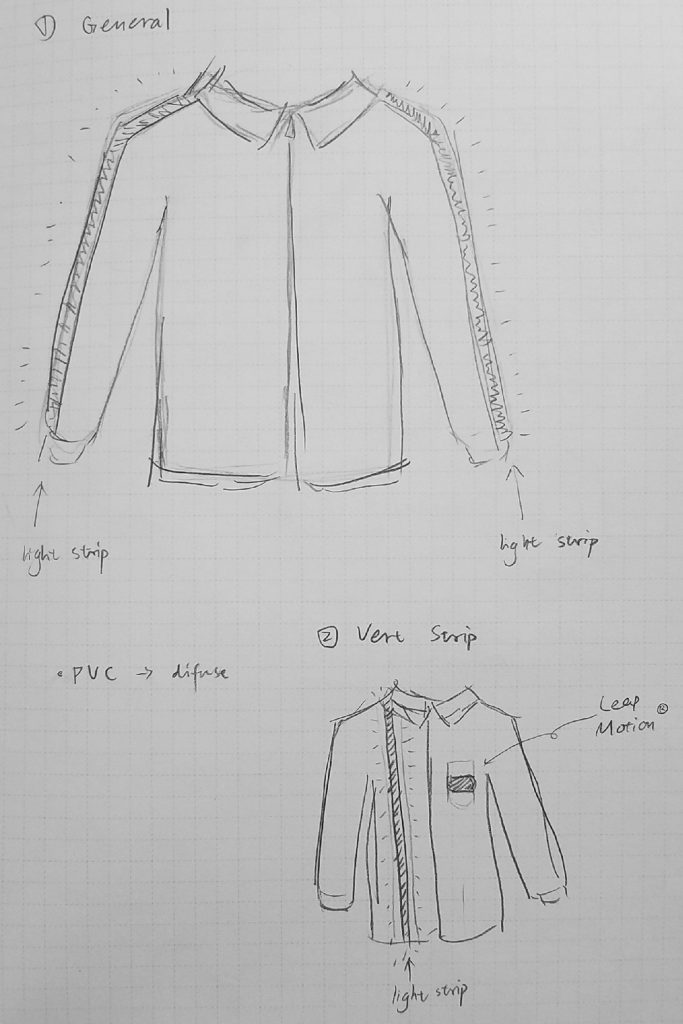
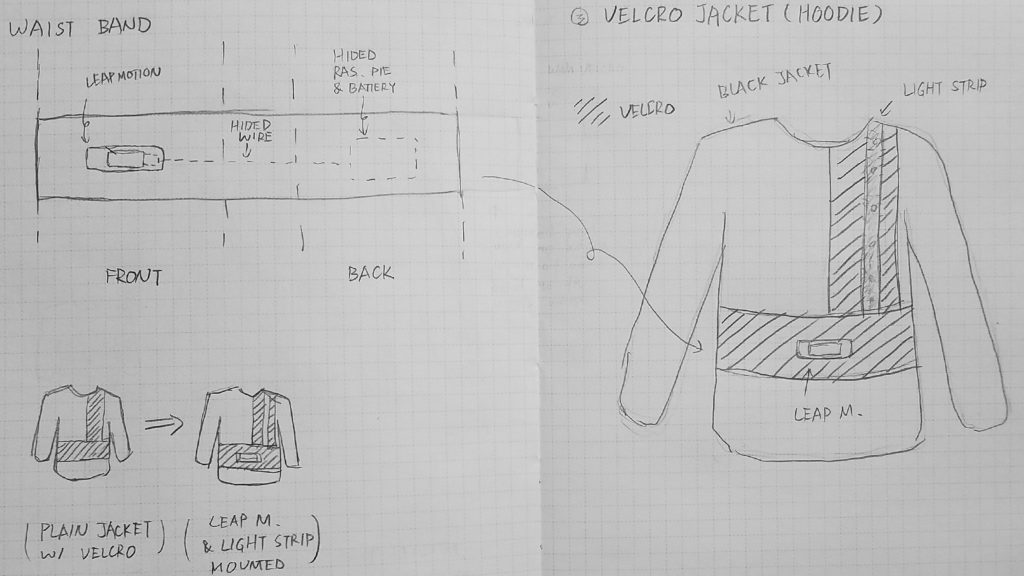
(Figure 3): Current design using Velcro. This is a remarkable shift in our project development. To solve the conflict between the freedom of light design and the constrain of other hardware devices, we proposed the use of Velcro to decomposite the design of hardward components (on the waist band) and the design of light (on the jacket). From now, all the hardward-related design will be presented on the waistband, which can be attach/detach to the jacket using the Velcro. The light on jacket is also configurable using Velcro, and can be connected to the waistband for power supply.


Material list

  • Circuit Board: (Potentially) MIDI encode/decoder, Leap motion image processor,
  • Leap Motion (1): $96
  • LED Strip light (2, TBD)
  • Black velcro fabric (we have in the studio)
  • A Jacket (1, TBD)
  • (Safe) Infrared LED (20)
  • Long USB cable (x2) (for emergency and design)


Areas of Concern

  • Infrared LED Safety to eye: To design a better tracking of hand while not directly influence users’ eye is a design challenge, and that might require some research in the area.
    • With the current LED model, it is basically safe to the eye with all the possible implementations we want to make.
  • Raspberry Pi Power Supply and Performance: Have to benchmark on the Raspberry Pi how well the theremin work with external power supply. The fall-back for this project is to directly connect all things back to a MacBook.
  • User Experience: How to let our users know how to operate without a screen?


Past Development Log

Cylon.js: an Arduino API to control the leap motion

Adafruit strip LED : a $17.99

Leap Motion installation: Troubleshooting in Windows.


Project Post #3: Theremin Jacket

Project Team

Junda Chen, Jeff Ma, Yudong Huang, William Black

Weekly Accomplishments

([x]: Finished Task)

  • 3D PrintLeap Motion case
  • [x] First software prototype for theremin
    • [x] Motion trace: proximity and height change
    • [x] Data Transfer and MIDI encode/decode
    • [x] Run on Arduino/Raspberry Pi
  • Leap Motion Optimization
    • [x] Add an infrared light source to
    • Determine where the light should be
      • Wrist
      • On Jacket
  • Jacket
    • [x] Jacket and light
    • Select a jacket.
    • [x] Design the jacket.
    • Design the light effect of the jacket

Image/Video

Material list

  • [x] Circuit Board: (Potentially) MIDI encode/decoder, Leap motion image processor,
  • [x] Leap Motion (1): $96
  • [x] LED Strip light (2, TBD)
  • A Jacket (1, TBD)
  • [x] (Safe) Infrared LED (20)

Areas of Concern

  • Infrared LED Safety to eye: To design a better tracking of hand while not directly influence users’ eye is a design challenge, and that might require some research in the area.

——

Development Log

Cylon.js: an Arduino API to control the leap motion

Adafruit strip LED : a $17.99

Leap Motion installation: Troubleshooting in Windows.

Project Post #2 – Theremin Jacket

Project Post 2

@Postdate: Mar 9th (Sat)

Project Title

Theremin Jacket

Project Team

Junda Chen, Jeff Ma, Yudong Huang, William Black

Major aspects for Development

  • Sensor

    • Sonar Sensor

    • Leap Motion

  • Arduino/Other interface & Software Design

    • MIDI Software

    • Storage

    • Data Transfer

  • Clothes Design

    • Sensor/Leapmotion embedding

    • Light Design

      • LED

      • Covering Material / Defussing material (Potentially)

    • Jacket

Weekly Accomplishments

  • Setup sonar sensor tracking in Arduino Mega.
  • Use sonar sensor to build a prototypical MIDI device.
  • Leap Motion Mechanism
    • How leap motion works, Accuracy, General application
    • HW and SW. Compatilibility to IoT Devicess
  • 3D PrintLeap Motion case
  • First software prototype for theremin
    • Motion trace: proximity and height change
    • Data Transfer and MIDI encode/decode
    • Run on Arduino/Raspberry pi
    • (Optimization) De-noise.
  • Select a jacket.
  • Design the jacket.

Image/Video

Changes to our approach

We originally want to design the primitive circuit and sensors to make the sensing work. William has just worked out the sonar in wednesday, and as a backup plan and primitive approach we will design a theremin using the sonar sensors and integrate it as a part of jacket.

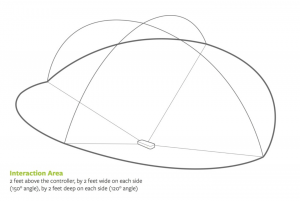
In search for potential improvement of gesture recognition, we also focus our attention on Leap Motion. On leap motion, we’re able to capture richer and more sensive gesture information — able to grab, tremble, drastically move up and down, within its well-defined range of service.

Material list

  • Circuit Board: (Potentially) MIDI encode/decoder, Leap motion image processor,
  • Leap Motion (1): $96
  • LED Strip light (2, TBD)
  • A Jacket (1, TBD)

Development Log

Cylon.js: an arduino API to control the leap motion

Adafruit strip LED : a $17.99

Leap Motion installation: Trouble shooting in Windows.

Project Post #1: Theremin Jacket

Project Title

Theremin Jacket

Team Member

Jeff Ma, Junda Chen, William Black, Yudong Huang

Project Description

1) What does our project do?

The concept of Theremin Jacket comes from the Theremin, an electronic musical instrument that could be controlled without physical contact by the performer. Thus, the Theremin Jacket we want to make allows the wearer to control an external connected MIDI to play music without any physical contact.

2) Who is our project for?

Theremin Jacket is for people who are fans of music, or more specifically, fans of the electronic musical instrument Theremin. It could also provide a chance to those without any experience of playing musical instrument to play music.

3) Describe how someone would use the developed device. What are the steps that a user would go through to interface with the technology?

First, there will be a switch on the jacket that allows wearers to turn on/off the circuit. When circuit is on, sensors on the jacket will read positions of wearers’ hands and arms in real time. After that, those data will be transmitted to the external connected MIDI through bluetooth and the MIDI will receive and play corresponding tones.

Besides the features mentioned above, we might also want to allow wearers to play different type of sounds by moving different parts of body instead of just two arms (ex. Playing drum by moving one foot up and down). We could also try allowing user store customize MIDI instrumental sounds in an external device and display sounds by speaker or earphone.

4) What makes your project different from existing products?

As we have researched so far, we have not found a wearable technology that support Theremin and MIDI music that allows user to move and control  the flow of music. There are products that allow user to move but produce funny music (e.g. movement jacket), and products that allow user to control music but in a fixed, not fully interact-able way (e.g. arm MIDI keyboard, MIDI shirt, etc).

Our project aims to provide an easy to control interface to detect user hand movement. User adjust pitch by putting hands in different heights ( or different relative position from the other device ) and control music flow by the touch of buttons and proximity to body.

Inspirations

12th December 1927: Professor Leon Theremin demonstrating his theremin. The theremin was the world’s first electronic musical instrument. It is played without actually touching any part of the instrument. Film scores of the 40s and 50s used the instrument to eerie effect and it makes a famous appearance in the chorus of the Beach Boys hit ‘Good Vibrations’. (Photo by Topical Press Agency/Getty Images)

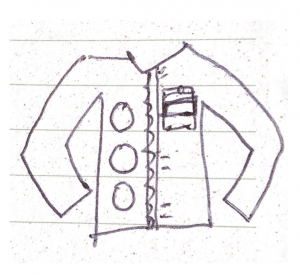
Sketch

Material/Tools Needed

  • Base Jacket
  • Accelerometers / Infrared Sensors / Sonars (for position detecting)
  • Arduino Board
  • Thread
  • Machine Needles
  • Battery

Skills/Concept to Master

  • Coding in Arduino
  • Connecting with MIDI
  • Making sensors work
  • Mounting sensors
  • Data transmit through Bluetooth

Timeline

Milestone 1 (March 25)

  • Try out different types of position detectors
  • Determine which type of position detectors to finally use

Milestone 2 (April 8)

  • Get the base jacket
  • Mount sensors on the jacket
  • Data transmit through Bluetooth
  • Connect with MIDI
  • Improve overall precision

Milestone 3 (April 22)

  • Improve overall precision
  • Aesthetic adjustments

Fallback Plan

We are planning to implement a jacket that allows wearers to control different parameters of music (i.e. pitch, amplitude or duration). If later in this semester we could determine that we have fallen behind what we have expected, we could: 1) Instead of having both arms to work, just implement and make sure one arm to work, and decrease the number of parameters of music we are going to control, or 2) Instead of making a Theremin Jacket, just simply make a position detector for parts of a body.