Project Post #4 – Velcro MIDI Jacket

Project Post 4

Project Title

Velcro MIDI Jacket

Project Team

Junda Chen, Jeff Ma, Yudong Huang, William Black

Weekly Accomplishments

Note — This is an accomplished item: item

  • 3D Print Leap Motion case
  • Theremn Software
    • Motion trace: proximity and height change
    • Data Transfer
    • Theremin instrumental voice
    • (Optimize) Range Detection
      • Test how many Infra-ray LEDs are sufficient to optimize detection
        • on wrist
        • on Jacket
    • (Optimize) Position to put the Leap Motion on the Jacket
      • Waist band — with a tiled case the effect is good.
    • Run on Arduino (Don’t have to run on Arduino)
    • Run on Raspberry Pi 3+
  • Leap Motion Optimization
    • Add an infrared light source to
    • Determine where the light should be
      • On Jacket
  • User Experience Design: Tune the software to let user make sense of how to use it.
  • Jacket
    • Select a light
    • Select a material for diffusion
      • Sheer from underneath
    • Design the jacket: Finally Decide on Velcro Hoodie !!!!
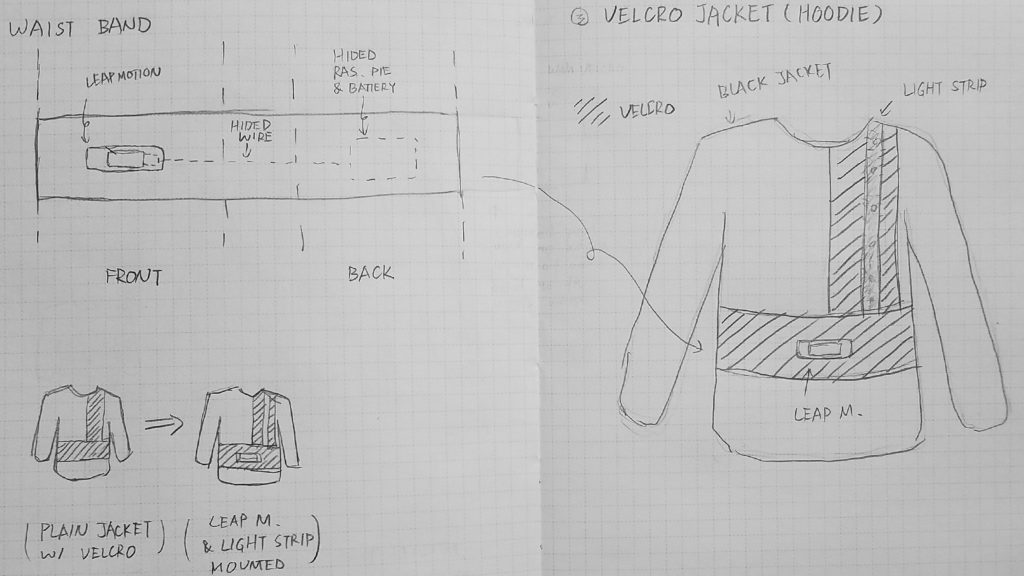
      • Velcro Hoodie? — Have all the things in the velcro and stick waistband to the velcro on the Hoodie.
    • Select (and buy) a jacket.
    • Re-Design the light effect of the jacket

Image/Video

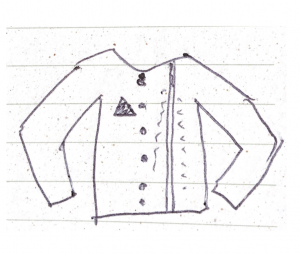
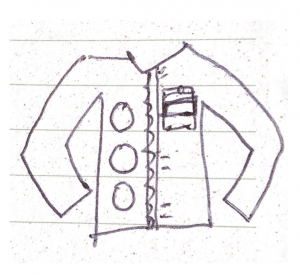
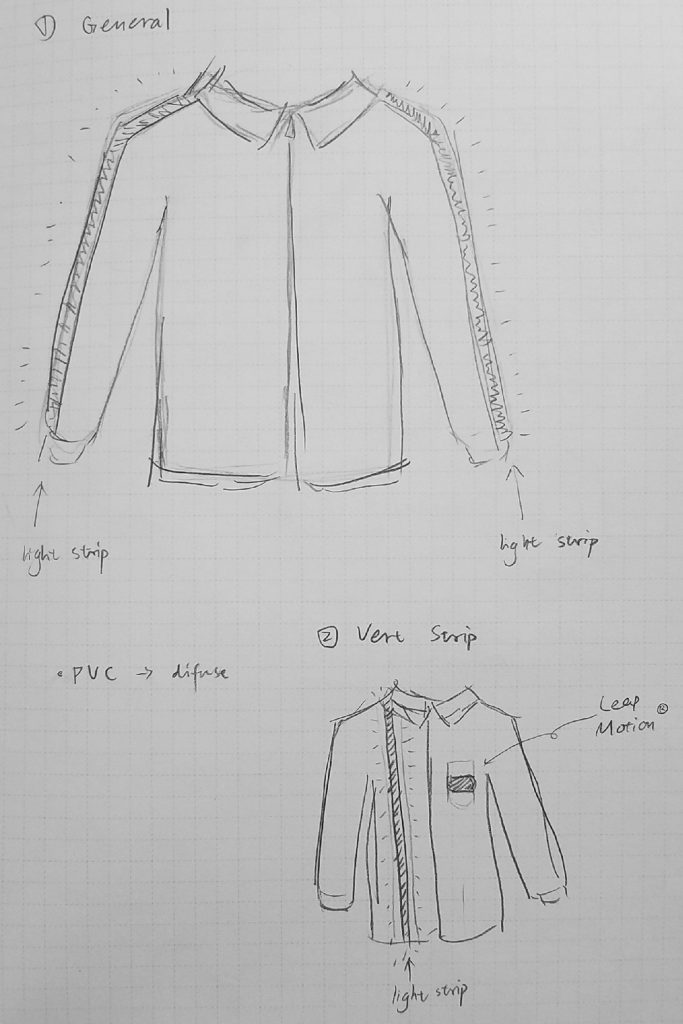
(Figure 1,2): Two implementations of light

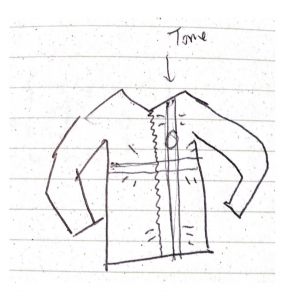
(Figure 3): Current design using Velcro. This is a remarkable shift in our project development. To solve the conflict between the freedom of light design and the constrain of other hardware devices, we proposed the use of Velcro to decomposite the design of hardward components (on the waist band) and the design of light (on the jacket). From now, all the hardward-related design will be presented on the waistband, which can be attach/detach to the jacket using the Velcro. The light on jacket is also configurable using Velcro, and can be connected to the waistband for power supply.


Material list

  • Circuit Board: (Potentially) MIDI encode/decoder, Leap motion image processor,
  • Leap Motion (1): $96
  • LED Strip light (2, TBD)
  • Black velcro fabric (we have in the studio)
  • A Jacket (1, TBD)
  • (Safe) Infrared LED (20)
  • Long USB cable (x2) (for emergency and design)


Areas of Concern

  • Infrared LED Safety to eye: To design a better tracking of hand while not directly influence users’ eye is a design challenge, and that might require some research in the area.
    • With the current LED model, it is basically safe to the eye with all the possible implementations we want to make.
  • Raspberry Pi Power Supply and Performance: Have to benchmark on the Raspberry Pi how well the theremin work with external power supply. The fall-back for this project is to directly connect all things back to a MacBook.
  • User Experience: How to let our users know how to operate without a screen?


Past Development Log

Cylon.js: an Arduino API to control the leap motion

Adafruit strip LED : a $17.99

Leap Motion installation: Troubleshooting in Windows.


Project Post #3: Theremin Jacket

Project Team

Junda Chen, Jeff Ma, Yudong Huang, William Black

Weekly Accomplishments

([x]: Finished Task)

  • 3D PrintLeap Motion case
  • [x] First software prototype for theremin
    • [x] Motion trace: proximity and height change
    • [x] Data Transfer and MIDI encode/decode
    • [x] Run on Arduino/Raspberry Pi
  • Leap Motion Optimization
    • [x] Add an infrared light source to
    • Determine where the light should be
      • Wrist
      • On Jacket
  • Jacket
    • [x] Jacket and light
    • Select a jacket.
    • [x] Design the jacket.
    • Design the light effect of the jacket

Image/Video

Material list

  • [x] Circuit Board: (Potentially) MIDI encode/decoder, Leap motion image processor,
  • [x] Leap Motion (1): $96
  • [x] LED Strip light (2, TBD)
  • A Jacket (1, TBD)
  • [x] (Safe) Infrared LED (20)

Areas of Concern

  • Infrared LED Safety to eye: To design a better tracking of hand while not directly influence users’ eye is a design challenge, and that might require some research in the area.

——

Development Log

Cylon.js: an Arduino API to control the leap motion

Adafruit strip LED : a $17.99

Leap Motion installation: Troubleshooting in Windows.
Project Post #3: Scavenger Stuffs

Weekly Accomplishments:

The first stuffed animal is almost done, barring the last few details of eyes and claws. “Jody” was given the last few fabric details earlier in the week, and the pocket installed has been tested to fit with the components ordered. The plush design should be done by end of week, if not the first day.

The game itself has begun progress as well. Jody has a digital sketch of herself in the game that has been rigged with basic animation, and the game’s UI has been set up for the main screen (without functionality besides simple button clicks). Using the DeepDreamGenerator AI found online, I converted some free-for-use background pictures into painter-like backgrounds for use in the game.

I’ve started work on getting the RaspberryPI set up as well with the RFID reader. Everything is wired together in the breadboard right now, and I’m just waiting on the SD card to load up Raspbian so I can get back to work.

Images:

Additional Material List:

    1. Battery/USB Charger (still torn on which I’ll be using, but right now it isn’t a priority)
    2. MicroSD Card (this might add a bit to the expense of the plush
    3. Cost of Plastic for 3D printing the pendants (depends on whether I’m crushing the old pendant ot make the new one, or working around the original key fob. Again, I’ll make this call once I have a base product working).

Areas of Concern:

I was initially a bit concerned by how elaborate the RFID reader would be to set up. I’ve found enough tutorials that hopefully I won’t run into a deadend, but I’m currently having issues with my MicroSD card not being recognized by my main computer which is slowing down progress. This seems like more of a minor hurdle though, and I’ve got plenty to work on in the meantime.

Project Post #3: Circuit Tattoo

Circuit Tattoo

John Compas

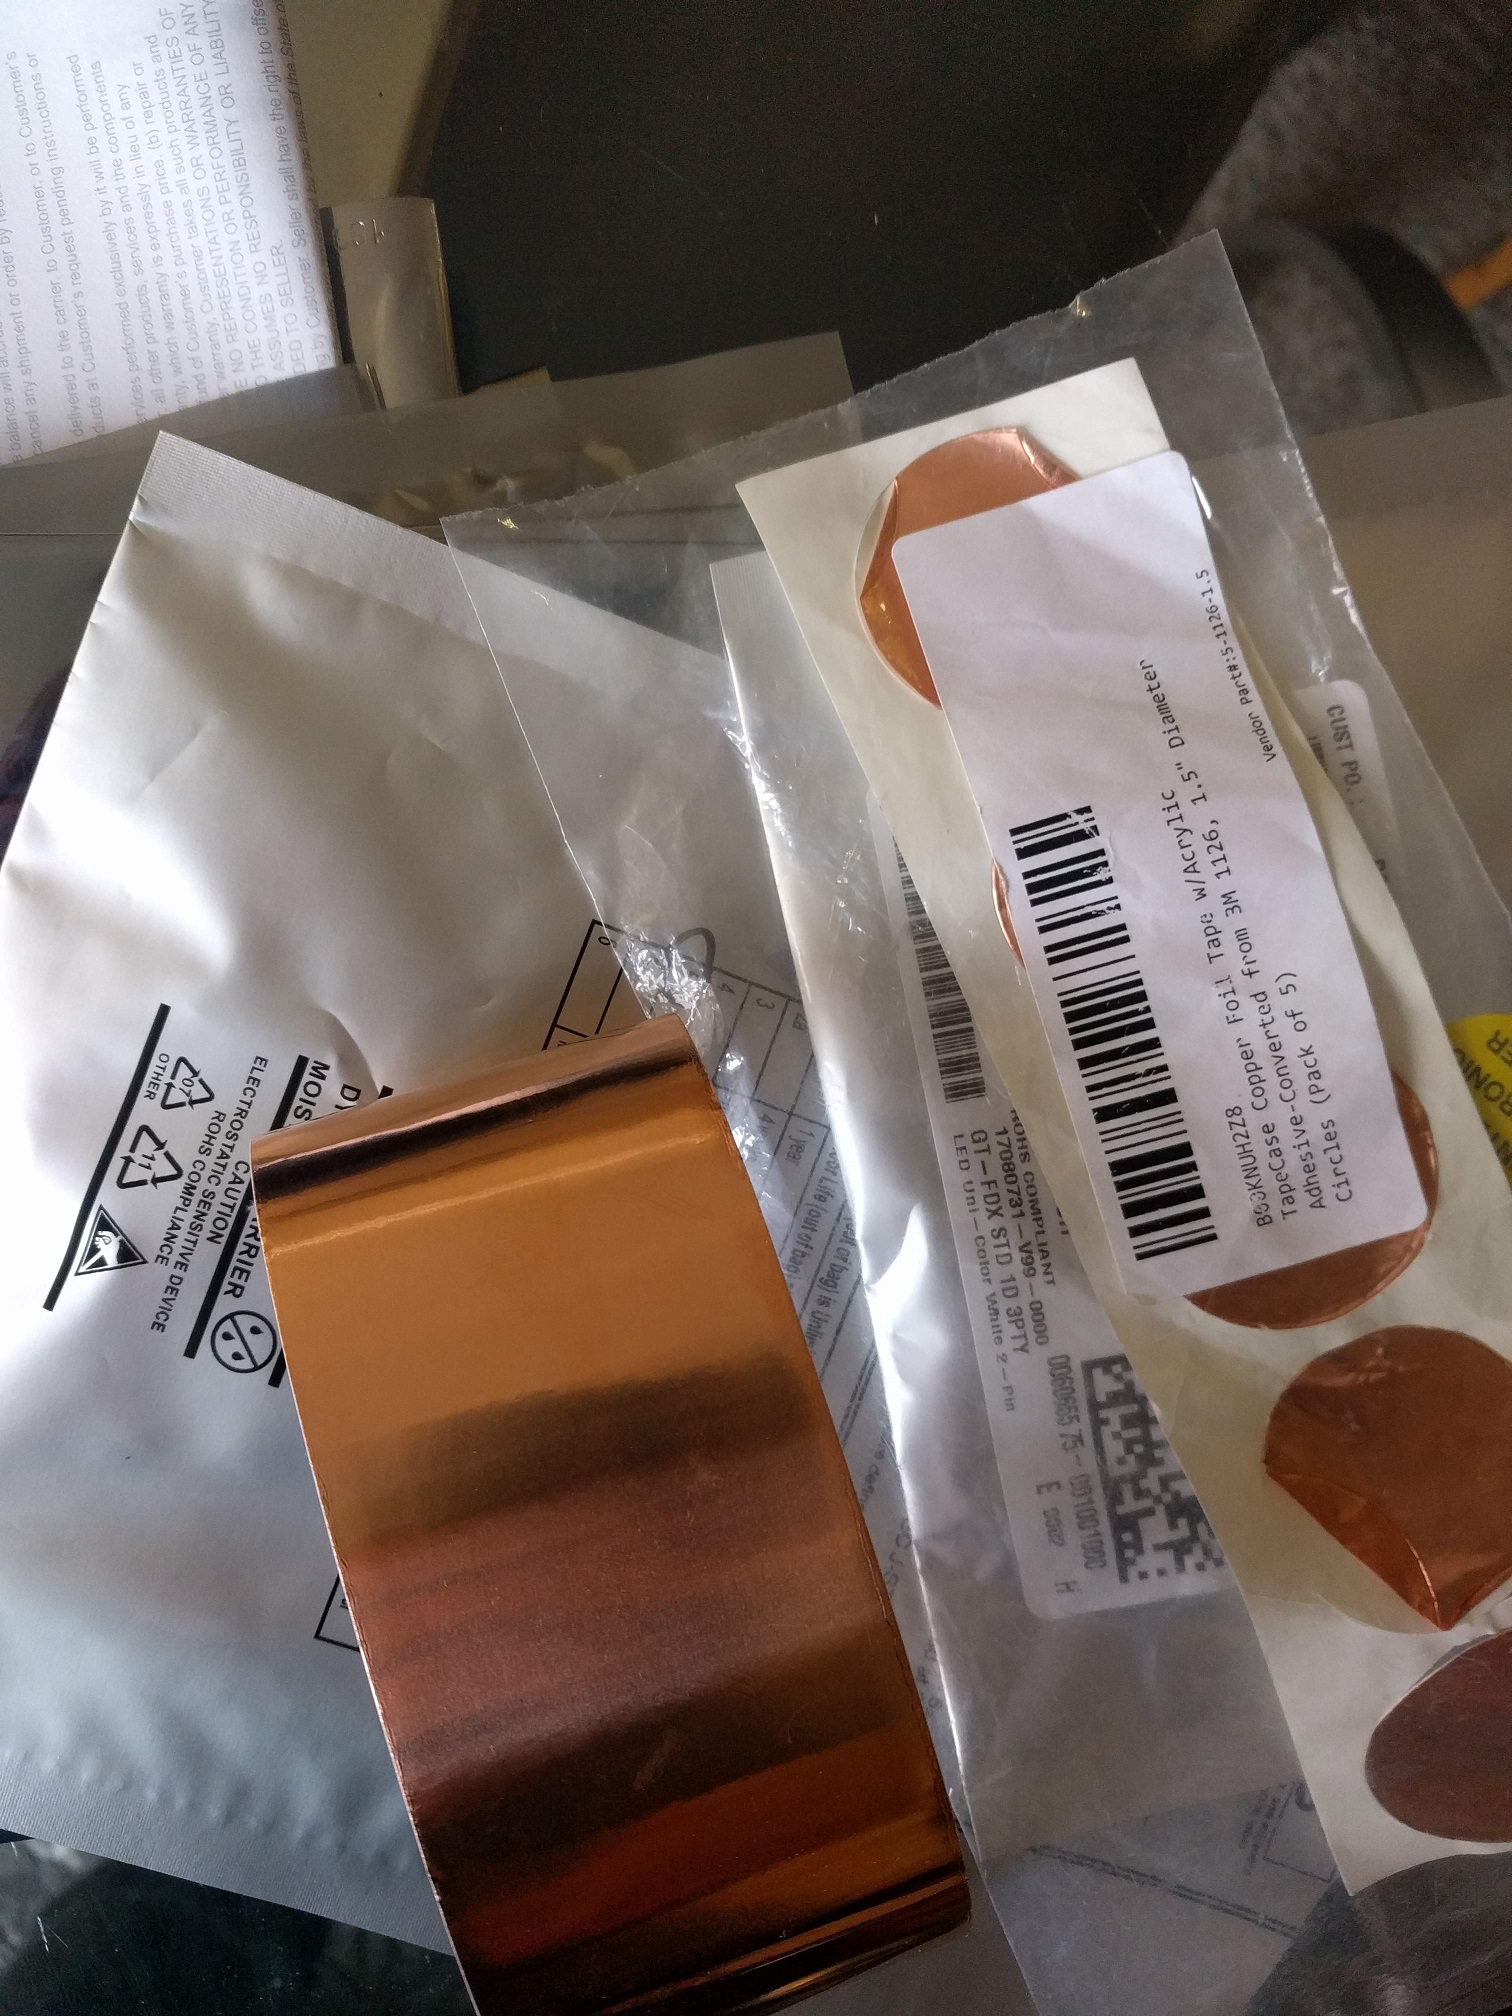
I have ordered thicker conductive material, mostly conductive tape. I’ll test it on the vinyl cutter tomorrow morning to see how well it performs.

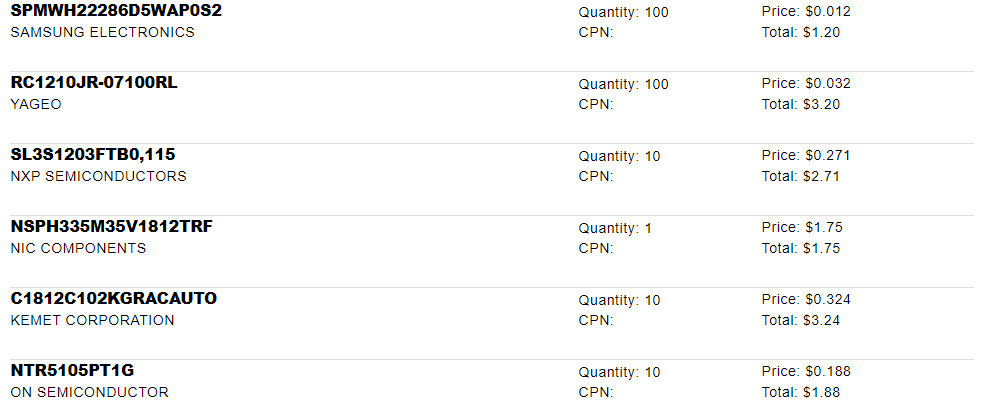
I’ve ordered some SMD components from Arrow to test out my first few designs, such as a multiplexed 2×2 array.

The design will utilize the SMD components to create an array that can be driven by the circuit playground.

I’m researching the antennas for the UHF RFID ICs that I ordered and will use AntSym to design them. I’m currently getting started working with it to determine how well it will work for me.

I think the antennas will certainly be the most challenging aspect of this project, along with getting the conductive material for the tattoos right. However, I think this new round of material will work much better than the leaf.

Project Post 3

Project title: Qi Jeans
Project team: Gregg Van Dycke
Weekly accomplishments: I have a mock jean pocket that fits the phone, and have started a second mock jean pocket with the phone slot as well as the internal pocket for the wireless charger.
Images:

No picture of mock pocket. I left it in my locker.
Material list: 10000mah wireless charging portable battery
Areas of concern: What I am most concerned with is functionality, as in how well the device will be able to charge the phone. Being early prototype I thought this might be a concern since this isn’t the designed use case of the charger. But I have ideas to on how to change it for the next iteration of Qi Jeans.

Project Post #3: Light up Vest

Project Title: Light Up Jacket (“You are hot but you are cool”)

Project Team: Obasi, Jack

Weekly Accomplishment:

Obasi:

Worked on the sample jacket.

Search for materials and fabrics.

Design pattern for the jacket.

Jack:

Searched for ways to light.

Wrote basic code for Playground Express.

Purchased lights for the jacket. 

Worked on ways to detect jumping motion through code.

Images

Code function: if the more pixels light up when the sound is louder (only if the sound is above threshold)

Changes to our approach

  1. We will try to make a light jacket (perhaps with less stuffing), so people can wear it indoor
  2. We will try to make it with transparent fabric so that the lights can have a glowing effect
  3. For now, instead of detecting the bass, we will detect loud sound since bass can be very tricky to detect
  4. We will add a “bounce” feature so that when the performer jump on stage the color changes as well
  5. We decide to make a vest instead of a jacket since a vest can be worn indoor and look cool at the same time.

Material List (Still deciding which to buy)

El Wire:

Blue, Green, Orange & Yellow colorways

$1.35 Each

6 wires in total

https://www.ellumiglow.com/electroluminescence/electroluminescent-wire

Neon Pixel Strip

LED light

$12.5 Each

0.5m – 2m

https://www.adafruit.com/product/3811?gclid=CjwKCAiAiJPkBRAuEiwAEDXZZdN0k6gopEcaCGBKvVWR_YBFFRyOOqmAiFx3_1TthxETDxXecGo_ZhoCfAwQAvD_BwE

Mini Skinny Neon Pixel Strip

mini LED light

$24.95 Each

1m – 2m

https://www.adafruit.com/product/2964?length=1

Lighting Tape Strip

Tape Strip

$8.95 Each

2 – 3?

https://www.adafruit.com/product/415?gclid=CjwKCAiAiJPkBRAuEiwAEDXZZQ3VhhcbDMvufS2GybwBge1zBLfJYWrOkZuZkYsYJYpU8I2vnJNpxRoCb5oQAvD_BwE

Lithium Ion Polymer Battery

Battery

$10 Each

2

https://www.adafruit.com/product/258

Areas of concern

What would be the best way to detect jumping motion (significant jumping motion) through code? I tried to use acceleration and shake function on MakeCode but none of them seem to work the way as intended.


Project Post #2: Tattoo Circuits

Tattoo Circuits

John Compas

Weekly Accomplishments

I have already ordered, and received all the materials needed for first prototypes:

  1. Clear Covering Self-Adhesive 
    1. https://www.amazon.com/Magic-Cover-Adhesive-Contact-Projects/dp/B000BPF9QY/ref=sr_1_26?crid=QOW16D2H82TC&keywords=vinyl+adhesive+paper&qid=1551742619&s=gateway&sprefix=vinyl+ad%2Caps%2C195&sr=8-26
    2. Count: 1
    3. Cost: $5.50
  2. Silhouette Temporary Tattoo Paper
    1. https://www.amazon.com/Silhouette-MEDIA-TATTOO-Temporary-Tattoo-Paper/dp/B0043WJ3OA
    2. Count: 1
    3. Cost:  $8.99
  3. Spray Adhesive
    1. https://www.amazon.com/3M-General-Purpose-45-Adhesive/dp/B000PCWRMC
    2. Count: 1
    3. Cost: $5.77
  4. Speedball Gold Leaf
    1. https://www.amazon.com/Bememo-Imitation-Gilding-Crafting-Decoration/dp/B0722X91YR
    2. Count: 1
    3. Cost: $6.99

I have most of the electrical components I want to test and solder onto the first prototypes.

I also designed and laser cut a testbed on acrylic, to simplify the layout and testing process before I try it on skin.

I haven’t changed too much in my approach yet, but I need to do more testing of the actual vinyl cutter.


Warm-Up Project: The No Sleep Pillow

This is the No Sleep Pillow! I used four capacitive touch sensors to control the volume of a battery powered speaker unit.

I simply drove a transistor to short the input audio connection to ground to lower the voltage.

I tried initially to do this in a digital manner but the results weren’t great. I based my code mostly on this example from GitHub, with a few important changes.

descriptor.srcaddr = (uint32_t) &ADC->RESULT.reg;
descriptor.btcnt = HWORDS;
descriptor.dstaddr = (uint32_t)&DAC->DATA.reg; // end address

I pulled the ADC results into the DAC, instead of into memory.


descriptor.btctrl = DMAC_BTCTRL_BEATSIZE_HWORD | DMAC_BTCTRL_VALID;

I also removed the DMAC_BTCTRL_DSTINC flag in the btctrl register. This was causing the controller to auto-increment the memory addresses it was writing to, creating invalid memory writes. I also played around with the number of half-words in the buffer, but ultimately keeping to one seemed to work as well as other values.

Still, the sound quality was terrible, so I decided to not go the digital route and pursued my analog solution. Potentially, more filtering on the input could have solved some of these issues but the Arduino’s DAC isn’t as high resolution as used in most audio-quality products.

Project Post#2: Michael Leykin

Project Title: Penetration of Endpoints and Networks Infiltration System.

Project Team: Me, myself and I.

Weekly Accomplishments:

  • This week was dedicated to researching methodology into constructing components:
    • Plenty of guides for making a rogue access point:
      •   https://null-byte.wonderhowto.com/how-to/build-pumpkin-pi-rogue-ap-mitm-framework-fits-your-pocket-0177792/
      • I will likely be looking at this for my guide if I choose to build one.
    • Also there are plenty of guides already of poor man’s bash bunnies:
      • https://www.cron.dk/poor-mans-bash-bunny/
      • https://blog.hackster.io/build-an-affordable-bash-bunny-with-a-raspberry-pi-zero-w-11a4abf7bde5
      • If I decide to build it I will be using these guides.
    • The RFID reader/writer was the hardest as there are no reliable methods to do this without spending a lot of money or trusting a sketchy manufacturer, I might consider replacing this device with something else (maybe something to due with bluetooth) if I cannot find a good way to do this.

Changes to Approach:

After receiving some feedback, I am now considering adding some bluetooth device to my jacket to exploit those possible attack surfaces, also I might just buy cheaper versions of all of these gadgets to prevent problems in the future. I will be weighing the costs and benefits of each approach.

Materials List:


Part Price Quantity Link
wireless network adapter $28.50 1 https://www.amazon.com/AWUS036NEH-Range-WIRELESS-802-11b-USBAdapter/dp/B0035OCVO6/?tag=whtnb-20
Ethernet cable $3 1 https://www.amazon.com/AmazonBasics-RJ45-Cat-6-Ethernet-Patch-Cable-5-Feet-1-5-Meters/dp/B00N2VILDM/?tag=whtnb-20
Raspberry Pi 3 or 3 B+ $38.10 1 https://www.amazon.com/ELEMENT-Element14-Raspberry-Pi-Motherboard/dp/B07BDR5PDW/?tag=whtnb-20
microSD card $6.85 1 https://www.amazon.com/SanDisk-microSDHC-Standard-Packaging-SDSQUNC-032G-GN6MA/dp/B010Q57T02/?tag=whtnb-20
power source $8.59 1 https://www.amazon.com/Enokay-Supply-Raspberry-Charger-Adapter/dp/B01MZX466R/?tag=whtnb-20
USB keyboard/mouse interface $16.99 1 https://www.amazon.com/gp/product/B00I5SW8MC/?tag=whtnb-20
SD card adapter $7.99 1 https://www.amazon.com/Vanja-standard-Connector-Notebooks-Smartphones/dp/B00W02VHM6/?tag=whtnb-20
Raspberry Pi Zero Wifi $10.00 1 https://www.adafruit.com/category/933?src=raspberrypi
Pi Zero USB Stem $5.00 1 https://shop.pimoroni.com/products/zero-stem-usb-otg-connector
2 x Tactile Push Button Switch With LED lights $3.00 1 https://www.aliexpress.com/item/5PCS-1-set-12X12X7-3-Tactile-Push-Button-Switch-Momentary-Tact-LED-5-Color-12X12X7-3mm/32873551440.html?spm=2114.search0104.3.2.3b0241a0ILdgzL&ws_ab_test=searchweb0_0,searchweb201602_5_10065_10130_10068_10890_10547_319_10546_317_10548_10545_10696_453_10084_454_10083_10618_10307_537_536_10902_10059_10884_10887_321_322_10103,searchweb201603_58,ppcSwitch_0&algo_expid=0747bf75-f245-43c5-a0c1-4966ea4078a8-0&algo_pvid=0747bf75-f245-43c5-a0c1-4966ea4078a8&transAbTest=ae803_5
DIP switch with 4 switches $3.00 1 https://www.aliexpress.com/item/10pcs-lot-Slide-Type-SMT-SMD-Dip-Switch-2-54mm-Pitch-2-Row-4-Pin-2/32956815576.html?spm=2114.search0104.3.3.4c971641sXqPaV&ws_ab_test=searchweb0_0,searchweb201602_5_10065_10130_10068_10890_10547_319_10546_317_10548_10545_10696_453_10084_454_10083_10618_10307_537_536_10902_10059_10884_10887_321_322_10103,searchweb201603_58,ppcSwitch_0&algo_expid=60dfe6ec-dd9e-4db7-93f0-5f94aec30ef4-0&algo_pvid=60dfe6ec-dd9e-4db7-93f0-5f94aec30ef4&transAbTest=ae803_5
2 x 330R resistors WE HAVE

Warm Up Project – Fu Tan

Using four capacitive touches to have four light outputs.

One sound output when shaking it.

Using light sensor to read the light level and give light output response.