Note: a tiny bit before the video started recording, I clapped my hands to get the lights to flash.
Project Post #2: Scavenger Stuffs
Scavenger Stuffs
Savvy Mann
Week 1:
- Ordered materials needed to finish prototype design.
- Began assembling prototype plushie (Jody)
- Began art assets for UI (Home screen, buttons [rectangular + circle], backdrops)
- Started research into bluetooth transmission as opposed to switching to WiFi
- Checked into new alternative for pendant base
- images post at least one image related to your project. This could be a photograph, a sketch, a screenshot etc.
Changes:
- Pendent base might be modeled around a pre-made RFID keychain, as they are cheaper and already pendent shaped
- Stuffed animal material will probably with a less pliable/elastic material to feel less cold.
- Data may be transmitted via bluetooth instead of WiFi, since the pi is capable of both.
Material List:
App (software):
- Unity w/ Anima2D plugin
- GameSparks
- Phone w/ Bluetooth capability
Pendants(each):
- RFID Writable Tag
- Price: $0.20-$1
- Qt: 10-20 (but you can buy 100 for $20 via the link)
- Link
Stuffed Animal (each):
- RFID Read/Write Module
- Price: $5.49
- Qt: 1
- Link
- Raspberry Pi Zero W
- Price: $10
- Qt: 1
- Link
- Polyform
Warm Up Project Video
Shake to wake him up and he will play a sound and light up.
Make a loud noise to scare him and he will play a scared sound and light up a different way.
Touch his tongue to annoy him and he will make an annoyed sound and flash.
Project Post #1: Theremin Jacket
Project Title
Theremin Jacket
Team Member
Jeff Ma, Junda Chen, William Black, Yudong Huang
Project Description
1) What does our project do?
The concept of Theremin Jacket comes from the Theremin, an electronic musical instrument that could be controlled without physical contact by the performer. Thus, the Theremin Jacket we want to make allows the wearer to control an external connected MIDI to play music without any physical contact.
2) Who is our project for?
Theremin Jacket is for people who are fans of music, or more specifically, fans of the electronic musical instrument Theremin. It could also provide a chance to those without any experience of playing musical instrument to play music.
3) Describe how someone would use the developed device. What are the steps that a user would go through to interface with the technology?
First, there will be a switch on the jacket that allows wearers to turn on/off the circuit. When circuit is on, sensors on the jacket will read positions of wearers’ hands and arms in real time. After that, those data will be transmitted to the external connected MIDI through bluetooth and the MIDI will receive and play corresponding tones.
Besides the features mentioned above, we might also want to allow wearers to play different type of sounds by moving different parts of body instead of just two arms (ex. Playing drum by moving one foot up and down). We could also try allowing user store customize MIDI instrumental sounds in an external device and display sounds by speaker or earphone.
4) What makes your project different from existing products?
As we have researched so far, we have not found a wearable technology that support Theremin and MIDI music that allows user to move and control the flow of music. There are products that allow user to move but produce funny music (e.g. movement jacket), and products that allow user to control music but in a fixed, not fully interact-able way (e.g. arm MIDI keyboard, MIDI shirt, etc).
Our project aims to provide an easy to control interface to detect user hand movement. User adjust pitch by putting hands in different heights ( or different relative position from the other device ) and control music flow by the touch of buttons and proximity to body.
Inspirations

Sketch

Material/Tools Needed
- Base Jacket
- Accelerometers / Infrared Sensors / Sonars (for position detecting)
- Arduino Board
- Thread
- Machine Needles
- Battery
Skills/Concept to Master
- Coding in Arduino
- Connecting with MIDI
- Making sensors work
- Mounting sensors
- Data transmit through Bluetooth
Timeline
Milestone 1 (March 25)
- Try out different types of position detectors
- Determine which type of position detectors to finally use
Milestone 2 (April 8)
- Get the base jacket
- Mount sensors on the jacket
- Data transmit through Bluetooth
- Connect with MIDI
- Improve overall precision
Milestone 3 (April 22)
- Improve overall precision
- Aesthetic adjustments
Fallback Plan
We are planning to implement a jacket that allows wearers to control different parameters of music (i.e. pitch, amplitude or duration). If later in this semester we could determine that we have fallen behind what we have expected, we could: 1) Instead of having both arms to work, just implement and make sure one arm to work, and decrease the number of parameters of music we are going to control, or 2) Instead of making a Theremin Jacket, just simply make a position detector for parts of a body.
Project Post #1: Michael Leykin
The Penetration of Endpoints and Networks Infiltration System
Michael Leykin
Description:
- A vulnerability assessment tool for a physical location target. My project incorporates a variety of ethical penetration testing tools integrated in the lining of a jacket, meant to look inconspicuous.
- This project is for experimental purposes and really does not consist of any legitimate uses, except those of malicious intent or a security team that is very dedicated to vulnerability assessments of every possible attack surface.
- As far as use goes, all the user would have to do is put this jacket on themselves like a normal jacket and then turn it on. Then they would have to turn on their computer at home so it can receive password hashes from the jacket later (if any are found). When on the location the user can do a number of actions that depend on their goals. If they come across a key card attached to someone or laying on a desk they can scan this card with the RFI scanner (located on the right sleeve) to make a copy of this card and access different parts of the building or a machine that they previously did not have access too. If the user comes across a unattended workstation they can insert the bash bunny (located on the left sleeve), select a payload they wish to inject and then inject the machine with malware, keyloggers or just retrieve data from the particular machine. Lastly while the user is walking around their target location they will be collecting password hashes from victim users connecting to the jacket’s fake wifi network as they try to connect to their legitimate wireless network. These are the basic uses of my project that could be used by a potential malicious actor or security team.
- So as far as the components of my project, there is nothing unique. All of these penetration testing tools exist in a variety of flavors in a plethora of products. What is unique, however, is the combination of these tools on a single platform that allow the user to conveniently combine the functionality of them at one time to get further into a system then just one of these tools could on their own.
Inspiration images/artists/designers/projects:
So my main inspiration behind this project was the existing penetration testing hardware. A lot of these existing tools can be found on site like Hak5, but I will be making most of my devices because the existing devices are overpriced and can be remade cheaper using a raspberry uno. But here is a quick list of the tools I will be incorporating (in function):
- The Wifi Pineapple
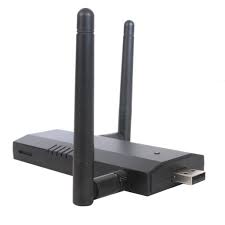
- What this does is mimic a preferred network to perform man-in-the-middle attacks. Allowing me to obtain credentials of victims that happen to get fooled by the mimicked network.
- The Bash Bunny
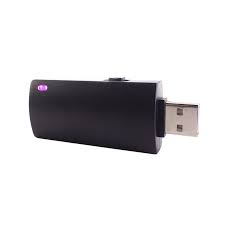
- This essentially emulates a trusted usb device (like a keyboard, mouse…etc) to then inject a multitude of payloads onto the victim device very quickly. It doesn’t matter whether or not the machine is locked, this will run its selected payload.
- The Keysy

- This device can read and then duplicate the rfid signal produced from a security badge or fob, allowing physical access to where I could not before.
Digital or Scanned Sketches:
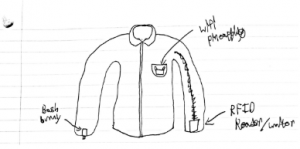
(Apologies for the poor drawing skill)
Materials/tools you’ll use/need:
(Working List)
- RFID Scanner/Writer
- A Raspberry Pi
- A USB WiFi Adapter
- A SD Card flashed with the Raspbian OS
- Raspberry Pi Zero Wifi
- Pi Zero USB Stem
- 2 x Tactile Push Button Switch With LED lights
- DIP switch with 4 switches
- 2 x 330R resistors
- A inconspicuous jacket with a lining, that I can take apart
Skills/concepts that you will need to master:
Soldering (maybe), sewing, some coding and some circuitry.
Timeline:
- Milestone 1 (March 25): Obtain/build all pen testing tools and have them operating separately in a test environment.
- Milestone 2 (April 8): Have all tools sewn into/incorporated into jacket in some way, but not closed (tools are still visible) yet.
- Milestone 3 (April 22): Have all tools configured with appropriate software and successfully concealed in the jacket.
The Fallback Plan:
The only place where this could really go wrong is in the construction of my tools, if this happens, I will have to open my wallet and buy them (unfortunately) but hopefully I will not have to resort to this. My bare minimum requirements is to have some form of the original functions incorporated into the jacket (software/design/hardware might be outdated for modern systems but the components are still concealed and present in the jacket).
Project Post #1: Puffer Jacket
Lighting Puffer Jacket
Team Member
Obasi Davis, Jack Yang
Project Description
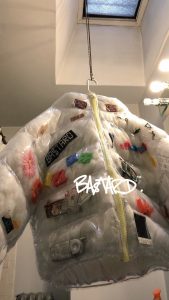
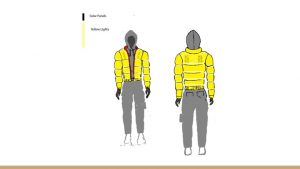
We will make a puffer jacket that lights up according to outside factors such as sound and temperature. Our project is for people who want to look good in a dark environment such as a concert or a club.
In order to use the puffer jacket, there will be an on/off switch for the lighting feature that wearers can choose as they wish. When lighting is off, wearers can wear it as a regular day-to-day jacket to keep them warm at the same time look stylish. When lighting is on, the jacket can glow or flash according to the surrounding music and/or color. The user-device interaction would be very straightforward and intuitive.
Currently, there is no LED puffer jacket on the market for purchase, which gives us a lot of room to improvise. However, there are a few lighting hoodies on the market. Most of them have either zipper lighting or fiber optic material. Since we are basing our lighting feature on a puffer jacket, there is more room for us to get creative with lighting patterns and integration of different sensors without looking too bulky.
Inspirations


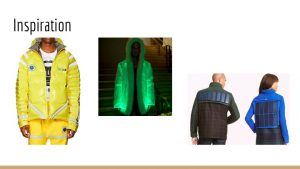

Digital Sketch
Material/Tools Needed
- Ripstop nylon fabric
- Batting
- Thread
- Battery
- Machine Needles
- LED lights/Fiber Optic Material
Skills/Concept to Master
- Circuits + sensors
- Combining tech with clothing
Timeline
Milestone 1 (March 25)
- Prototype Light/Music Sensor
- Order Materials
- Test usage
- Make a pattern for coats
Milestone 2 (April 8)
- Finish sensors
- Implement circuits into clothing
Milestone 3 (April 22)
- Finish implementation
- Aesthetic finishes
- Real life testing
Fallback Plan
We are planning to implement both light and sound sensor features to the jacket. If one of the sensors do not work as desired, we can ditch the malfunction feature and implement other ones. The worst case scenario is that none of the sensors is working, in that case, we can just have LED lights that glow accordingly, but that is unlikely to happen given our current progress.
Project Post #1 : Scavenger Stuffs
Scavenger Stuffs
Savannah Mann
Scavenger Stuffs is a project dedicated to bringing wearable tech to a broader demographic by creating a game where all components are not only fun and enjoyable, but also low-cost to produce, maintain, or replace. The game consists of a scavenger-hunt-like format where people download an app, travel to different locations to find stuffed animals, then scan a pendant against the stuffed animal to get a digital representation of that animal in their game.
- What does your project do?:
The Scavenger Stuffs app is a game where you can collect various types of animals and send them on adventures for set amounts of time. During their adventure they send you updates and in-game rewards. Scanning a pendant against one of the real-life plushes will reward players with more animals.
- Who is your project for?
The app is designed for age groups between 7 and 20, and parents are also encouraged to play the game along with their children.
- What are the steps that a user would go through to interface with the technology?
The app will be available for download through the Google Play store. Players will be asked to create an account during this process. If a player has a Scavenger Pendent, then can register the name on the pendant to their account, and after that point any animal scanned with that pendent will result in that animal being added to the user account. From that point on, the user is free to roam around looking for and collecting animals, and they can send their animals off on adventures within the game itself.
- What makes your project different from existing products?
Many location/product to virtual pet products have been done before (Webkinz, Pokemon Go, etc.), but none incorporate any technology in their designs other than a phone. Scavenger Stuffs allows for the game and components to be free-standing and cheaply manufactured, which means that players get a physical pendant to own, keep, and personalize at low cost, and locations which house the animal plush get an attraction to encourage visitors.
- inspiration images/artists/designers/projects that are relevant to your idea


- digital or scanned sketches of your project
- a bulleted list of the materials/tools you’ll use/need
- 10-20 RFID Tags
- 1 RFID READ/WRITE Module per Animal
- 1 RaspberryPI Zero W per Animal
- Fabric + Polyform Stuffing for each animal
- Pendents to house tags (preferably 3D printed)
- Unity Software
- GameSparks Software
- list of skills/concepts that you will need to master for completion (for example soldiering, sewing, etc)
- a timeline (where you would like to be when in the project)
- Here are major milestone dates for you to work around
- Milestone 1 (March 25): Prototype animal design is created and houses a functional PI unit which can communicate with the server.
- Milestone 2 (April 8): App is developed to the point that the user can receive corresponding animals from scanning pendents
- Milestone 3 (April 22): App features games and adventures for the user to embark on
- Here are major milestone dates for you to work around
- a fallback plan
- Worst comes to worst (if the RFID scanning goes poorly), users will be able to scan a QR code posted on the animal to recieve the reward in-game.
Initial Project Post – Jeff Ma
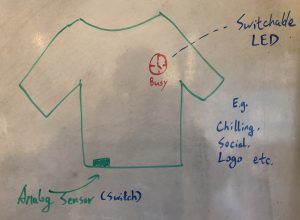
This wearable technology I wish to create is through interaction with the clothes or with other environments, the status shown on the clothes can be changed to suit the user’s displaying purpose.
It uses an analog switch to change the LED displayed. The LED may also be changed using sensors through interaction with other people and the environment. The platform is prone to change to maybe jacket, beanie, caps etc.
This project is meant to be playful and experimental, it could also be pragmatic depending on what image it displays
Potential consumer:
People who wish to display a status based on the situation on their clothes, gear geeks
Confident:
Programming
Art Experience
Some hardware
Some 3d printing
Not so confident:
Soldering
Sewing
Compactly connecting microcontrollers
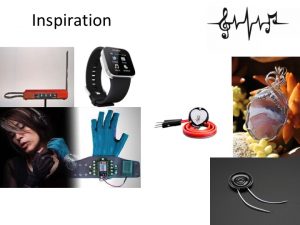
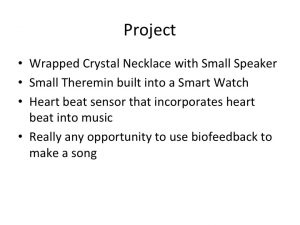
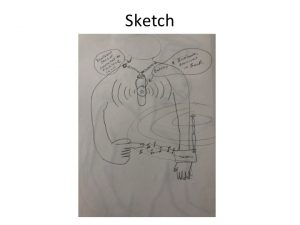
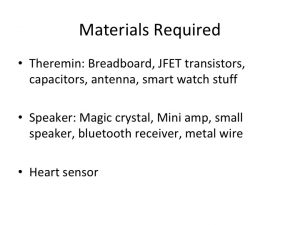
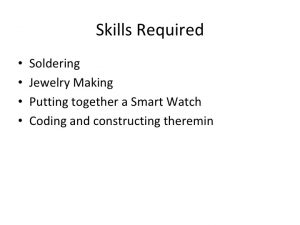
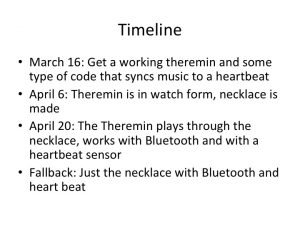
Theremin watch/ speaker necklace
… also I took Art Metals so I can make jewelry (kinda)
Project Pitch – Yudong Huang
Synchronization Suit
For the final project, I would like to make a synchronization suit that could assist people with needs of learning poses and moves. In general, it provides wearers with feedback of what part of body to move and where to move. Therefore, it could be helpful especially for performers needing to synchronize their moves.
A good example of how synchronization suit could be useful is learning a dance. As a dancer, I have been leading practices and teaching a dance routine for times, and it really takes me a lot of energy and time. If we could have a wearable tech that provides everyone in a team with feedback of how to move their body in ream time, it could improve whole team’s efficiency and save a lot of time. The idea was first inspired by the yoga learning helper mentioned in class discussion.
Functions
Following are tow main function modes of the suit I could imagine so far.
Real Time Feedback – Each sync suit could be set as a teacher or a learner. When set as learner, it receives signals from a suit set as teacher, and tells the wearer whether his or her moves is synchronized with the teacher. This mode should work when there are more than one suits.
Pre-Record Moves – When working alone, the suit allows the wearer to record a sequence of moves (ex. a dance, a fitness move-pattern) which could be later used to compare with moves of another wearer (either send to another suit or give the suit to another wearer). At the end of comparing, the suit would tell a sync rate to the user as result.
Implementation
Here are some choices I would have to make or difficulties I would face with making the suit.
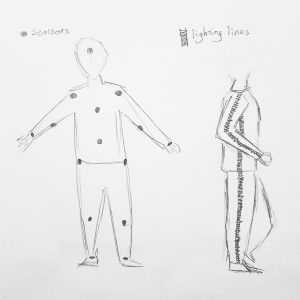
How to collect data of teacher’s moves? – I think sensors that could collect information of position change would be very helpful in this case. To as clear as much draw the moves of teacher’s whole body, sensors would be placed at each key joint of human body (ex. wrist, elbow, shoulder, chest, crotch, knee).
Feedback should be provided in what ways? – As the wearer could potentially teach / learn numbers of poses and moves, the way of giving feedback should be simple enough and feedback should be easy enough to get no matter in what poses. So far the idea I have come up with is that there would be lighting lines along the side of arms and legs to work as the real time feedback giver. Whether the part of body is in the correct position would be shown in binary colors (ex. green for yes and red for no), and because the lighting lines are along the side of whole body, they already cover the largest space they could cover, which might be easy enough to see.
In what ways to tell wearer the position to move? – This would probably be the hardest part of making the suit. Should the guiding be told visually, or guiding should be transmitted physically through a light force on body? This is an important choice and should be considered and discussed further.
Other Thoughts
As colors are displayed based on whether moves are synchronized, this might be made use of in performing and creating a different visual experience.
Maybe choreographs or move patterns could be designed and edited in software and imported into the suit in the future.
