Project Post #3: Light up Vest

Project Title: Light Up Jacket (“You are hot but you are cool”)

Project Team: Obasi, Jack

Weekly Accomplishment:

Obasi:

Worked on the sample jacket.

Search for materials and fabrics.

Design pattern for the jacket.

Jack:

Searched for ways to light.

Wrote basic code for Playground Express.

Purchased lights for the jacket. 

Worked on ways to detect jumping motion through code.

Images

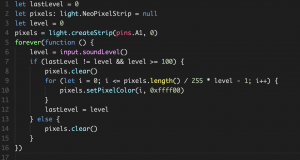
Code function: if the more pixels light up when the sound is louder (only if the sound is above threshold)
Changes to our approach

  1. We will try to make a light jacket (perhaps with less stuffing), so people can wear it indoor
  2. We will try to make it with transparent fabric so that the lights can have a glowing effect
  3. For now, instead of detecting the bass, we will detect loud sound since bass can be very tricky to detect
  4. We will add a “bounce” feature so that when the performer jump on stage the color changes as well
  5. We decide to make a vest instead of a jacket since a vest can be worn indoor and look cool at the same time.

Material List (Still deciding which to buy)

El Wire:

Blue, Green, Orange & Yellow colorways

$1.35 Each

6 wires in total

https://www.ellumiglow.com/electroluminescence/electroluminescent-wire

Neon Pixel Strip

LED light

$12.5 Each

0.5m – 2m

https://www.adafruit.com/product/3811?gclid=CjwKCAiAiJPkBRAuEiwAEDXZZdN0k6gopEcaCGBKvVWR_YBFFRyOOqmAiFx3_1TthxETDxXecGo_ZhoCfAwQAvD_BwE

Mini Skinny Neon Pixel Strip

mini LED light

$24.95 Each

1m – 2m

https://www.adafruit.com/product/2964?length=1

Lighting Tape Strip

Tape Strip

$8.95 Each

2 – 3?

https://www.adafruit.com/product/415?gclid=CjwKCAiAiJPkBRAuEiwAEDXZZQ3VhhcbDMvufS2GybwBge1zBLfJYWrOkZuZkYsYJYpU8I2vnJNpxRoCb5oQAvD_BwE

Lithium Ion Polymer Battery

Battery

$10 Each

2

https://www.adafruit.com/product/258

Areas of concern

What would be the best way to detect jumping motion (significant jumping motion) through code? I tried to use acceleration and shake function on MakeCode but none of them seem to work the way as intended.

 

Project Post #3: Radio Outdoor Emergency Transmitter (ROET)

Radio Outdoor Emergency Transmitter (ROET)

Natalie Tack

Weekly Accomplishments:

I worked out a regular expression to get the location data from the GPS module, I also figured out how to output audio from the circuit playground express (CPE) to the radio, without an AUX cord. I had a setback this week, with the Arduino IDE not working for me. I wasn’t sure this was the issue at first, so I troubleshooted it and in the end had to uninstall the IDE and reinstall it.

By the end of this next week I plan to have the CPE output audio correctly to the radio, and correctly output the audio for GPS coordinates.

Images:

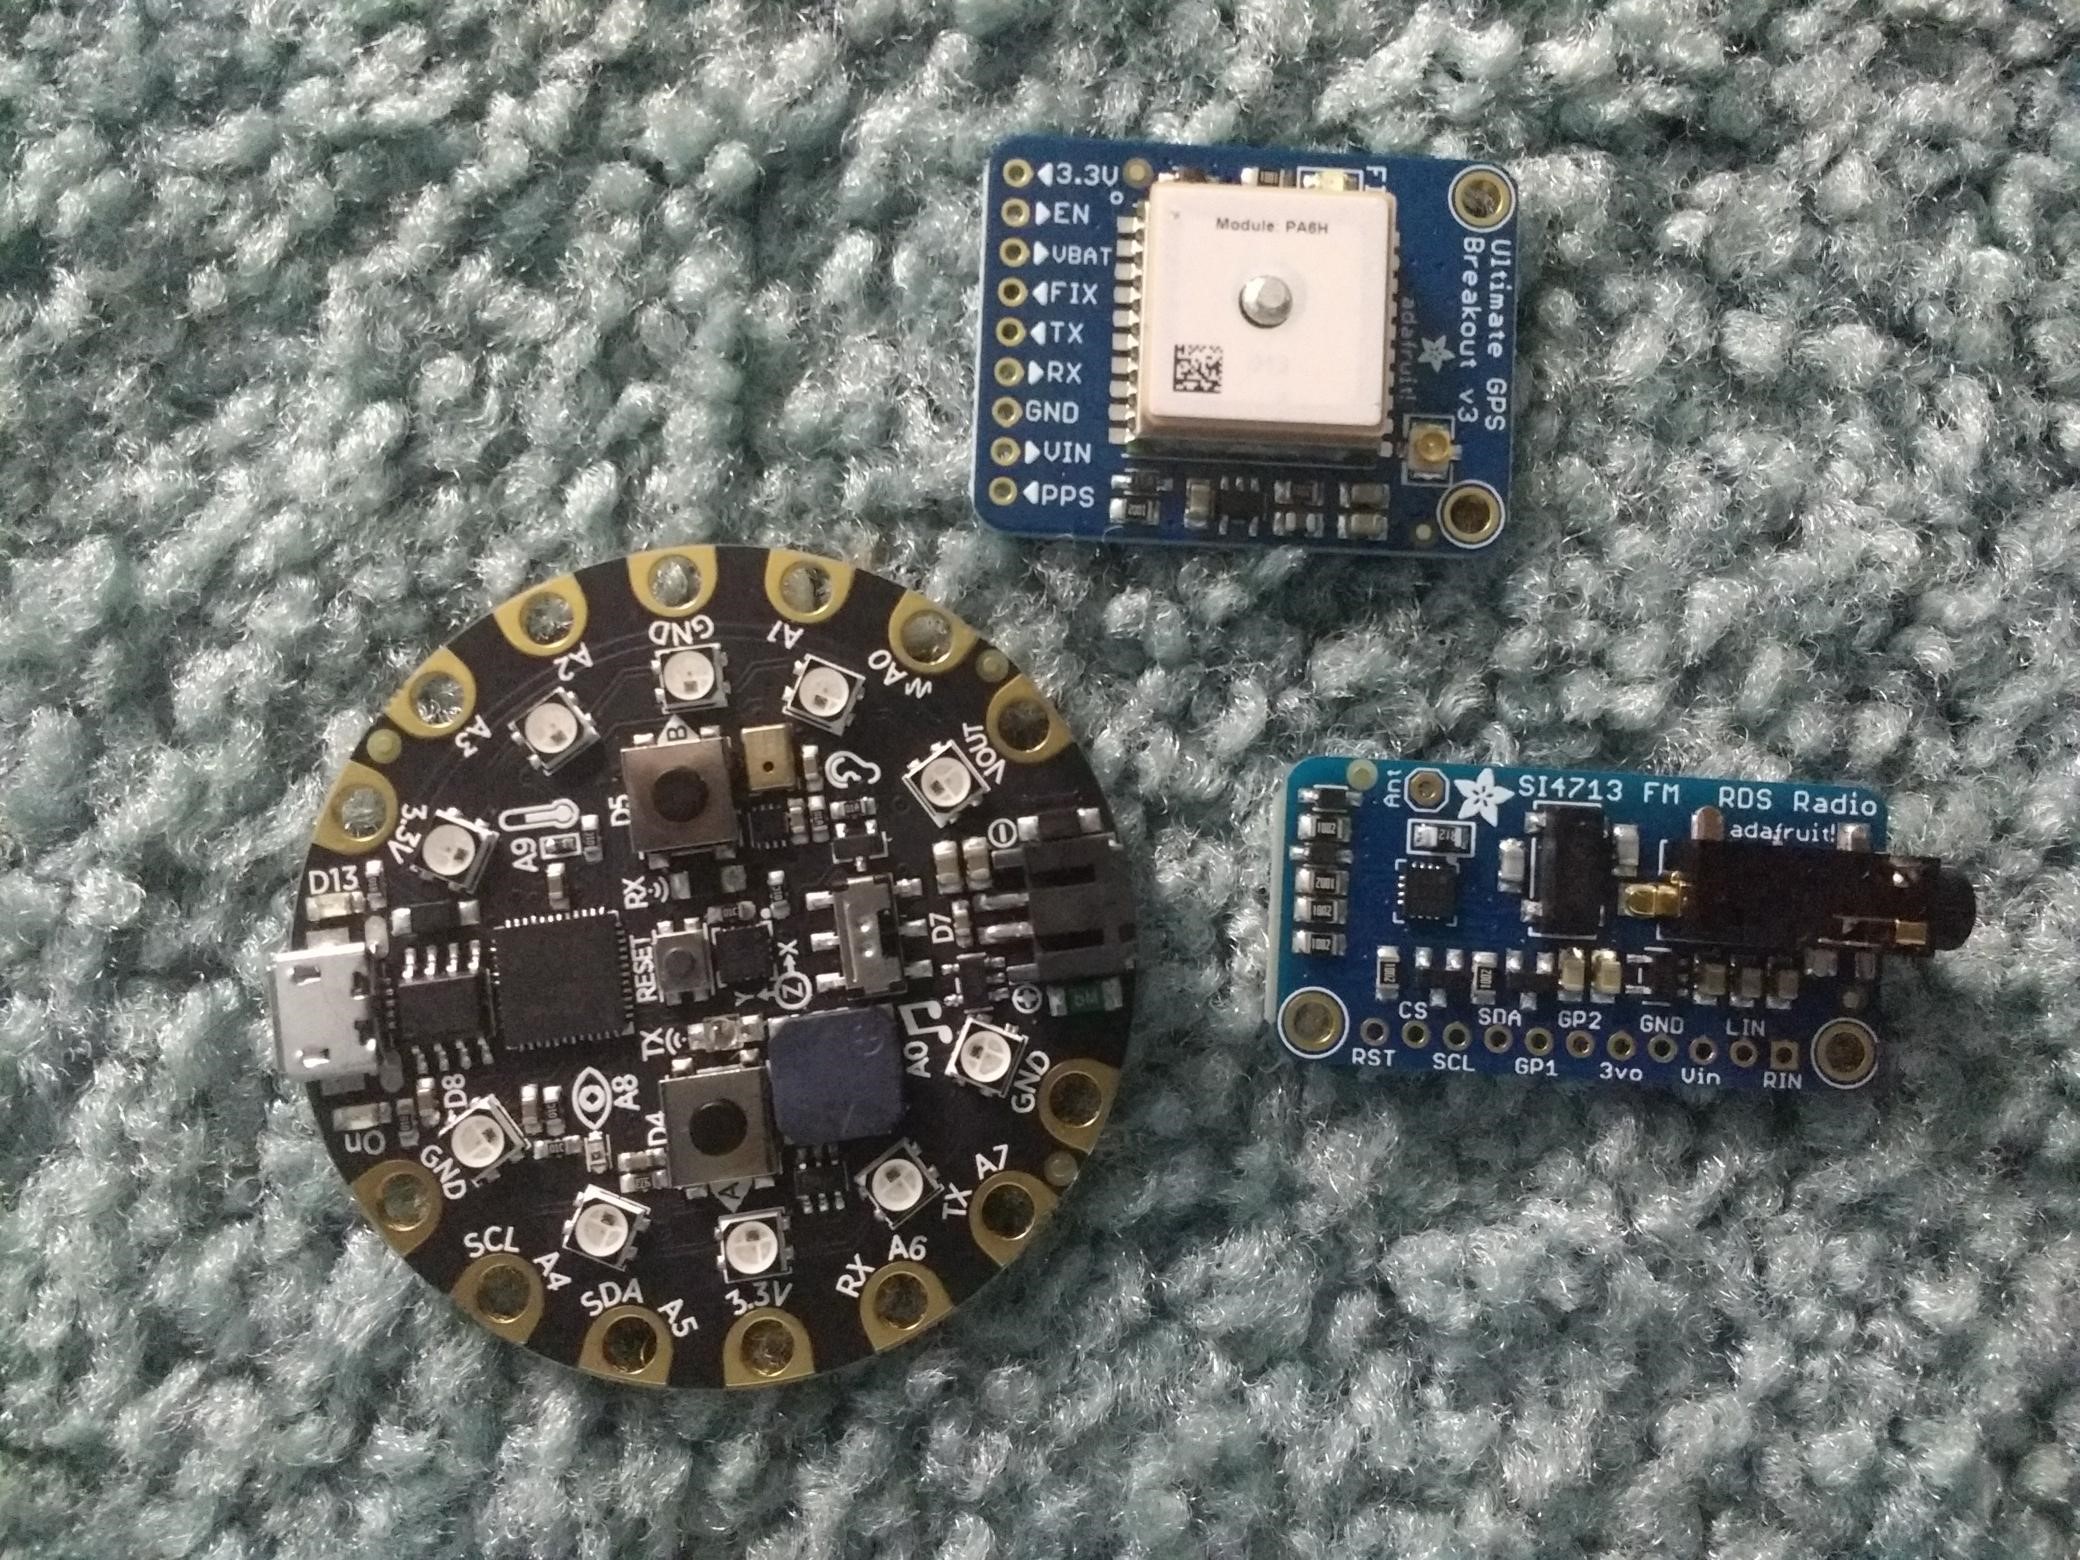
The below image is of the modules I received this week to complete my project (except the vibration module).

Material List:

  1. FM Stereo Radio Transmitter (already purchased and in use)
    1. Price: $20
    2. Quantity: 1
    3. Link: https://www.amazon.com/Adafruit-Stereo-Transmitter-RBDS-Breakout/dp/B00SK8ME4Y#
  2. GPS Module
    1. Price: $40
    2. Quantity: 1
    3. Link: https://www.adafruit.com/product/746
  3. Vibration Module
    1. Price: $2
    2. Quantity: 1
    3. Link: https://www.adafruit.com/product/1201?gclid=EAIaIQobChMI36npo8Hz4AIVDYdpCh2TdwvHEAQYAiABEgLWm_D_BwE

Areas of Concern:

My only concern currently is that all the connections I make to/from the CPE function correctly. Another struggle I had this weekend was making sure my connections were completed, it took a lot of trial and error with the wires to make sure everything was connected.

When I eventually solder the wires to the modules I’ll have to make sure that the connections work perfectly before soldering everything.

Warmup Project: MIDI Keyboard

  • Inputs: 1. Pin touch; 2. Shake.
  • Outputs: 1. Sound; 2. Lights.
  • The right 4 buttons play 7 keys (from C to B) in different permutations (tone D, F, A are played by buttons working in pairs).
  • The left 2 buttons are used to increase/decrease the 7 keys from middle to high/low.
  • Lights on the micro-controller would be set to colors corresponding with low, middle or high tones.
  •  If it is shaken, a piece of music would be played, and user could pretend the music is played by him or her.

Warmup Project: Wake Up Boo

Wake Up Boo has 3 buttons and 1 sensor function that are made active through the circuit playground.

Covering the playground(dark environment) will display a light animation.

Pressing the lower left button could spin lights around the board.

Pressing the left hand will display a sound.

Long holding the right hand will set a timer and lights will show and music will play after the set time (could be used as an alarm clock).

Warmup Project: Kermit

Kermit has lights activated via the Circuit Playground’s buttons (a short press turns the lights on, a long press turns them off), and plays The Rainbow Connection when held upright (activated via the Circuit Playground’s tilt sensor)