Pillow that wakes you up with your favorite ring tones.
Jay Sovinec, Warmup Project Demo Video
This ‘remote’ pillow interacts with my TV that still uses IR. It can power it on and off, and also change the channel.
Michael Leykin: Warm up Project Video Post
This Moon/Sun pillow simply lights as a moon (half of it lights) in the dark and a sun (all lights in the light). In addition to this it lights up whatever half its leaning towards while making noises.
Warmup Project Video Post
Cloud Soft Pillow Functions (in order within video):
1) This left/lower capacitive touch button activates a temperature sensor. The sensor then displays a single light around the adafruit with position and color corresponding to the temperature value in increments of 10 degrees F
2) The upper left capacitive touch button resets the device, turning off all lights and playing an A 440 pitch
3) The lower right capacitive touch button activates a sound volume sensor which displays a series of lights corresponding to the volume level at the time the button was pressed
4) When button A is pressed, a different version of volume sensing takes place — this time visualizing the volume level continuously in live time and displaying lights in response
Warmup Project: Pot of Flowers
Input #1: Soft switch button
leads to…
Output #1: Turning LED light on/off
Input #2: Shaking the pillow
leads to…
Output #2: The circuit playground playing a short tune
Project Post 2: Lit Lehenga
Individual: Jessica Fernandes
Weekly accomplishments:
- organized feedback and potential adjustments to project
- considering different sensors for project
- researched lights and power sources
- thought about construction of putting lights into garment
Image:

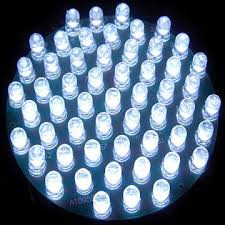
This orientation of lights helped me consider ways to incorporate the lights into the embroidery/design of the fabric for aesthetic purposes when the lights are off.
My pictures of the lehenga, garment layers, and waist construction.
Materials
- Circuit Playground Express (1) $24.95
- Enclosure (1) $4.95 (optional)
- Super Bright LED Sequins (50) $39.50
- 10 Packs of 5 for $3.95
- Warm White/Royal Blue
- 4-5 in parallel on a pin, high to low
- Photoresistors (light sensors)
- Cheap, available in classroom
- Must calibrate
- If not using built in light sensor in CPE
- Portable battery charger (5v) + USB cable
- Already own one to test (2 outputs)
- Compact 2.1A Output Portable Charger (1) $12.99
Project Post 2: Flutter
Project name: Flutter (subject to change)
Team: Julia Kosier & Yiting Liu
Weekly accomplishments:
- Julia: purchased color sensor, floral wire, and cellophane
- Yiting: purchased side emitting fiber optics
- Brainstormed ways to attach the sleeve that holds the color sensor – it may ease putting the wings on/taking them off for the sleeve to be removable in some way
- Brainstormed materials – we researched fabrics to be used for the sleeve as well as fabrics we may use for the wings if we aren’t satisfied with the diffusion of the cellophane alone
Below is a similar light-up wing project we found while brainstorming that uses nylons to diffuse the light:

Changes to approach: As mentioned above, we’re exploring the potential of the sleeve being removable – i.e, via a zipper or velcro – to ease use
Below is a table of our materials purchased thus far
| Part/Material | Price | Quantity | Link to a purchase location | |
| 1 | Side Glow Fiber Optic Cable 1.5mm~8mm Optical Fiber For Lighting Decorations
[1.5mm for 15 meters] |
$15.99 w/o tax | 1 | https://www.ebay.com/itm/Side-Glow-Fiber-Optic-Cable-1-5mm-8mm-Optical-Fiber-For-Lighting-Decorations/253189403496?ssPageName=STRK%3AMEBIDX%3AIT&var=552285229283&_trksid=p2057872.m2749.l2649 |
| 2 | Color sensor | $7.95 | 1 | https://www.adafruit.com/product/1334 |
| 3 | 16 gauge floral wire | $11.99 | 1 | https://www.amazon.com/gp/product/B00T831TFA/ref=ppx_yo_dt_b_asin_title_o00_s00?ie=UTF8&psc=1 |
| 4 | Diffusing fabrics for sleeves | $15.99 | 1 | https://www.amazon.com/gp/product/B07GR4NCC9/ref=ppx_yo_dt_b_asin_title_o01_s00?ie=UTF8&psc=1 |
Project Post #2: Tattoo Circuits
Tattoo Circuits
John Compas
Weekly Accomplishments
I have already ordered, and received all the materials needed for first prototypes:
- Clear Covering Self-Adhesive
- https://www.amazon.com/Magic-Cover-Adhesive-Contact-Projects/dp/B000BPF9QY/ref=sr_1_26?crid=QOW16D2H82TC&keywords=vinyl+adhesive+paper&qid=1551742619&s=gateway&sprefix=vinyl+ad%2Caps%2C195&sr=8-26
- Count: 1
- Cost: $5.50
- Silhouette Temporary Tattoo Paper
- https://www.amazon.com/Silhouette-MEDIA-TATTOO-Temporary-Tattoo-Paper/dp/B0043WJ3OA
- Count: 1
- Cost: $8.99
- Spray Adhesive
- https://www.amazon.com/3M-General-Purpose-45-Adhesive/dp/B000PCWRMC
- Count: 1
- Cost: $5.77
- Speedball Gold Leaf
- https://www.amazon.com/Bememo-Imitation-Gilding-Crafting-Decoration/dp/B0722X91YR
- Count: 1
- Cost: $6.99
I have most of the electrical components I want to test and solder onto the first prototypes.
I also designed and laser cut a testbed on acrylic, to simplify the layout and testing process before I try it on skin.

I haven’t changed too much in my approach yet, but I need to do more testing of the actual vinyl cutter.
Warmup Project – IR Remote Control Pillow
This is the TV/Audio Receiver Remote Control. Once you flip the switch, you can touch any of the capacitive touch buttons and control different functions on the TV/Audio Receiver. Functions include: TV On/Off, Volume Up/Down, Mute, Switch to Bluetooth input, and Switch to Aux input.
Warm-Up Project: The No Sleep Pillow
This is the No Sleep Pillow! I used four capacitive touch sensors to control the volume of a battery powered speaker unit.
I simply drove a transistor to short the input audio connection to ground to lower the voltage.
I tried initially to do this in a digital manner but the results weren’t great. I based my code mostly on this example from GitHub, with a few important changes.
descriptor.srcaddr = (uint32_t) &ADC->RESULT.reg;

descriptor.btcnt = HWORDS;

descriptor.dstaddr = (uint32_t)&DAC->DATA.reg; // end address
I pulled the ADC results into the DAC, instead of into memory.
descriptor.btctrl = DMAC_BTCTRL_BEATSIZE_HWORD | DMAC_BTCTRL_VALID;
I also removed the DMAC_BTCTRL_DSTINC flag in the btctrl register. This was causing the controller to auto-increment the memory addresses it was writing to, creating invalid memory writes. I also played around with the number of half-words in the buffer, but ultimately keeping to one seemed to work as well as other values.
Still, the sound quality was terrible, so I decided to not go the digital route and pursued my analog solution. Potentially, more filtering on the input could have solved some of these issues but the Arduino’s DAC isn’t as high resolution as used in most audio-quality products.
