Project Post #2: Virtual Vermin

Virtual Vermin

Jeff Brandt


Weekly Accomplishments:

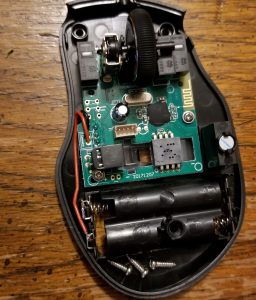
  • Bought a cheap wireless computer mouse
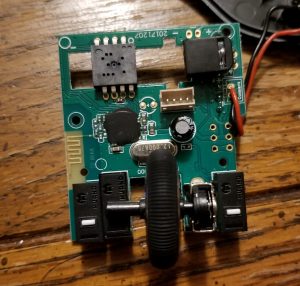
  • Took apart a computer mouse and saw exactly what components were inside
  • Created new concept sketch for integrating the technology into the glove
  • Found sources for all materials that I think I will need


Images:
 

Changes to Approach:

After listening and reading the class’ responses from my final project pitch, I realized there was a lot that I hadn’t thought about in regards to the movement of a computer mouse. While some suggestions were currently out of the scope of the project, they did bring to light some issues I can look to improve on after my first iteration is complete. These were mainly the accuracy of the cursor and the ability to turn the glove on/off to be able to use when typing.


Material List:

Wireless Mouse // Quantity: 1 // $9.99 // https://www.amazon.com/gp/product/B015X2OD52/ref=ppx_yo_dt_b_asin_title_o00_s00?ie=UTF8&psc=1

Conductive Fabric // Quantity: 1 sq. ft. // ? // Supplies in classroom?

Conductive Thread // Quantity: 2 yds. // ? // Supplies in classroom?

Negative Poisson Ratio Foam // Quantity: 1 sq. ft. // Free // Supplied by my research lab

Gloves // Quantity: 1 // $11.95 // https://www.amazon.com/Agloves-screen-gloves-texting-gloves/dp/B004A9FI2M/ref=sr_1_6?keywords=thin+glove&qid=1552266834&s=electronics&sr=1-6

Adafruit Circuit Playground // Quantity: 1 // Supplied // Already given in class

Short Flex Sensor // Quantity: 1 // $7.95 // https://www.adafruit.com/product/1070

Membrane LED Keypad // Quantity: 1 // $2.95 // https://www.adafruit.com/product/1333

Round Force Sensitive Resistor // Quantity: 3 // $7.00 // https://www.adafruit.com/product/166

Small Piezo Touchpad // Quantity: 3 // $0.95 // https://www.adafruit.com/product/1740

Project Post #2

SAFE Sleeve

Smart Active Flexion Extension Sleeve

Jake Cordover


Accomplishments


From project post 1’s timeline the goal for this week was: decide implementation plan and order materials needed.


I have decided to implement the wireless approach or utilizing IMUs in order to measure flexion/extension angles with a stretch goal of measuring lateral translation. There were a few deciding factors that went into this decision: one, and perhaps most importantly, if the wired approach, or using materials to measure the change in resistance were utilized to extrapolate to joint angles, the sleeve would need to be recalibrated and mapped to a set of goniometer values for every use, or else run the risk of inaccurate data. Measuring knee angles with a goniometer every time the sleeve is to be used is impractical and defeats the purpose of the sleeve. The second major deciding factor was the longevity of the device, as a knee sleeve is subjected to frequent forces. Thus, any change in characteristics of conductive materials or loose connections could render the sleeve useless. Thus, the wireless approach was selected.


There were a few drawbacks with this implementation plan, namely price and learning curve. For the price aspect, I have reached out to one of the companies I’m considering sourcing for IMU sensors and secured a 10% discount. While the price remains expensive, I really like these sensors because they are essentially ready to go with the IMU data, Bluetooth connection, and a rechargeable battery, enclosed in a small package. The other option is to secure an IMU, a Bluetooth module, a battery, and a development board, which may prove to be less expensive, however the task of integrating everything into an active knee sleeve becomes harder.


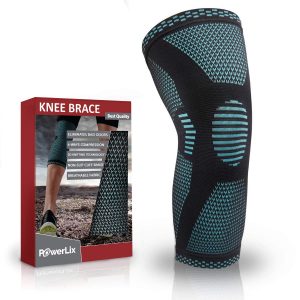
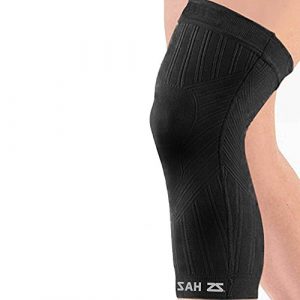
Additionally, I have decided on two knee sleeves to order. They are both relatively inexpensive and get high reviews on amazon. I did some preliminary research on 3D printing, and I would like to print a snap fit enclosure with sew tabs to anchor the electronics onto the sleeve.


Finally, as I’m going with the wireless approach, I will need to learn about IMUs and how to extrapolate this data into angular measurements. I spent time this week reading about accelerometers and gyroscopes, how they work, and how their data can be used to calculate angles.


Images


Knee sleeve 1


Knee sleeve 2


Changes to approach


At this point, there have not been any changes to my approach, however I have selected the wirelessimplementation as outlined in this weeks accomplishments.


Material List


Part/Material Price ($) Quantity Link
Potential IMU 1 117 with discount secured 1 https://yostlabs.com/product/bluetooth-mini/
Potential IMU 2 76 1 https://mbientlab.com/store/metamotionc/
Knee Sleeve 1 16.97 1 https://www.amazon.com/PowerLix-Compression-Knee-Sleeve-Basketball/dp/B01MQYADOT/ref=sr_1_5?keywords=powerlix+knee+sleeve&qid=1552264456&s=gateway&sr=8-5
Knee Sleeve 2 20 1 https://www.amazon.com/Zensah-Knee-Compression-Sleeve/dp/B00GPU7QRO/ref=sr_1_6?keywords=zensah+knee+sleeve&qid=1552264496&s=gateway&sr=8-6#customerReviews
3D printing

and associated costs

TBD TBD TBD


Project Post#2: Michael Leykin

Project Title: Penetration of Endpoints and Networks Infiltration System.

Project Team: Me, myself and I.

Weekly Accomplishments:

  • This week was dedicated to researching methodology into constructing components:
    • Plenty of guides for making a rogue access point:
      •   https://null-byte.wonderhowto.com/how-to/build-pumpkin-pi-rogue-ap-mitm-framework-fits-your-pocket-0177792/
      • I will likely be looking at this for my guide if I choose to build one.
    • Also there are plenty of guides already of poor man’s bash bunnies:
      • https://www.cron.dk/poor-mans-bash-bunny/
      • https://blog.hackster.io/build-an-affordable-bash-bunny-with-a-raspberry-pi-zero-w-11a4abf7bde5
      • If I decide to build it I will be using these guides.
    • The RFID reader/writer was the hardest as there are no reliable methods to do this without spending a lot of money or trusting a sketchy manufacturer, I might consider replacing this device with something else (maybe something to due with bluetooth) if I cannot find a good way to do this.

Changes to Approach:

After receiving some feedback, I am now considering adding some bluetooth device to my jacket to exploit those possible attack surfaces, also I might just buy cheaper versions of all of these gadgets to prevent problems in the future. I will be weighing the costs and benefits of each approach.

Materials List:


Part Price Quantity Link
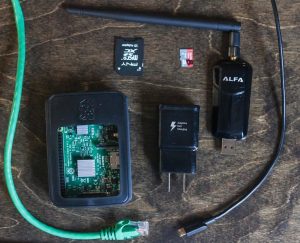
wireless network adapter $28.50 1 https://www.amazon.com/AWUS036NEH-Range-WIRELESS-802-11b-USBAdapter/dp/B0035OCVO6/?tag=whtnb-20
Ethernet cable $3 1 https://www.amazon.com/AmazonBasics-RJ45-Cat-6-Ethernet-Patch-Cable-5-Feet-1-5-Meters/dp/B00N2VILDM/?tag=whtnb-20
Raspberry Pi 3 or 3 B+ $38.10 1 https://www.amazon.com/ELEMENT-Element14-Raspberry-Pi-Motherboard/dp/B07BDR5PDW/?tag=whtnb-20
microSD card $6.85 1 https://www.amazon.com/SanDisk-microSDHC-Standard-Packaging-SDSQUNC-032G-GN6MA/dp/B010Q57T02/?tag=whtnb-20
power source $8.59 1 https://www.amazon.com/Enokay-Supply-Raspberry-Charger-Adapter/dp/B01MZX466R/?tag=whtnb-20
USB keyboard/mouse interface $16.99 1 https://www.amazon.com/gp/product/B00I5SW8MC/?tag=whtnb-20
SD card adapter $7.99 1 https://www.amazon.com/Vanja-standard-Connector-Notebooks-Smartphones/dp/B00W02VHM6/?tag=whtnb-20
Raspberry Pi Zero Wifi $10.00 1 https://www.adafruit.com/category/933?src=raspberrypi
Pi Zero USB Stem $5.00 1 https://shop.pimoroni.com/products/zero-stem-usb-otg-connector
2 x Tactile Push Button Switch With LED lights $3.00 1 https://www.aliexpress.com/item/5PCS-1-set-12X12X7-3-Tactile-Push-Button-Switch-Momentary-Tact-LED-5-Color-12X12X7-3mm/32873551440.html?spm=2114.search0104.3.2.3b0241a0ILdgzL&ws_ab_test=searchweb0_0,searchweb201602_5_10065_10130_10068_10890_10547_319_10546_317_10548_10545_10696_453_10084_454_10083_10618_10307_537_536_10902_10059_10884_10887_321_322_10103,searchweb201603_58,ppcSwitch_0&algo_expid=0747bf75-f245-43c5-a0c1-4966ea4078a8-0&algo_pvid=0747bf75-f245-43c5-a0c1-4966ea4078a8&transAbTest=ae803_5
DIP switch with 4 switches $3.00 1 https://www.aliexpress.com/item/10pcs-lot-Slide-Type-SMT-SMD-Dip-Switch-2-54mm-Pitch-2-Row-4-Pin-2/32956815576.html?spm=2114.search0104.3.3.4c971641sXqPaV&ws_ab_test=searchweb0_0,searchweb201602_5_10065_10130_10068_10890_10547_319_10546_317_10548_10545_10696_453_10084_454_10083_10618_10307_537_536_10902_10059_10884_10887_321_322_10103,searchweb201603_58,ppcSwitch_0&algo_expid=60dfe6ec-dd9e-4db7-93f0-5f94aec30ef4-0&algo_pvid=60dfe6ec-dd9e-4db7-93f0-5f94aec30ef4&transAbTest=ae803_5
2 x 330R resistors WE HAVE

Project Post #2: Light Up Jacket

Project Title: Light Up Jacket (“You are hot but you are cool”)

Project Team: Obasi, Jack

Weekly Accomplishment:

Obasi:

Worked on the sample jacket.

Search for materials and fabrics.

Jack:

Searched for ways to light.

Wrote basic code for Playground Express.

Images

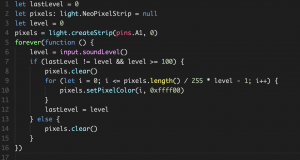
Code function: if the more pixels light up when the sound is louder (only if the sound is above threshold)

Changes to our approach

  1. We will try to make a light jacket (perhaps with less stuffing), so people can wear it indoor
  2. We will try to make it with transparent fabric so that the lights can have a glowing effect
  3. For now, instead of detecting the bass, we will detect loudsound since bass can be very tricky to detect
  4. We will add a “bounce” feature so that when the performer jump on stage the color changes as well

Material List (Still deciding which to buy)

El Wire:

Blue, Green, Orange & Yellow colorways

$1.35 Each

6 wires in total

https://www.ellumiglow.com/electroluminescence/electroluminescent-wire

Neon Pixel Strip

LED light

$12.5 Each

0.5m – 2m

https://www.adafruit.com/product/3811?gclid=CjwKCAiAiJPkBRAuEiwAEDXZZdN0k6gopEcaCGBKvVWR_YBFFRyOOqmAiFx3_1TthxETDxXecGo_ZhoCfAwQAvD_BwE

Mini Skinny Neon Pixel Strip

mini LED light

$24.95 Each

1m – 2m

https://www.adafruit.com/product/2964?length=1

Lighting Tape Strip

Tape Strip

$8.95 Each

2 – 3?

https://www.adafruit.com/product/415?gclid=CjwKCAiAiJPkBRAuEiwAEDXZZQ3VhhcbDMvufS2GybwBge1zBLfJYWrOkZuZkYsYJYpU8I2vnJNpxRoCb5oQAvD_BwE

Lithium Ion Polymer Battery

Battery

$10 Each

2

https://www.adafruit.com/product/258


Project Post 2– Circular Pleating

Circular Pleating

  • weekly accomplishments list what you accomplished for each team member

This week, I acquired the Polyester fabric for the first circular garments. I also drafted a digital pattern for a skirt, and did research into laser cutting polyester.


  • changes to your approach after presenting your work what changes have you made in your approach

I decided to do a smaller garment made of 2 yards of fabric before making a large gown with the remaining 10 yards.

  • material list For each material fill out the following information (a table may be a good way to do this)
    • Part/Material
      • Polyester
    • Price
      • 2.37 per yard
    • Quantity
      • 12 yards
    • Link to a purchase location
      • https://www.fabricwholesaledirect.com/products/chiffon-fabric

Select the projects category before publishing

Project Post #2 Sungjin (SJ) Park

Project Title

  • Heart rater

Project  Team

  • Sungjin (SJ) Park

Weekly Accomplishments

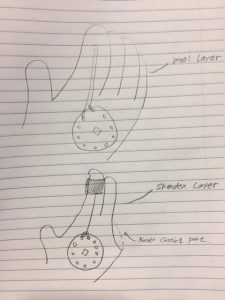
  • I bought spandex glove to start with the design of inner layer of the glove. How it should be comfortable on hand with the device attached would be a key concern of the design.

Images

Changes to Your Approach

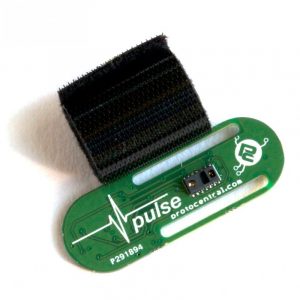
  • I decided to choose PULSE+ PULSE-OX & HEART RATE SENSOR BASED ON MAX30102 for heart rate sensor which is attached on a fingertip. Measuring heart rate on a wrist would make the glove way bigger than my original thought.

Material List


Project Post #2 – Theremin Jacket

Project Post 2

@Postdate: Mar 9th (Sat)

Project Title

Theremin Jacket

Project Team

Junda Chen, Jeff Ma, Yudong Huang, William Black

Major aspects for Development

  • Sensor

    • Sonar Sensor

    • Leap Motion

  • Arduino/Other interface & Software Design

    • MIDI Software

    • Storage

    • Data Transfer

  • Clothes Design

    • Sensor/Leapmotion embedding

    • Light Design

      • LED

      • Covering Material / Defussing material (Potentially)

    • Jacket

Weekly Accomplishments

  • Setup sonar sensor tracking in Arduino Mega.
  • Use sonar sensor to build a prototypical MIDI device.
  • Leap Motion Mechanism
    • How leap motion works, Accuracy, General application
    • HW and SW. Compatilibility to IoT Devicess
  • 3D PrintLeap Motion case
  • First software prototype for theremin
    • Motion trace: proximity and height change
    • Data Transfer and MIDI encode/decode
    • Run on Arduino/Raspberry pi
    • (Optimization) De-noise.
  • Select a jacket.
  • Design the jacket.

Image/Video

Changes to our approach

We originally want to design the primitive circuit and sensors to make the sensing work. William has just worked out the sonar in wednesday, and as a backup plan and primitive approach we will design a theremin using the sonar sensors and integrate it as a part of jacket.

In search for potential improvement of gesture recognition, we also focus our attention on Leap Motion. On leap motion, we’re able to capture richer and more sensive gesture information — able to grab, tremble, drastically move up and down, within its well-defined range of service.

Material list

  • Circuit Board: (Potentially) MIDI encode/decoder, Leap motion image processor,
  • Leap Motion (1): $96
  • LED Strip light (2, TBD)
  • A Jacket (1, TBD)

Development Log

Cylon.js: an arduino API to control the leap motion

Adafruit strip LED : a $17.99

Leap Motion installation: Trouble shooting in Windows.

Project Post #2

Project Title: Vis Hat

Group Member: Lydia, Jay, Sharon, Fu.

Group Member Weekly Updates:

Lydia

  • Researched material specifics and found links for items needed
  • Ordered materials
  • Emailed Justin Anderson (WARF) to follow up on getting in touch with BME Chair Justin Williams about hardware questions
  • Continuing to research documents and do literature reviews for similar projects, taking note of hardware design/cap design overall

Jay

  • Researched frontal cortex physiology, studying up on how this process works to gain a better understanding of project variables
  • Researched materials: double checking, learning more about component terminology in preparation for the build
  • Studying circuit designs for similar projects, familiarization with circuit design diagrams and techniques
  • More logistics: gathering informational resources (papers, websites)

Sharon

  • Researched how brain waves work, studying and researching different mind reading products(EEG)
  • Materials searching and double checking
  • Researched sample codes for analyzing brain wave
  • Researched and learned different brain wave while in people in different stages

Fu

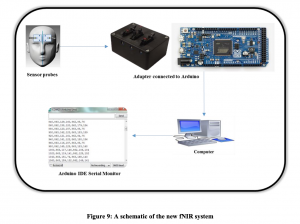
  • Researched materials and discussed about the IR led emitters and Aduino Due circuit board.
  • Studied the structure of the brain hat system and learn new knowledge about the circuit we need and signal processing.
  • Finding papers related to wearable brain monitoring system.

Changes to Approach:

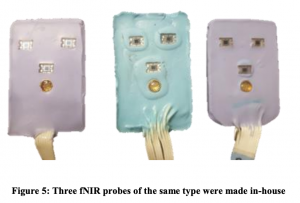
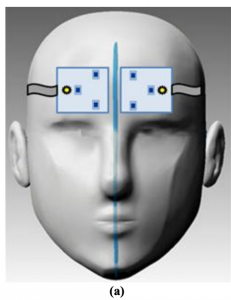
The sensors used to measure brain data are called optodes. This week we extensively researched where to find these, with the plan of ordering however many optodes we would need and proceeding from there. We weren’t able to find any optodes for purchase and upon reading other papers and researching findings regarding similar projects, we found that other groups have built their own optodes by combining led IR emitters and sensor combinations. We’ve revised our plan to follow this path as well and are currently in the process of researching further circuitry approaches and the logistics of building this kind of hardware.

Images:

Materials:

** To be updated after we review the spreadsheet

Part/material Price per unit ($) Quantity Notes
730nm emitter 8.61 2
850nm emitter 1.46 2
NPN transistor 5.99 1 the unit we found includes over 200
arduino due 34.43 1
Shipping and tax 7.99, 1.55


InGlove

Shruthi, Vedant, Curt

Accomplishments

Vedant

Figuring out which microcontroller would be best to use given the requirements for digital/analog pins and wifi module. Looking at the API gateway application and seeing what kind of functionality it can provide for the IoT aspect of the project. Asking Makerspace about electronics equipment checkout for the microcontroller.

Shruthi

This week we met up and had a discussion on which sensors and controllers would be most appropriate keeping in mind each of our individual project needs.

For the home assistant, we do not require as many analog reads as the SRF would due to the difference in granularity requirement. We ordered compact boards for easy integration into the fabric layout and plan to use header pins and a breadbroad for the prototype development phase.Also, we decided to start off with two flex sensors, one long and one short as a starting point. (For the thumb and the index finger). The SRF on the other hand requires a board with more analog reads.

We also plan to meet again this week and try out programming a particle photon board and integrate with the IFTTT app to be able to read simple signals.

Curt

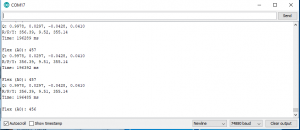
This week I spearheaded the IMU and flex sensor testing of which some results are shown below. I had also spend some time mapping out what sensors are needed and what / when to order the components. Furthermore, during discussion with the team it was determined that we need different microcontrollers for our respective projects. I am going to be using an ESP32 based development board from Adafruit.

Images / Results

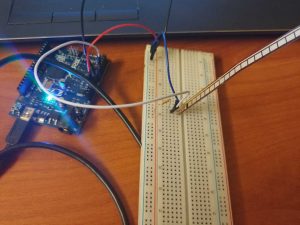
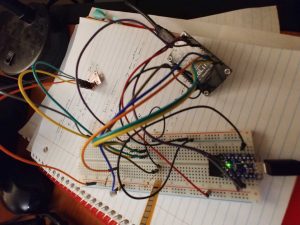
During this week the team tested a flex sensor with an arduino and breadboard to see if the signal presented is reliable. We also tested Velostat to determine feasibility of detecting finger movement.

We also explored a Sparkfun MPU-9250 I2C IMU to capture hand orientation.

We found that the orientation data in the glove is fairly reliable and we did not notice drift in signal.

Changes to Approach

No major change in approach due to our presentation in class. Though while determining materials we decided that each sub-project needs a different microcontroller due to different needs.

Materials List

Home Assistant Sub-Project

  1. Particle Photon – $19.00 (1)
  2. Flex sensor – 4.5 inches – $12.95 (1)
  3. Flex sensor – 2.5 inches – $7.95 (1)

*After initial prototype, purchase more flex sensors.

SRF Sub-Project

Already purchased / owned

  1. Glove for prototype [final version subject to change based on prototype]
  2. Sparkfun IMU – $14.95 (1)
  3. Flex Sensor – 4.5 inches  – $15.95 (1)

Ordered

  1. ESP32 Dev Board – $15.00 (1)
  2. High Torque Micro Servo – $9.95 (3)
  3. Resistive Force Sensor – $7.00 (1)
  4. Flex sensor – 4.5 inches – $12.95 (1)

Future / After initial prototype

  1. Resistive Force Sensor – $7.00 (5)
  2. Flex sensor – 4.5 inches – $12.95 (3) and/or Flex Sensor 2.5 inches – $7.95 (8)