Project Post #1: Radio Outdoor Emergency Transmitter

Radio Outdoor Emergency Transmitter

Natalie Tack

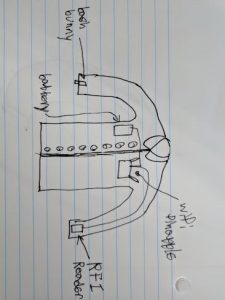
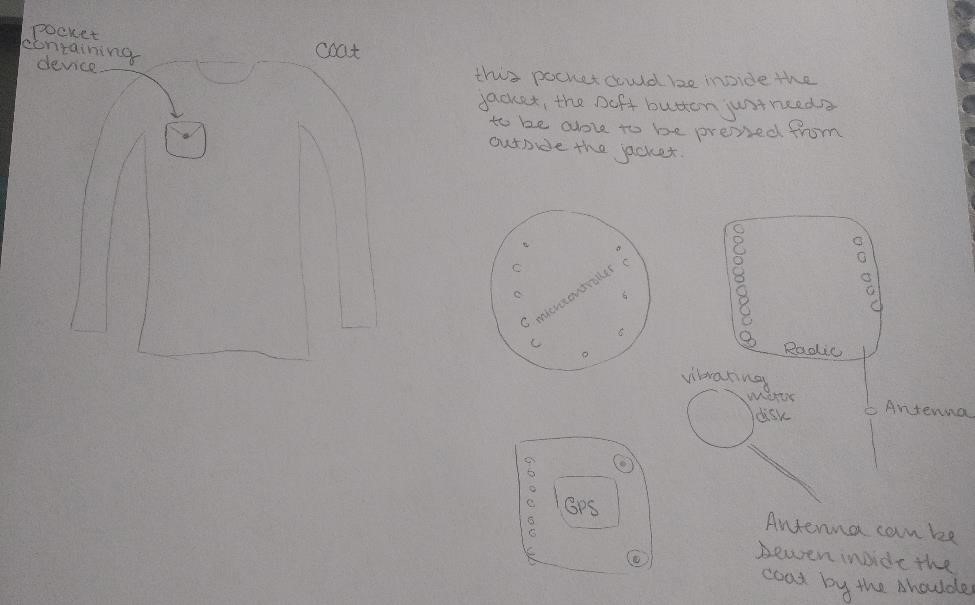
A device that transmits a prerecorded message that requests assistance at specific GPS coordinates. This happens when a user presses a button 3 times (3 times to limit the amount of accidental transmissions). The device will then respond with 2 vibrations. The device will then listen for 1 minute, if there is no more user input, the device will send the pre-recorded message. If there is user input, the transmission will be sent. The transmission will be relayed multiple times either over different frequencies or over the same frequency.

This device is for people who enjoy to spend time outdoors without necessarily carrying a phone. This device is designed to work without a phone so that if a phone breaks or is unable to send a call if an accident happens, this device can still transmit a signal over radio waves.

This product is different from existing products because most other emergency alert devices are connected to a phone or wifi. This device will be primarily for use outdoors and works exclusively with radio waves.

Something out there that is similar to what I am trying to design is an Emergency Position Indicator Radio Beacon, which is what boats use when they need help. Once someone has pushed the button, it transmits a signal on a designated radio frequency that relays the boat’s information and coordinates to the Coast Guard, it also relays all this information to an emergency contact if that is provided.

This is similar to my project, there is also a similar mechanism out there for airplanes, however, there is no designated frequency or product out there for outdoor emergencies on land in the US.

Materials:

  • Microcontroller (if needed, some radio transceivers have it)
  • GPS module
  • Adafruit Feather 32u4 with RFM69HCW Packet Radio – 433MHz – RadioFruit
  • Vibration Motor
  • SD card (not sure if needed, media file might be small enough)
  • Fabric to make soft button
  • Wire to connect via soldering

Skills/Concepts

  • More knowledge of radio transmission (radio licenses and such)
  • How to connect microcontroller and radio transmitter to send mp3 or wav files
  • A little bit of soldering (have done before)
  • Sewing (have done before)

A Timeline:

Before March 25: 1st: radio transmitter relays message (from file)

2nd: radio transmitter can relay message with GPS coordinates

3rd: two vibrations happen before relaying message

Before April 8:      1st: vibration happens after 3 soft button presses

2nd: after 3 button presses, two vibrations occur, one minute passes,  radio transmission is sent.

Before April 22:     1st: if user presses button during one minute of listening, no message is sent

Finally: work out any last kinks

Fallback Plan: if radio signal does not transmit, will use Bluetooth to send message to emergency contacts instead

Minimal Outcome that is Success: message is sent on user input (whether that be Bluetooth, Wifi, or radio) and message does not send with user input during listening state of device.
Project Post #1: Puffer Jacket

Lighting Puffer Jacket

Team Member

Obasi Davis, Jack Yang

Project Description

We will make a puffer jacket that lights up according to outside factors such as sound and temperature. Our project is for people who want to look good in a dark environment such as a concert or a club.

In order to use the puffer jacket, there will be an on/off switch for the lighting feature that wearers can choose as they wish. When lighting is off, wearers can wear it as a regular day-to-day jacket to keep them warm at the same time look stylish. When lighting is on, the jacket can glow or flash according to the surrounding music and/or color. The user-device interaction would be very straightforward and intuitive.

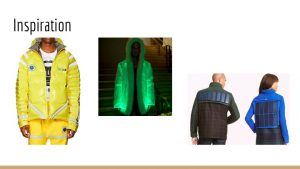
Currently, there is no LED puffer jacket on the market for purchase, which gives us a lot of room to improvise. However, there are a few lighting hoodies on the market. Most of them have either zipper lighting or fiber optic material. Since we are basing our lighting feature on a puffer jacket, there is more room for us to get creative with lighting patterns and integration of different sensors without looking too bulky.

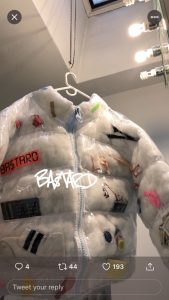
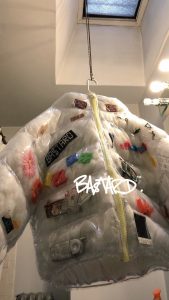
Inspirations


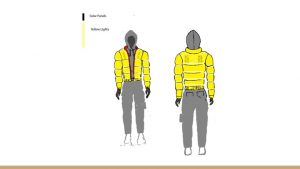
Digital Sketch

Material/Tools Needed

  • Ripstop nylon fabric
  • Batting
  • Thread
  • Battery
  • Machine Needles
  • LED lights/Fiber Optic Material

Skills/Concept to Master

  • Circuits + sensors
  • Combining tech with clothing

Timeline

Milestone 1 (March 25)

  • Prototype Light/Music Sensor
  • Order Materials
  • Test usage
  • Make a pattern for coats

Milestone  2 (April 8)

  • Finish sensors
  • Implement circuits into clothing

Milestone 3 (April 22)

  • Finish implementation
  • Aesthetic finishes
  •  Real life testing

Fallback Plan

We are planning to implement both light and sound sensor features to the jacket. If one of the sensors do not work as desired, we can ditch the malfunction feature and implement other ones. The worst case scenario is that none of the sensors is working, in that case, we can just have LED lights that glow accordingly, but that is unlikely to happen given our current progress.

Project Post #1 : Scavenger Stuffs

Scavenger Stuffs

Savannah Mann

Scavenger Stuffs is a project dedicated to bringing wearable tech to a broader demographic by creating a game where all components are not only fun and enjoyable, but also low-cost to produce, maintain, or replace. The game consists of a scavenger-hunt-like format where people download an app, travel to different locations to find stuffed animals, then scan a pendant against the stuffed animal to get a digital representation of that animal in their game.

  • What does your project do?:
    The Scavenger Stuffs app is a game where you can collect various types of animals and send them on adventures for set amounts of time. During their adventure they send you updates and in-game rewards. Scanning a pendant against one of the real-life plushes will reward players with more animals.


  • Who is your project for? 

The app is designed for age groups between 7 and 20, and parents are also encouraged to play the game along with their children.


  • What are the steps that a user would go through to interface with the technology?

The app will be available for download through the Google Play store. Players will be asked to create an account during this process. If a player has a Scavenger Pendent, then can register the name on the pendant to their account, and after that point any animal scanned with that pendent will result in that animal being added to the user account. From that point on, the user is free to roam around looking for and collecting animals, and they can send their animals off on adventures within the game itself.


  • What makes your project different from existing products?

Many location/product to virtual pet products have been done before (Webkinz, Pokemon Go, etc.), but none incorporate any technology in their designs other than a phone. Scavenger Stuffs allows for the game and components to be free-standing and cheaply manufactured, which means that players get a physical pendant to own, keep, and personalize at low cost, and locations which house the animal plush get an attraction to encourage visitors.

  • inspiration images/artists/designers/projects that are relevant to your idea

Image result for cool fantasy stuffed animalsImage result for cool fantasy stuffed animalsImage result for cool fantasy stuffed animals

  • digital or scanned sketches of your project
  • a bulleted list of the materials/tools you’ll use/need
    • 10-20 RFID Tags
    • 1 RFID READ/WRITE Module per Animal
    • 1 RaspberryPI Zero W per Animal
    • Fabric + Polyform Stuffing for each animal
    • Pendents to house tags (preferably 3D printed)
    • Unity Software
    • GameSparks Software
  • list of skills/concepts that you will need to master for completion (for example soldiering, sewing, etc)
  • timeline (where you would like to be when in the project)
    • Here are major milestone dates for you to work around
      • Milestone 1 (March 25): Prototype animal design is created and houses a functional PI unit which can communicate with the server.
      • Milestone 2 (April 8): App is developed to the point that the user can receive corresponding animals from scanning pendents
      • Milestone 3 (April 22): App features games and adventures for the user to embark on
  • a fallback plan
    • Worst comes to worst (if the RFID scanning goes poorly), users will be able to scan a QR code posted on the animal to recieve the reward in-game.


Initial Project Pitch

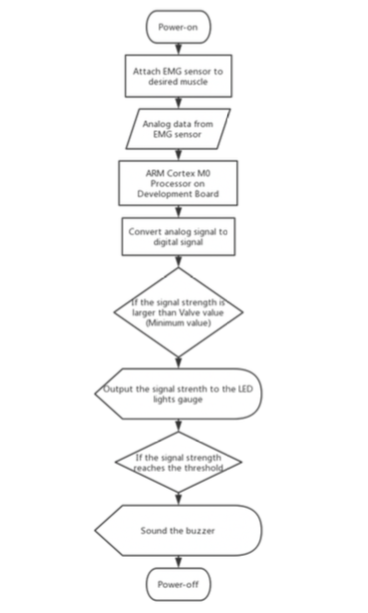
Project Diagram

Project Description:

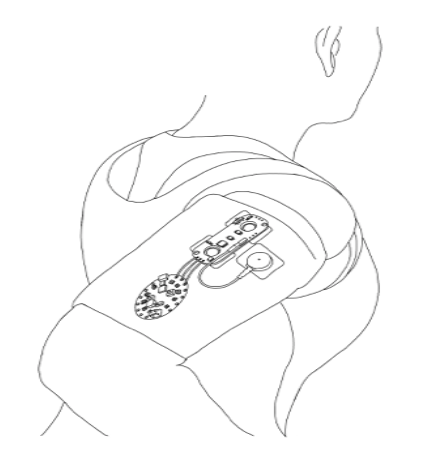
My project will use an electromyography (EMG) sensor and Adafruit Circuit Playground Express Development Board I got from the class. Here is how it works: The EMG sensor will receive the electro signal sent from human muscle and transmitted via analog format. The development board which has an ARM Cortex M0 Processor can convert the analog signal into digital format and visualize it via the onboard LED lights gauge and showing it like a bar- like indicator. And if the sensor senses the muscle is putting on maximum strength, the buzzer will sound to alert the person from muscle related injuries.

Inspiration Project

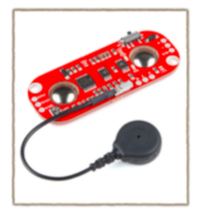
  • Muscle Sensor + LED Shield
  • The muscle sensor output the analog signal directly into the LED Shield and can display a 10-segment bar graph

Project Sketches

  • The final product will look like an armband and has LED indicator with buzzer and/or vibration module

Materials and tools

  • MCU: LilyPad Arduino 328 Main Board
  • EMG Sensor: MyoWare Muscle Sensor + Biomedical Sensor Pad
  • LED: MyoWare LED Shield/LilyPad Pixel Board/SparkFun RGB LED Breakout – WS2812B
  • Buzzer: LilyPad Buzzer
  • Vibration Motor: LilyPad Vibe Board
  • Tools: Soldering Iron, Breadboard
  • Miscellaneous:Male & Female header connectors, Jumper wire

MCU: LilyPad Arduino 328 Main Board

The LilyPad Arduino consists of an ATmega328 with the Arduino bootloader and a minimum number of external components to keep it as small (and as simple) as possible. This board will run from 2V to 5V and offers large pin-out holes that make it easy to sew and connect. Each of these pins, with the exception of (+) and (-), can control an attached input or output device (like a light, motor, or switch).

EMG Sensor: MyoWare Muscle Sensor + Biomedical Sensor Pad

This is the MyoWare Muscle Sensor, an Arduino-powered, all-in-one electromyography (EMG) sensor from Advancer Technologies. The MyoWare board acts by measuring the filtered and rectified electrical activity of a muscle; outputting 0-Vs Volts depending the amount of activity in the selected muscle, where Vs signifies the voltage of the power source. It’s that easy: stick on a few electrodes (not included), read the voltage out and flex some muscles!


Skills and concepts

  • Soldering
  • A/D Converter Basics
  • Coding on Arduino Platform

Timeline

  • Milestone 1 (March 16): Make the project basic functions work on breadboard
  • Milestone 2 (April 6): Test the Valve and Threshold value and test on wearable scenarios
  • Milestone 3 (April 20): Fully tested and ensured the project works perfectly during real life situations

Fallback Plan

If it’s not easy to successfully find out the actual workable valve and threshold value for the project to function properly, I can change the project into testing suddenly peaked muscle electro signal to count such as push-ups or sit-ups

Project Member

Sin-Ying Lin


Initial Project Post – Jeff Ma

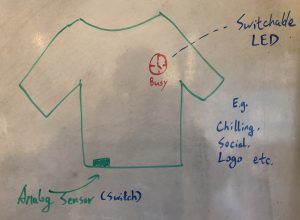
This wearable technology I wish to create is through interaction with the clothes or with other environments, the status shown on the clothes can be changed to suit the user’s displaying purpose.

It uses an analog switch to change the LED displayed. The LED may also be changed using sensors through interaction with other people and the environment. The platform is prone to change to maybe jacket, beanie, caps etc.

This project is meant to be playful and experimental, it could also be pragmatic depending on what image it displays

Potential consumer:

People who wish to display a status based on the situation on their clothes, gear geeks

Confident:

Programming

Art Experience

Some hardware

Some 3d printing

Not so confident:

Soldering

Sewing

Compactly connecting microcontrollers

Initial Project Pitch

Jeff Brandt

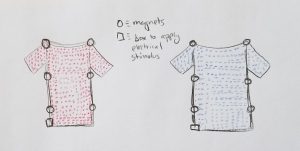
My design is for a shirt that can change colors due to an electrical stimulus. This will be accomplished by magnetized beads on the shirt that will flip their orientation and thus show only one half of the bead that is colored differently than the other half. This is trying to solve a problem for over-packers on work trips or vacations by allowing the user to pack less clothing but still be able to have a different appearance each day.

I am confident in the materials selection process as well as some very basic programming.

I am less confident in the design aspects such as stitching or weaving together fabrics.

Michael Leykin: Initial Project Pitch

Name: Michael Leykin

Idea#1: Defense

The 3-factor Bluetooth authentication bracelet!

Sketch:

Purpose: Add additional layers of security to any physical device.
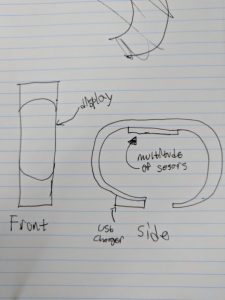
Project is meant to be a pragmatic solution for companies with large number of workstations.

How It Would Work: After application is installed on machine, the Bluetooth bracelet would calibrate to identify you, then from then on, you would have to have the bracelet on when logging into your machine.

Confident Skills: Programming, security knowledge.

Not Confident Skills: Product design, hardware design, electrical engineering and bio metric sensors.

Idea#2: Offense

Penetration of

Endpoints and

Networks

Infiltration

System

Sketch:

Purpose: To perform a vulnerability assessment on a physical location/organization.

This project is not pragmatic at all, the only legitimate use for such a project would be for malicious purposes, so this is mainly experimental and playful.

Again, the only people I could see using this would be a malicious actor or a very dedicated security team.

How it would work: The wearer of this jacket could use a multitude of the pen testing tools present in this jacket to gain a variety of information to send back to your home machine (password hashes, metadata from workstations…etc).

Confident Skills: Programming, Pen testing tool knowledge.

Non-confident Skills: Component integration into a garment, sewing.