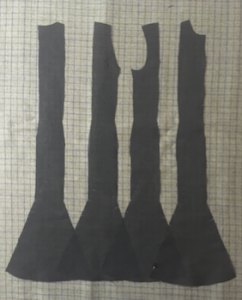
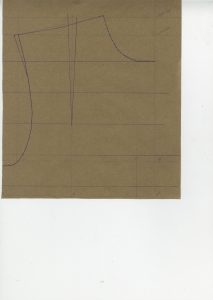
Project Post #6: Virtual Vermin

Virtual Vermin

Jeff Brandt


One Sentence: A flexible, full functioning computer mouse designed with 3D modeling in mind.

(I think this is dressed up a bit more than “a computer mouse in a glove”)

Weekly Accomplishments:

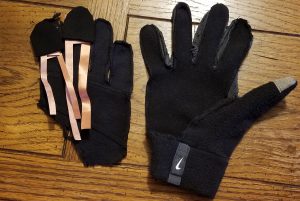
  • Reconfigured soft switch buttons to stretch the conductive fabric further down the fingers
  • Submitted 3D print to Makerspace to print circuit board cover
  • Deconstructed glove so that the soft switches can be integrated


Images:
Material List:

Wireless Mouse // Quantity: 1 // $9.99 // https://www.amazon.com/gp/product/B015X2OD52/ref=ppx_yo_dt_b_asin_title_o00_s00?ie=UTF8&psc=1

Conductive Fabric // Quantity: 1 sq. ft. // ? // Supplies in classroom

Conductive Thread // Quantity: 2 yds. // ? // Supplies in classroom

Negative Poisson Ratio Foam // Quantity: 1 sq. ft. // Free // Supplied by my research lab

Gloves // Quantity: 1 // $11.95 // https://www.amazon.com/Agloves-screen-gloves-texting-gloves/dp/B004A9FI2M/ref=sr_1_6?keywords=thin+glove&qid=1552266834&s=electronics&sr=1-6

3D printed cover for circuit board // Quantity: 1 // $2.14 // creating in Solidworks


Areas of Concern:

Right now, my biggest area of concern is trying to determine how to best insulate the conductive fabric/thread paths that extend from the finger tips to the palm. I have a vision of how to do it in my head but as I have never had to sew multiple layers of things before, I am not sure if there are any tips that could be of help. Marianne, if you are available to run through this process again with me for a short period of time on Monday that would be great.

As for the electronics component, Kevin, I think I decided against the integration of a microcontroller. My current plan may not be the ideal configuration for an actual go-to-market product however it will accomplish, if not exceed, the goals I had set at the beginning of the semester for a first iteration.

Project Post #6 – Velcro MIDI Jacket

Project Post 6

Project Title

Velcro MIDI Jacket

Project Team

Junda Chen, Jeff Ma, Yudong Huang, William Black

Weekly Accomplishments

A MIDI(Theremin) jacket that can be worn and played as an instrument for synchronized acoustic and visual performances.

Weekly Accomplishments

  • Jacket
    • Adjust Velcro sheet to appropriate width for attachment (Yudong)
    • Velcro sewed and attached to the horizontal waist area (Yudong)
  • Leap Motion Case
    • More polished to be sewing ready (Yudong)
  • Light Strip
    • Able to light up the strip through circuit playground (Jeff)
    • Briefly decided to use 35 LED lights based on jacket implementation(Jeff)
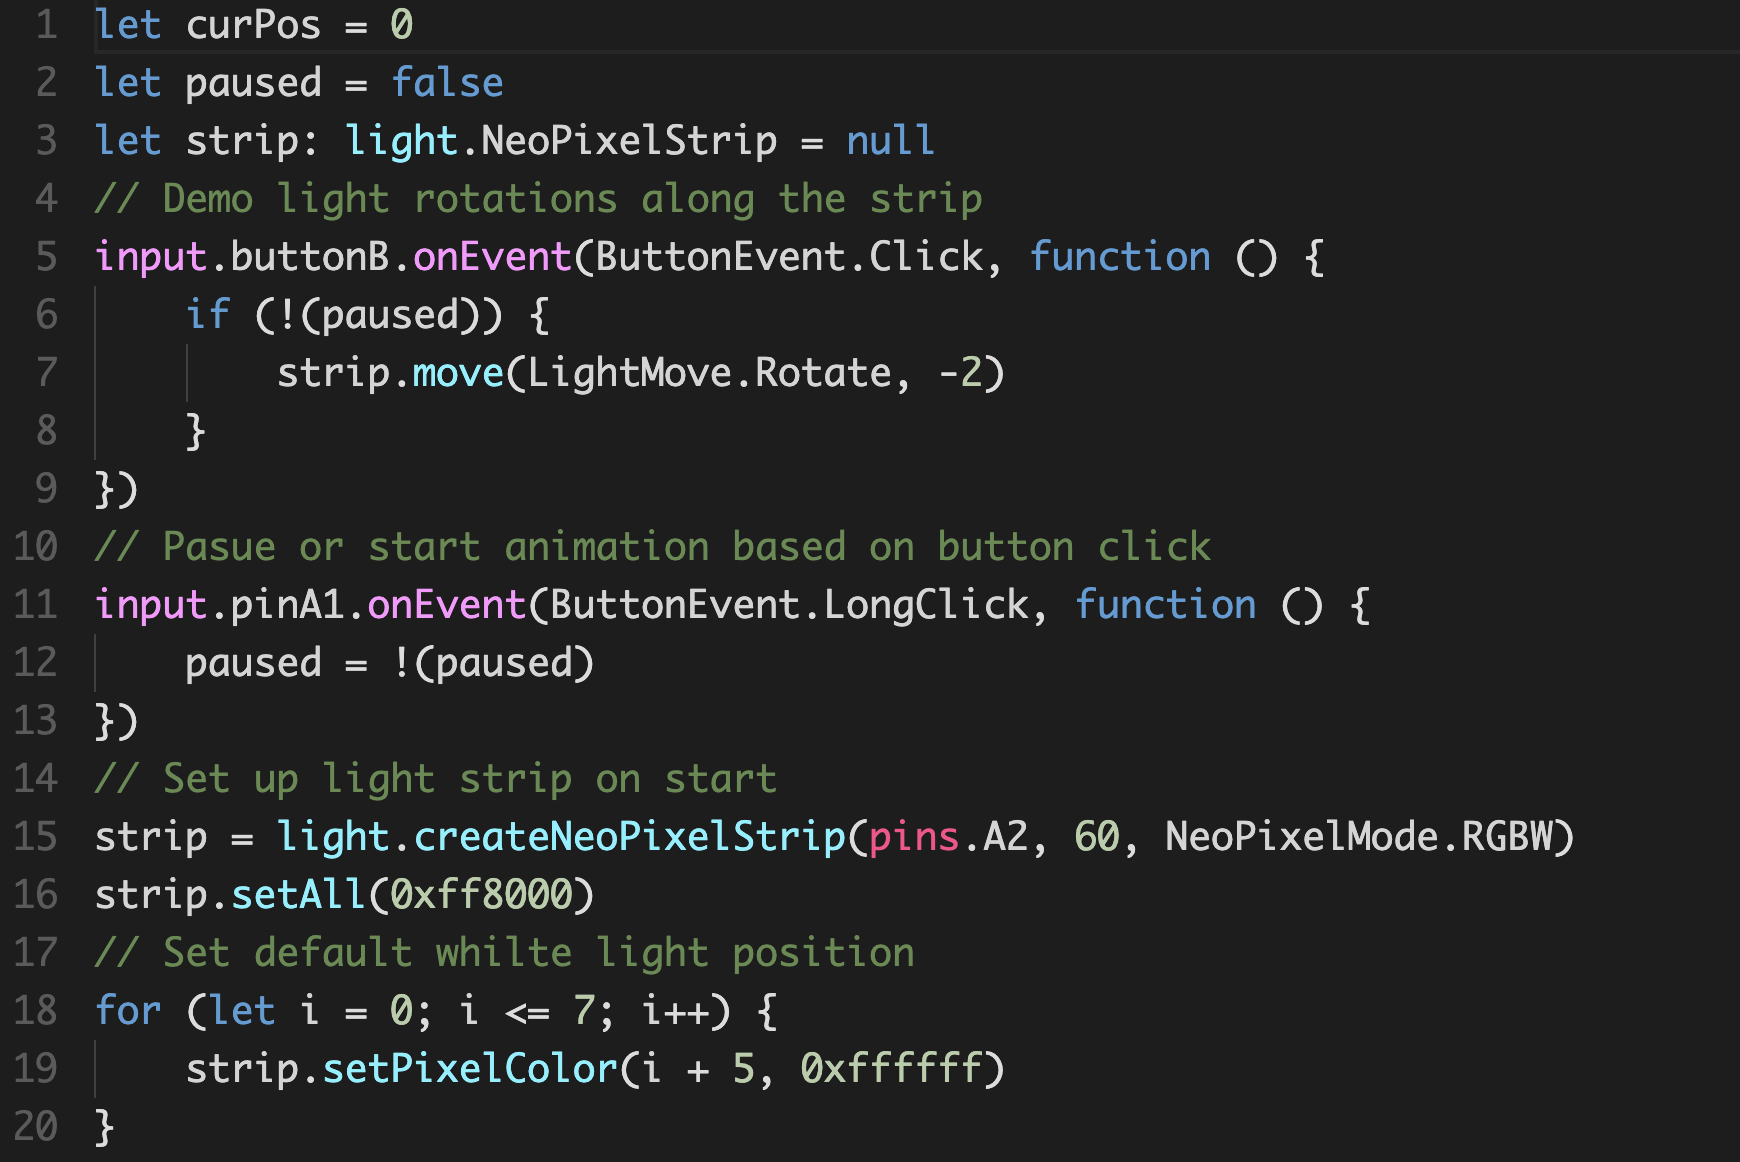
    • Able to rotate white light by a certain range through control (Jeff)
    • We still need to test out if the circuit playground will respond correctly with Analog input data from the output of the Raspberry PI GPIO port in controlling the light strip to move synchronously through Raspberry PI. (Jeff)
  • Raspberry PI Power supply
    • Reimaging Raspberry PI with a proper system (Junda)
    • Test connectivity and data transmission through the PI (Junda)
  • Leap Motion Device
    • Modified MIDI sound and shared code for data transmission among the team (William)
  • Speaker
    • Purchasing an outside speaker for enhanced sound delivery (William)

Image/Video

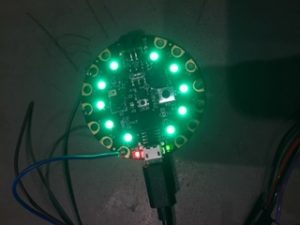
Video Light strip with its current functionality working

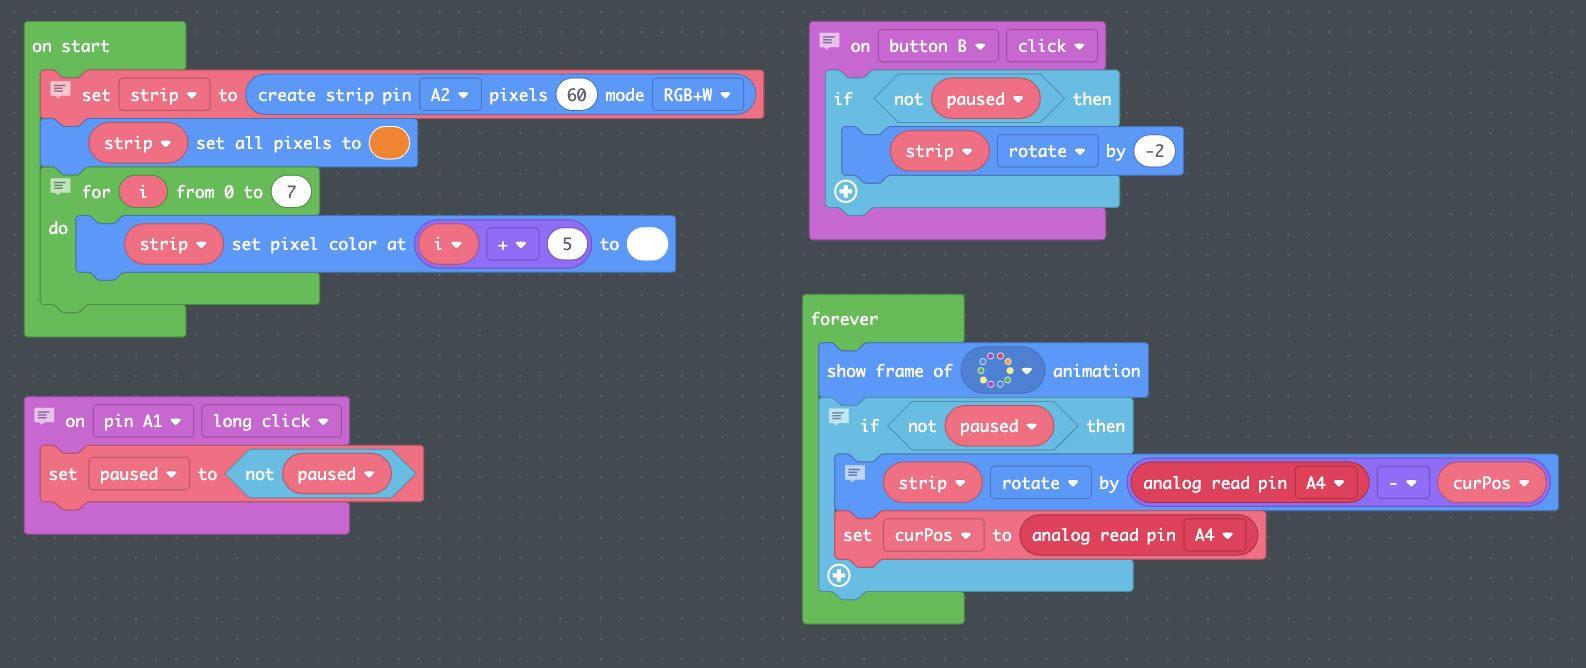
Light strip with analog inputs on A4(not connected to PI)

Light strip with white light rotations based on clicking

Image 2 Current JavaScript code(with analog input on A4) and demo from MakeCode

https://makecode.com/_iye9ed6AmHLw

Material list

  • Circuit Board: (Potentially) MIDI encode/decoder, Leap motion image processor,
    • Arduino (1):
    • Circuit Playground (1)22
    • Raspberry Pi 3B + (1, with toolkits): $30-50
  • Leap Motion (1): $96
  • LED Strip light (2, TBD)
  • Black velcro fabric (we have in the studio)
  • A Jacket (1, TBD)
  • (Safe) Infrared LED (20)
  • A long USB cable (x2) (for emergency and design)
  • Portable speaker for sound display

Areas of Concern

  • We need to speed up the process of integration with basic functionalities
  • The light strip needs to be properly covered with sewing
  • The hardware needs to be sewed on for further integrated design
  • The theremin sound for the leap motion needs fine-tuning
  • The data flow from the leap motion scripts to the circuit playground analog read through the GPIO  needs to be handled as soon as possible

Project Post #6

Project Title 

Heart Rater

Project  Team

Sungjin (SJ) Park

One sentence that describes your project 

  • Winter glove that reads and indicates your heart rate zone on winter activities.

Weekly Accomplishments

  • Still working on the accuracy of the heart rate
  • Ordered small sized battery to fit on back of the glove.

Image

Material List 

Added Item

  • Part/Material: Lithium Ion Polymer Battery
  • Price: $6.95
  • Quantity: 1
  • Link to a purchase location: https://www.adafruit.com/product/2750

Kept Items

  • Part/Material: Adafruit Circuit Playground Express
  • Price: Provided in class
  • Quantity: 1


  • Pulse Sensor (Heart-Rate Monitor)
  • Price: $24.99
  • Quantity: 1
  • Link to a purchase location:  https://shop.openbci.com/products/pulse-sensor?utm_medium=cpc&utm_source=googlepla&variant=22543672899&gclid=Cj0KCQjwjpjkBRDRARIsAKv-0O12qE-56tiH7XDqo-T9Cz1l4Yf1ybwdN9RlAyg_Nkxs_yUG0b9LqbsaAkcxEALw_wcB


Areas of Concern

  • Ground wire broke. Soldering need to be done again for GND wire.

Project Post 6 for Circular Pleating


Circular Pleating

  • weekly accomplishments list what you accomplished for each team member

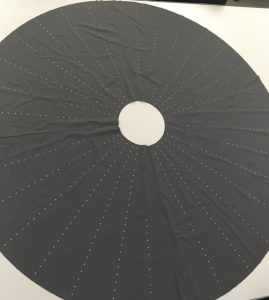
This past week, I laser cut and have mostly assembled a laser cut circle skirt. Seeing how easy the actual pleating process would be (I thought it would be 10x longer) I am hoping to get two done by the showcase/ Dress and skirt

I have also done more research into thermoforming and will start the process soon

This upcoming week I hope to print and assemble another garment


changes to your approach after presenting your work what changes have you made in your approach

I have figured out how to work with the software

  • material list For each material fill out the following information (a table may be a good way to do this)
    • Part/Material
      • Polyester
    • Price
      • 2.37 per yard
    • Quantity
      • 12 yards
    • Link to a purchase location
      • https://www.fabricwholesaledirect.com/products/chiffon-fabric


Project Post #6: Michael Leykin

Project Title: Penetration of Endpoints and Networks Infiltration System

Project Team: Me, Myself and I

One Sentence: On-premises vulnerability assessment tool.

Weekly Accomplishments + Pics:

I have designed the parts for the covers for the first two parts and these are ready for printing. I have also taped down the RFID theif into one shape.

Material List:


Part

Price Quantity Link
wireless network adapter $28.50 1 https://www.amazon.com/gp/product/B0035OCVO6/ref=ppx_od_dt_b_asin_title_s01?ie=UTF8&psc=1
Ethernet cable $3 1 https://www.amazon.com/AmazonBasics-RJ45-Cat-6-Ethernet-Patch-Cable-5-Feet-1-5-Meters/dp/B00N2VILDM/?tag=whtnb-20
Raspberry Pi 3 or 3 B+ $38.10 1 https://www.amazon.com/ELEMENT-Element14-Raspberry-Pi-Motherboard/dp/B07BDR5PDW/?tag=whtnb-20
microSD card $6.85 1 https://www.amazon.com/SanDisk-microSDHC-Standard-Packaging-SDSQUNC-032G-GN6MA/dp/B010Q57T02/?tag=whtnb-20
power source (Enokay Power Supply for Raspberry Pi 5V 2.5A Micro USB Charger Adapter with On Off Switch) $8.59 1 https://www.amazon.com/Enokay-Supply-Raspberry-Charger-Adapter/dp/B01MZX466R/?tag=whtnb-20
USB keyboard/mouse interface (Rii Mini Wireless 2.4GHz Keyboard with Mouse Touchpad Remote Control, Black (mini X1)) $16.99 1 https://www.amazon.com/gp/product/B00I5SW8MC/?tag=whtnb-20
SD card adapter $7.99 1 https://www.amazon.com/Vanja-standard-Connector-Notebooks-Smartphones/dp/B00W02VHM6/?tag=whtnb-20
Raspberry Pi Zero Wifi $10.00 1 https://www.adafruit.com/category/933?src=raspberrypi
Pi Zero USB Stem $5.00 1 https://shop.pimoroni.com/products/zero-stem-usb-otg-connector
2 x Tactile Push Button Switch With LED lights $3.00 1 https://www.aliexpress.com/item/5PCS-1-set-12X12X7-3-Tactile-Push-Button-Switch-Momentary-Tact-LED-5-Color-12X12X7-3mm/32873551440.html?spm=2114.search0104.3.2.3b0241a0ILdgzL&ws_ab_test=searchweb0_0,searchweb201602_5_10065_10130_10068_10890_10547_319_10546_317_10548_10545_10696_453_10084_454_10083_10618_10307_537_536_10902_10059_10884_10887_321_322_10103,searchweb201603_58,ppcSwitch_0&algo_expid=0747bf75-f245-43c5-a0c1-4966ea4078a8-0&algo_pvid=0747bf75-f245-43c5-a0c1-4966ea4078a8&transAbTest=ae803_5
DIP switch with 4 switches $3.00 1 https://www.aliexpress.com/item/10pcs-lot-Slide-Type-SMT-SMD-Dip-Switch-2-54mm-Pitch-2-Row-4-Pin-2/32956815576.html?spm=2114.search0104.3.3.4c971641sXqPaV&ws_ab_test=searchweb0_0,searchweb201602_5_10065_10130_10068_10890_10547_319_10546_317_10548_10545_10696_453_10084_454_10083_10618_10307_537_536_10902_10059_10884_10887_321_322_10103,searchweb201603_58,ppcSwitch_0&algo_expid=60dfe6ec-dd9e-4db7-93f0-5f94aec30ef4-0&algo_pvid=60dfe6ec-dd9e-4db7-93f0-5f94aec30ef4&transAbTest=ae803_5
2 x 330R resistors HAVE 1
MFRC522 RFID reader module $5.49 1 https://www.amazon.com/gp/product/B01CSTW0IA/ref=ppx_od_dt_b_asin_title_s01?ie=UTF8&psc=1
MIFARE 1K RFID card (with changeable UID, 13.56Mhz) Included 1
some RFID card to copy (only 13.56Mhz cards can be read/written by this particular card reader module) Included 1
Tactile Touch Push Button Switch Tact Switches 6 X 6 X 5mm Included 1
LEDs (red, yellow, green) + resistors (1k ohm) $7.00 1 https://www.amazon.com/gp/product/B01ER728F6/ref=ppx_od_dt_b_asin_title_s02?ie=UTF8&psc=1
3 AA batteries (1.5V each) HAVE 1
2 zener diodes (3.7V) or (3.6V) $8.00 1 https://www.amazon.com/gp/product/B07BTKVRG8/ref=ppx_od_dt_b_asin_title_s01?ie=UTF8&psc=1
switch (3 Terminals ON/ON 2 Positions SPDT Electronic Push Button Sliding Switches) $5.00 1 https://www.amazon.com/gp/product/B0799R529Z/ref=ppx_od_dt_b_asin_title_s02?ie=UTF8&psc=1
cables, hot glue, tape (30AWG Insulated Silver Plated Single Core Copper PCB 0.25mm Kynar Wrapping Wire) $5.00 1 https://www.amazon.com/gp/product/B07M7BHKRV/ref=ppx_od_dt_b_asin_title_s01?ie=UTF8&psc=1
Arduino Pro Micro 5V $20.89 1 https://www.amazon.com/gp/product/B01MTU9GOB/ref=ppx_yo_dt_b_asin_title_o04_s00?ie=UTF8&psc=1
PCB Prototyping Board $10.00 1 https://www.amazon.com/gp/product/B072Z7Y19F/ref=ppx_od_dt_b_asin_title_s02?ie=UTF8&psc=1
Solder Gun $67.98 1 https://www.amazon.com/gp/product/B01MDTO6X7/ref=ppx_yo_dt_b_asin_title_o06_s00?ie=UTF8&psc=1
Desoldering Gun and Desoldering Wick $7.69 1 https://www.amazon.com/gp/product/B07BB8DGMP/ref=ppx_yo_dt_b_asin_title_o07_s00?ie=UTF8&psc=1
Battery Pack For Raspberry Pi 3 B+ $25.25 1 https://www.amazon.com/gp/product/B07BSG7V3J/ref=ppx_yo_dt_b_asin_title_o02_s00?ie=UTF8&psc=1

Areas of Concern: Still need to figure out a way to boost my wifi pumpkin to be more powerful and need to find a way to effectively demonstrate my tools, may be difficult without getting into technicalities. I am also concered about my covers fitting onto my parts. Everything is coming together but I am still having some last roadblocks.

Project Post #6

PROJECT POST #6

Project Title: Vis Hat  

Project Team: Lydia, Fu, Jay

1 Sentence: This Vis Hat collects and visualizes your brain data as you respond to your environment using Near Infrared Spectroscopy technology.

Weekly Accomplishments:

Lydia:

  • 3D modeled and printed the first prototype for housing photodiode emitter and detectors
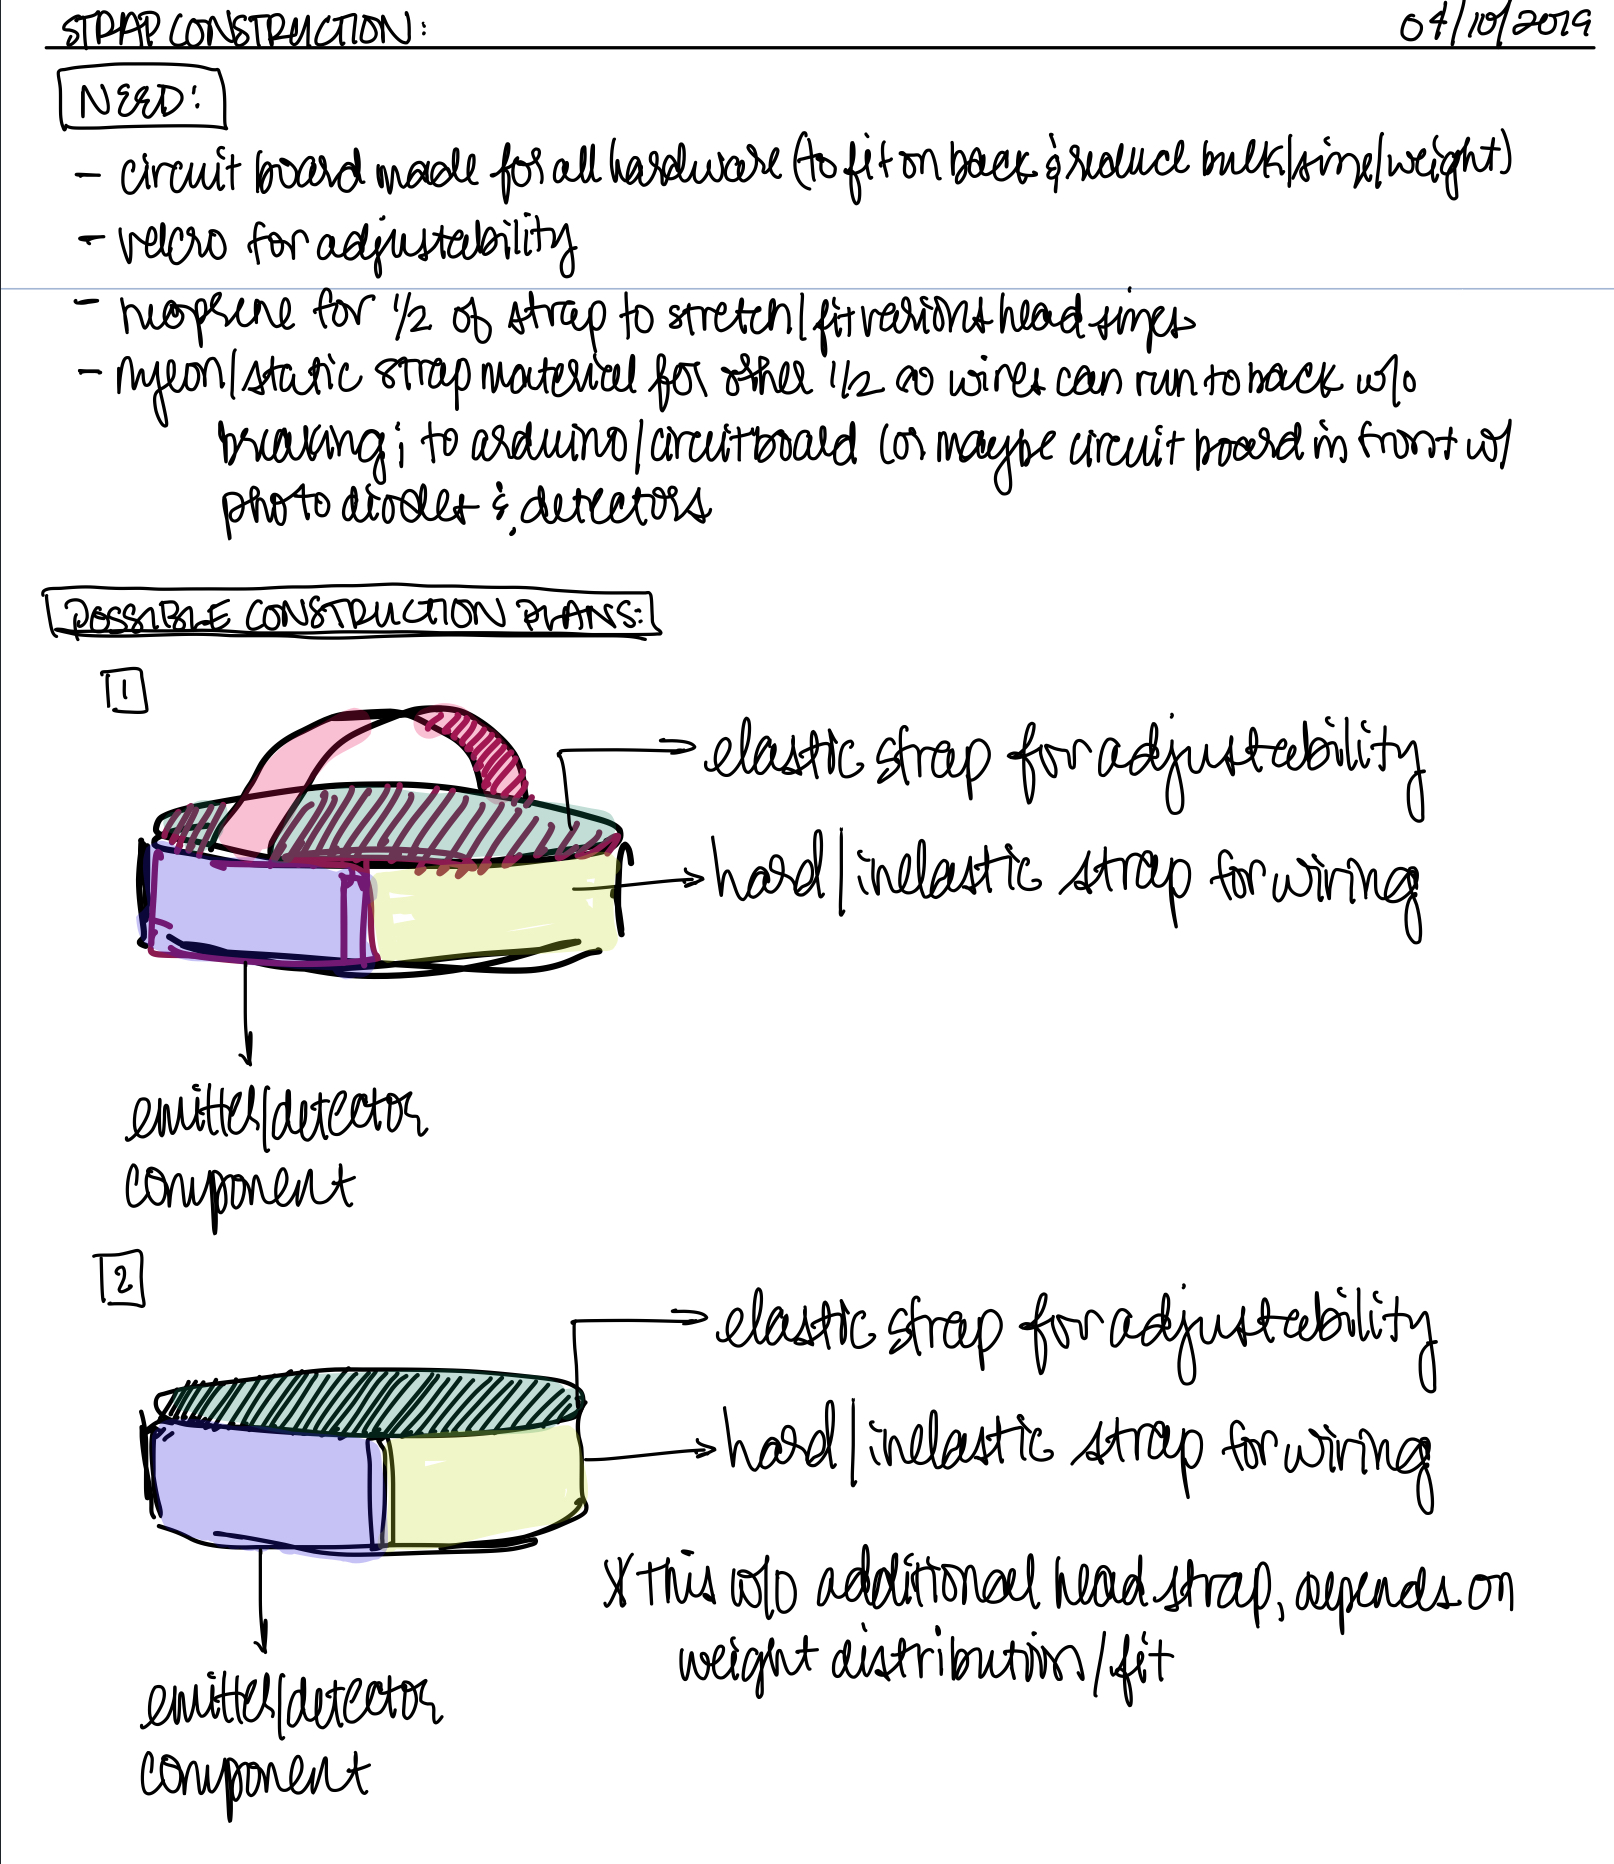
  • Planned out remaining prototype design construction
  • Built first rendition of prototype for Vis Hat
  • Looking into current visualization code

Fu:

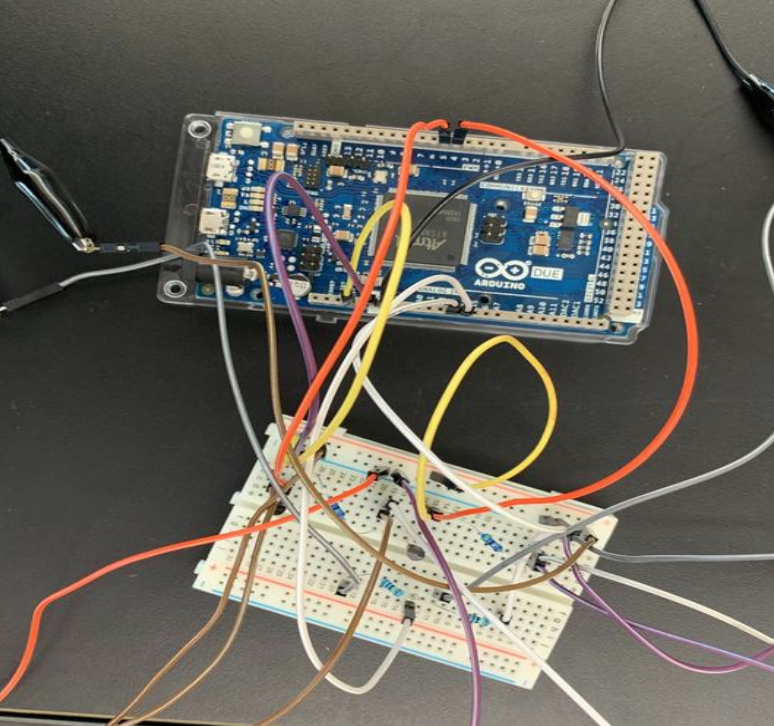
  • Circuit assembly on breadboard, optimize and design final circuit on protoboard..
  • NPN transistor build in circuit.
  • Tuning the resistor for higher sensitivity.
  • Looking code for duty cycles.

Jay:

  • Proof of concept testing, breath test using diodes on head
  • Circuit assembly
  • Resistor adjustments for sensitivity of photodiode
  • NPN transistor added for control of emitters
  • Code to address NPN Transistors
  • Started code for duty cycles of scanner

Images:

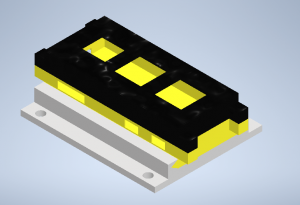
Image 1 is of the 3d model in rendered form

Image 2 is a photo of updated prototype model notes

Image 3 is of the completed circuit on breadboard


Material List:

title/link # needed price/unit notes shipping and tax TOTAL PRICE:
arduino due 1 34.43 34.43
NPN transistor 1 5.99 this one unit contains ~200 resistors 5.99
730nm emitter 2 8.61 9.54 26.76
850nm emitter 2 1.46 2.92
850 max nir detector/sensor 2 5.37 9.02 19.76
bluetooth 1 28.95 RN41XVC (with chip antenna) 8.81 37.76
850nm emitter 2 1.46 To account for trial and error hardware testing 7.99 9.45
9 volt batter power supply adapter 1 5.99 5.99

Project Concerns:

At this point we are in the home stretch of the course with a good amount to do. We have it all planned out, which works with the schedule but at this point have two potential concerns. One is that things take longer than planned. We hope to finish the build and testing this coming week, which could mean we find out our data gathering isn’t where it needs to be. The following week we’ve left for data visualization, which encompasses the data analysis and cleanup portion of the project, the demo setup (figuring out a good way of displaying everything for the demo and presentation) and coding the actual visuals. This shouldn’t be too big of a task, we just need to make sure we’re on top of it and thinking ahead. We’re planning to meet more outside of class time and planning for things in the meantime beforehand.


Project Post #6: ROETE

Radio Outdoor Emergency Transmitter Electronic

Natalie Tack

One sentence that describes my project: A device that transmits location via radio when activated in an emergency.

Weekly Accomplishments:

I figured out how to parse the GPS coordinates, I hit a snag with the remove method in Arduino, if you use remove(0) I thought it would remove the first character at index 0 in a string. I was wrong, it removes everything in a string from the zero index onward. So I fixed that problem.

I also programmed the device to wait for 3 button clicks, then buzz twice, then wait 30 seconds (less than a minute for demo purposes), then if no user input, the broadcast starts after the 30 seconds.

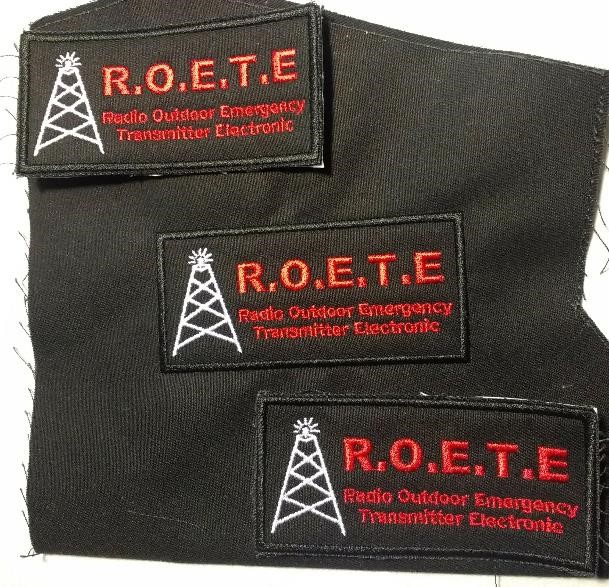
I also got the patch this week and found a jacket with an inside pocket that might work better for putting the radio transmitter in.

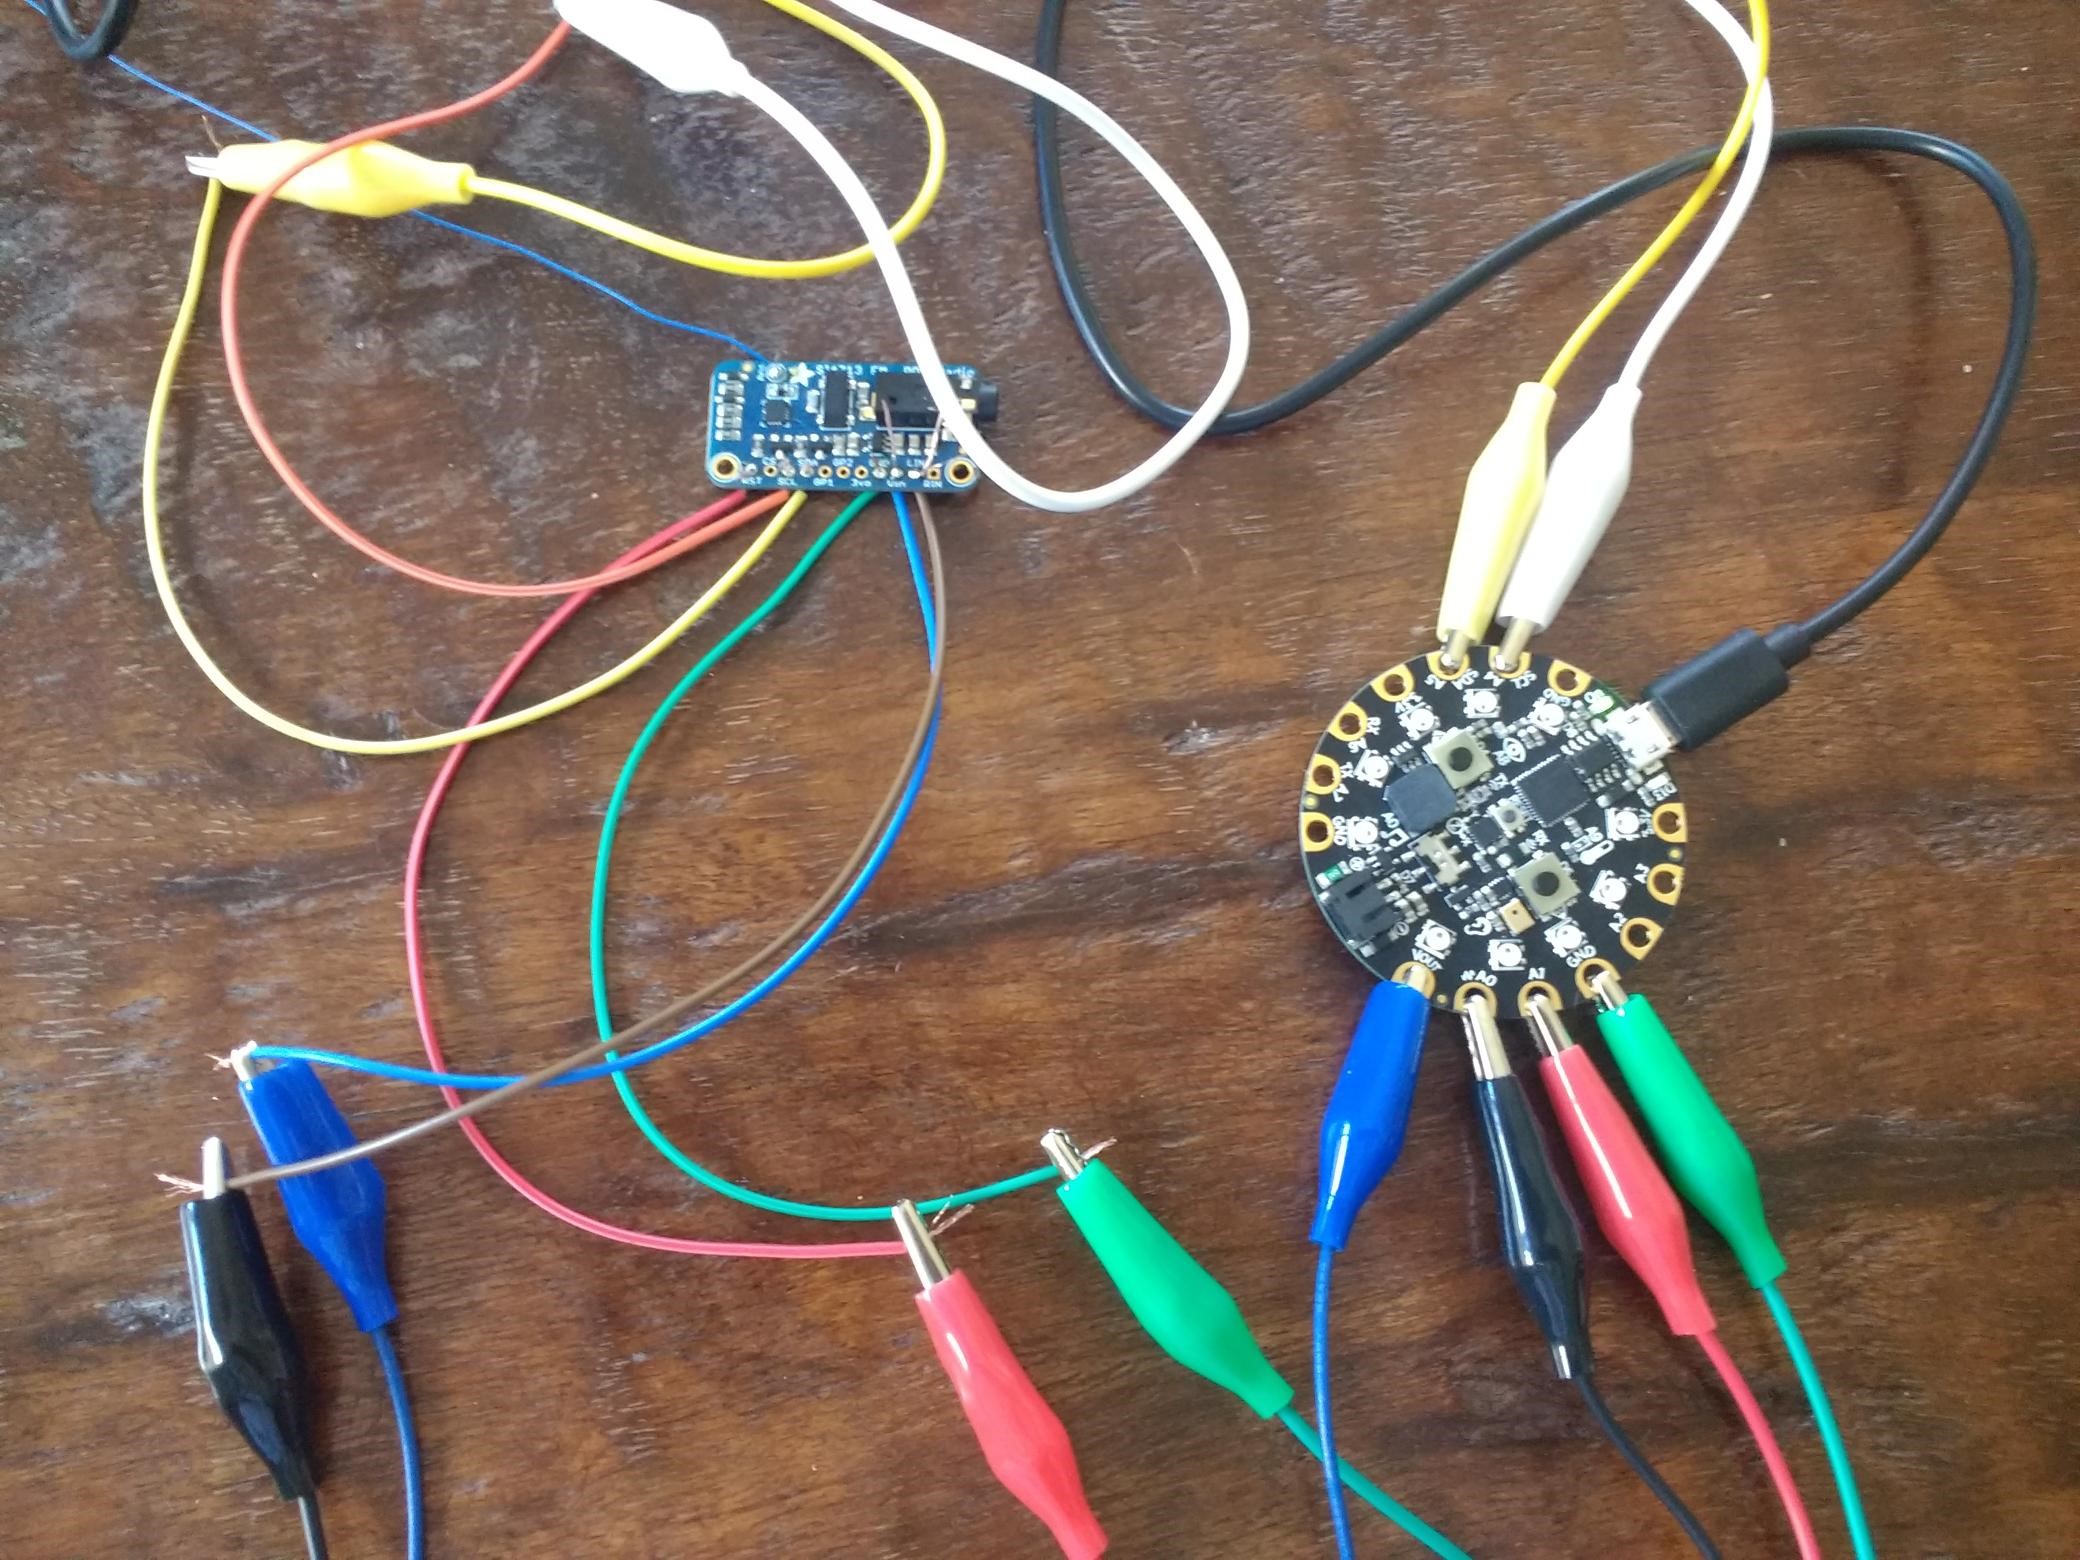
Earlier in the week I had problems with the radio connections again, as the radio wasn’t being registered as connected to the Circuit Playground Express. Hopefully this next week I can solder the connections and they’ll work all the time.

Image (not new, but showing the connections I’m having problems with):

Image (patches):

Material List:

  1. FM Stereo Radio Transmitter
    1. Price: $20
    2. Quantity: 1
    3. Link: https://www.amazon.com/Adafruit-Stereo-Transmitter-RBDS-Breakout/dp/B00SK8ME4Y#
  2. GPS Module
    1. Price: $40
    2. Quantity: 1
    3. Link: https://www.adafruit.com/product/746
  3. Vibration Module
    1. Price: $6.95
    2. Quantity: 1
    3. Link: https://www.sparkfun.com/products/11008?_ga=2.218497438.624035456.1554576553-2048369341.1554576553
  4. Patch
    1. Price: $20
    2. Quantity: 1
    3. Link: http://eliteembroideryandscreenprinting.com/
  5. Transistor
    1. Price: $0.30
    2. Quantity: 1
    3. https://www.digikey.com/product-detail/en/on-semiconductor/PN2222ABU/PN2222AFS-ND/6534&?gclid=EAIaIQobChMIn9Kmo5G84QIV1LjACh2IEQZDEAQYAyABEgJoIfD_BwE

Areas of Concern:

This week I’m going to integrate all of the technology with the visual aspect. Sewing the button together and  putting all the electronics into some sort of container so that everything fits together.

I think that I’ll need some help this week just figuring out how to organize everything together so that it is easy to disconnect from the jacket to take out.

Also, the patch is non-traditional, so there is no satin edging. I might need help with how to make the edges of the patch look neater (in the image 2 of the patches are cut close to the edge, the other patch is still connected to a larger piece of fabric).

Project Post #5: Scavenger Stuffs

Weekly Accomplishments:

Second stuffed animal has been started and details have been added.

The game now has a working “travel” feature, allowing users to venture out with their animas for a set period of time. The user is updated every [x] seconds, showing what their Anima is up to

The server (GameSparks) has been fully set up to hold the information for the game. Right now, everything is being tested on the provided test harness, but I’ve been able to confirm some of the features such as the “Add Anima” script are working as intended on the gameside.

The RFID tags can now be read. The wiring is a bit iffy, so its not consistent yet. I’ve switched over to setting up on the RaspberryPI 0W for testing as a result. After many attempts with the bluetooth/wifi connections, I believe the best way of handling passing information will be making a dummy controller of Unity to load onto the pi and run to update the database.

Images:


Additional Material List:

    1. Battery/USB Charger (still torn on which I’ll be using, but right now it isn’t a priority)
    2. MicroSD Card (this might add a bit to the expense of the plush
    3. Cost of Plastic for 3D printing the pendants (depends on whether I’m crushing the old pendant ot make the new one, or working around the original key fob. Again, I’ll make this call once I have a base product working).

Areas of Concern:

Biggest issues this week:

  • The RFID Read/Writer works, but the wiring causes it to be a bit iffy as to whether its going to work or not. Shouldn’t be an issue once soldered, but I’m hesitant to solder without having a working temp on the 0W
  • Passing information is a bit odd since I don’t have a proper SDK for the pi. The best way of adding Animas will be writing to a file the RFID data as is implemented now, and then having a dummy Unity file waiting for that change and using the Unity SDK to pass the info up. The dummy Unity file works, and the RFID part works, so now it’s just a matter of making sure a Linux Unity build is viable and works as intended
  • (Also WIFI will be needed for the Animas due to this change. Not a bit deal, but since there is no graphical interface, I’ll either have to scan and jump on the nearest network or SHH into the pi whenever setting one up)

Project Post #5: Wearable Circuits

Wearable Circuits

This week, I’ve been looking into rectennas and trying to see if I can power small LEDs from RF from common sources like Wifi routers or leakage from microwaves.

I think doing an incredibly intricate design with impedance matching, ect. might be too much work for the time I have. I’m thinking it will be easier and more practical to experimentally determine what kind of energy I can collect with a small rectifying circuit.

I’ve been inspired by these two examples:

https://ieeexplore-ieee-org.ezproxy.library.wisc.edu/document/8072590

https://ieeexplore-ieee-org.ezproxy.library.wisc.edu/stamp/stamp.jsp?tp=&arnumber=8072590

And this guy (although he’s using a massive antenna): https://www.youtube.com/watch?v=XpLCK88nVgU

I also have ordered new NFC tags, that are much lower frequencies and can be read by your phone.

Materials List:

  1. Clear Covering Self-Adhesive 
    1. https://www.amazon.com/Magic-Cover-Adhesive-Contact-Projects/dp/B000BPF9QY/ref=sr_1_26?crid=QOW16D2H82TC&keywords=vinyl+adhesive+paper&qid=1551742619&s=gateway&sprefix=vinyl+ad%2Caps%2C195&sr=8-26
    2. Count: 1
    3. Cost: $5.50
  2. Silhouette Temporary Tattoo Paper
    1. https://www.amazon.com/Silhouette-MEDIA-TATTOO-Temporary-Tattoo-Paper/dp/B0043WJ3OA
    2. Count: 1
    3. Cost:  $8.99
  3. Spray Adhesive
    1. https://www.amazon.com/3M-General-Purpose-45-Adhesive/dp/B000PCWRMC
    2. Count: 1
    3. Cost: $5.77
  4. Speedball Gold Leaf
    1. https://www.amazon.com/Bememo-Imitation-Gilding-Crafting-Decoration/dp/B0722X91YR
    2. Count: 1
    3. Cost: $6.99
  5. SPMWH22286D5WAP0S2 (Samsung LEDs)
    1. Count: 100
  6. RC1210JR-07100RL (100 Ohm Resistor)
    1. Count: 100
  7. SL3S1203FTB0,115 (UHF RFID)
    1. Count: 10
  8. C1812C102KGRACAUTO (Capacitor)
    1. Count: 10
  9. NTR5105PT1G (Diode)
    1. Count: 10
  10.  Conductive Guitar Tape
  11.  NSR201MXT5G (RF Schottky Diode)
  12.  ST25DV16K-IER6T3 (NFC IC)
  13. RF700072 (NFC Antenna)
  14. RF700070 (NFC Antenna)


Project Post 5 for Circular Pleating


Circular Pleating

  • weekly accomplishments list what you accomplished for each team member

This Week I finished the dress pattern and uploaded it to an illustrator vector,  I laser printed test pieces on the laser cutter and realized that I will have to map the pattern with dots in order for the pieces to have more integrity. Now that I have the process figured out, the dress making should become a lot easier.

I have also started writing a paper/ presentation that I will be giving at UGS this upcoming friday. Seeing as my project is kind of toeing the line of what we consider to be technology, I would like to chat along those lines.

This upcoming week I hope to laser cut, and start assembling a full sized garment. I’m also wondering how many I should hope to hit to be successful in this course.


changes to your approach after presenting your work what changes have you made in your approach

I am making sure to draft the patterns that will be cut in the laser cutter with dots. I think this will make construction a lot easier

  • material list For each material fill out the following information (a table may be a good way to do this)
    • Part/Material
      • Polyester
    • Price
      • 2.37 per yard
    • Quantity
      • 12 yards
    • Link to a purchase location
      • https://www.fabricwholesaledirect.com/products/chiffon-fabric