InGlove – Post 5

InGlove

Curt, Shruthi, Vedant

Weekly Accomplishments

Curt –

I am going to present this in a different tone relative to previous posts that I have written. Specifically, I am going to allow more digression / stream of conscious comments in order to capture some of the context of last week (hopefully for entertainment value). If you don’t care for the longer version I have included a summary.

(Summary)

  • 3D printed all prototype finger parts
  • Constructed first version of the finger. Noting all construction issues.
  • Developing electronics of the finger (and struggling with a servo jitter issue along with sporadic movements)
  • Figured out the erratic servo issues are due to the ESP32 being a 3.3V microcontroller that has an issue controlling 5V servos once the Vcc voltage drops (motors starting moving). Current solution to this is to use a different 5V microcontroller until I get a 5V level shifter. Also servos will be driven off a separate USB powersupply.
  • Programmed a servo driver interface to determine appropriate starting joint values and joint limits. This will hopefully be shown in the demo.
  • I wear the finger to understand how it feels (weird) and
  • Ordered a glove that I like (also some through-hole PCBs for soldering later in the project).
  • Goal for next week is to crank out the flex sensors and integrate everything together.

(Long Version)

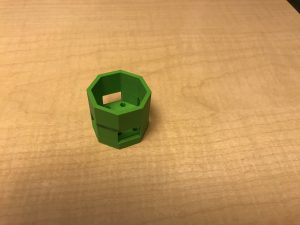
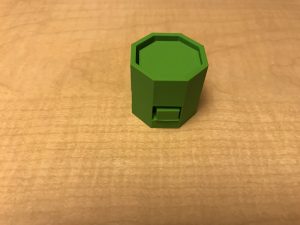
My work this week focused on finishing the prototype robotic finger and its mounting in order to start wearing the device thereby gathering insight into improvements for future versions. Below are several pictures from early in the week as I started exploring the integration process. During this time I was also printing parts at both the 3D printer on the second floor and the 3D printer at College Library InfoLab.
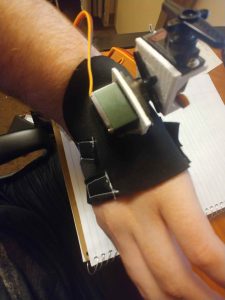
After picking up the 3D parts on Friday (in the much needed break I had during the day of the UIST deadline) I was able to get started on constructing the full finger.  More specifically, I started construction of the finger after a quick break to decompress from submitting the paper I was coauthoring (where I had a night’s deficit of sleep and fresh dose of caffeine mixing with the adrenaline already keeping me awake). I don’t have a picture of this version as it never took complete form. Instead I found I had to modify the components in order to get the individual pieces to work together. Unfortunately this meant going through all of the extra hinges I printed (in anticipation of this). Furthermore, I ended up cracking and warping most pieces (pretty sure this was not the sleep deprivation just poor part design).  In the end, I did manage to create a finger that came together as a complete piece (along with plenty of notes on what to change for future versions). Below is a picture of the finger in all its glory (note it is actually a later picture once it started working).
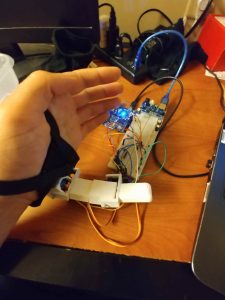
On Saturday I resolved to complete the finger for the demo on Monday. In comparison to my induced manic state on Friday (solely as a response to the unhealthy cocktail of stress, sleep deprivation, and caffeine), I was less productive. On Saturday, I was able to wire up the finger and started programmatic control of the servos. During this time I found an issue with using the ESP32 as my microcontroller, in that the ESP32 is a 3.3V device whereas the servos are ~5.5V. Ideally this is not a problem since the 3.3V should be barely high enough to be detected as high but once the servo starts to move (thereby drawing current) the voltage rail sags causing the microcontroller (connected to the same USB hub as servo motor voltage regulator) IO voltage to sag as well. This manifests as unpleasant jittering with the occasional sporadic spasm (which made me question whether the thing I was created was even safe to wear nevertheless I continued on). I ended up banishing the finger to a plastic box so that it would not make a freedom-focused break for the edge of the desk while I was debugging.  Saturday ends with me using an old arduino-clone microcontroller that is 5V to get rid of some of the odd behavior. I am planning on getting a 3.3V to 5V level shifter IC which should work even when the voltage rail sags.

Sunday, I finish some debugging on the servo control using the arduino clone and then use the serial interface I wrote to capture the joint information that I think is acceptable for the finger. After this I placed the finger onto my hand to get a feel for the device. As a short description, “it feels very weird when the servo moves”. Though this was nothing like an earlier moment where I only had the base on and reached into a cabinet getting caught on an edge that frankly I did not notice before. This event caused a moment of panic as my body had not adopted the base as part of its mapping. Lastly on Sunday, I ordered the glove that I intend to use for the final version. Final figure is an action shot with the finger.
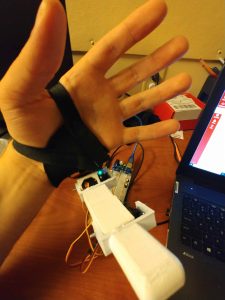
My goals for this next week is to develop all of the flex sensors. I purchased the electrical tape I need (and so long as the Velostat, conductive thread, and conductive fabric last), I should be able to complete all eight sensors. Then it is onto implementation of the algorithm. I did put some further thought into this and I will be using PCA in order to make sense of all the data entering from flex sensors in addition to the orientation and acceleration vectors captured for the hand. From the PCA output I will construct a supervised learning ML task, starting with a linear regression (we can all dream that the solution is simple), but moving to something more complex like nonlinear regression, random forest regression, etc. Specifically to make it a supervised learning task I will create a program that requests a set of gesture and then I will enter the servo joint values associated with that state.

Shruthi –

For this week I worked on building an android application. I spent sometime simply understanding the basics of android app development process. After that I tried reading through the particle documentation of its API and was trying it out. My goal was to have an app read the data off a particle photon. However, the particle documentation is a bit vague and assumed a lot of knowledge of android development and I found it hard to build something from that documentation alone. I then started looking around for examples and eventually found one. In the process I realized that in order to establish connection with the particle server I need to use sockets to establish an open ssl connection using REST interface. To set this up I installed all the binaries required to setup curl on windows, however it is currently giving me an error when I try to POST a request. I plan on spending time maybe until Wednesday on this before trying alternate approaches.

Vedant – 

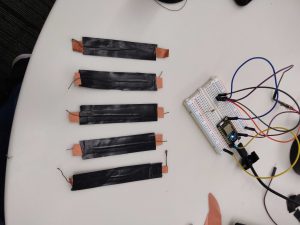
This week we looked more into developing an app that can relay information from the Particle Photon to the Smart Switch/Bulb. I looked into the API for the smart switch app and how to obtain information about it such as the device ID, local key and IP address. I worked on making 5 more of the DIY flex sensors which we will sew on to the glove. Additionally, I started looking into how to send IR signals using a photon and converting the IR codes into the format the photon can use.
Materials Lists

Home Assistant Sub-Project

  1. Particle Photon – $19.00 (1)
  2. Flex sensor – 4.5 inches – $12.95 (1)
  3. Flex sensor – 2.5 inches – $7.95 (1)

*We decided to go ahead with more of the DIY flex sensors. So we might possibly need more velostat and copper sheets and conducting thread.

SRF Sub-Project

Already purchased / owned

  1. Glove for prototype [final version subject to change based on prototype]
  2. Sparkfun IMU – $14.95 (1)
  3. Flex Sensor – 4.5 inches  – $15.95 (1)
  4. ESP32 Dev Board – $15.00 (1)
  5. High Torque Micro Servo – $9.95 (3)
  6. Resistive Force Sensor – $7.00 (1)
  7. Flex sensor – 4.5 inches – $12.95 (1)
  8. 3D printed  SRF – ~$9.00 (N/A)

Need to Purchase / Being Shipped

  1. Resistive Force Sensor – $7.00 (5)
  2. Flex sensor – 4.5 inches – $12.95 (3) and/or Flex Sensor 2.5 inches – $7.95 (8)
  3. Glove [Final design] – $14.99 (1 ordered)
  4. PCBs – N/A (N/A ordered)
  5. 3.3V to 5.0V Level Shifter IC – ~$1.00 ( 1)

Areas of Concern

Curt –

Falling behind on the glove portion. Need to just build all of the sensors and get them mounted on the glove along with the IMU. Also, I need to work through the issues with the finger that the prototype demonstrates. Some of these may not be addressed by the showcase as I would need to test alternate approaches to find the best. One important note in particular, is that I am going to need another servo in order to get a 4th degree of freedom.

Shruthi –

The particle photon community is not very extensive and hence debugging has become quite challenging as you run into new errors.

Vedant –

I was able to get the device ID and IP address but I am having trouble getting the local key for the smart switch. I did some more research and found couple of other ways to get it, so I will be working on that next week. Additionally, I was having trouble finding a IR code converter (from HEX to raw) for the IR codes for my TV, so I’ll have to look a little more into that as well.

Project Pots 5: Lighting Jacket

Project Title: Light Up Jacket (“You are hot but you are cool”)

Project Team: Obasi, Jack

Weekly Accomplishment:

Obasi:

Worked on the sample jacket.

Search for materials and fabrics.

Design pattern for the jacket.

Jack:

Searched for ways to light.

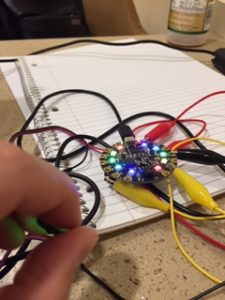
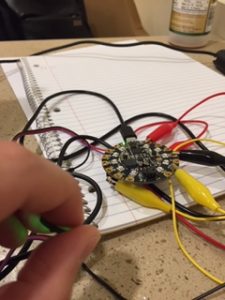
Wrote basic code for Playground Express.

Purchased lights for the jacket. 

Found a way to light up the wires and circles. 

Combine lighting effect with Obasi’s material and produce cool effects.

Have NeoPixels light up in different ways

Images

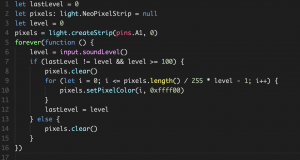
Code function: if the more pixels light up when the sound is louder (only if the sound is above threshold)

Changes to our approach

  1. We will try to make a light jacket (perhaps with less stuffing), so people can wear it indoor
  2. We will try to make it with transparent fabric so that the lights can have a glowing effect
  3. For now, instead of detecting the bass, we will detect loud sound since bass can be very tricky to detect
  4. We will add a “bounce” feature so that when the performer jump on stage the color changes as well
  5. We decide to make a vest instead of a jacket since a vest can be worn indoor and look cool at the same time.
  6. We decided to use the RGB NeoPixel as our primary way of lighting. We also design a pattern of where our lights would go

Material List

El Wire:

Blue, Green, Orange & Yellow colorways

$1.35 Each

6 wires in total

https://www.ellumiglow.com/electroluminescence/electroluminescent-wire

Neon Pixel Strip

LED light

$12.5 Each

0.5m – 2m

https://www.adafruit.com/product/3811?gclid=CjwKCAiAiJPkBRAuEiwAEDXZZdN0k6gopEcaCGBKvVWR_YBFFRyOOqmAiFx3_1TthxETDxXecGo_ZhoCfAwQAvD_BwE

Mini Skinny Neon Pixel Strip

mini LED light

$24.95 Each

1m – 2m

https://www.adafruit.com/product/2964?length=1

Lighting Tape Strip

Tape Strip

$8.95 Each

2 – 3?

https://www.adafruit.com/product/415?gclid=CjwKCAiAiJPkBRAuEiwAEDXZZQ3VhhcbDMvufS2GybwBge1zBLfJYWrOkZuZkYsYJYpU8I2vnJNpxRoCb5oQAvD_BwE

Lithium Ion Polymer Battery

Battery

$10 Each

2

https://www.adafruit.com/product/258

Areas of concern

We are trying to figure out how to light up the entire jacket and control the patterns with one playground express


Project Post #5: Flow

Project title: Flow

Team: Julia Kosier & Yiting Liu

Accomplishments

Julia:

  • Troubleshooted the code for the RGB LEDs; got basic test of LEDs operational

Yiting:

  • Printed out 3d design in College library and reconstructed the design and print at college library
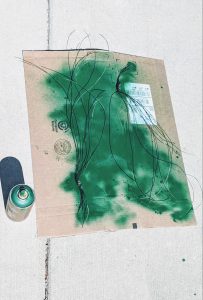
  • Spray painted and adhere cellophane on top of the wings
  • Brainstormed the design for the sleeves to attach the color sensor


images

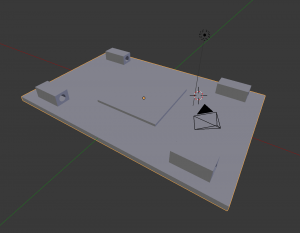
3d printing of the holder of led lights, optical fibers, and a microcontroller in Blender with recalculated dimensions – College Library cost: $24

Spray Painted Wings

Part/Material Price Quantity Link to a purchase location
1 Side Glow Fiber Optic Cable 1.5mm~8mm Optical Fiber For Lighting Decorations

[1.5mm for 15 meters]

$15.99 w/o tax 1 https://www.ebay.com/itm/Side-Glow-Fiber-Optic-Cable-1-5mm-8mm-Optical-Fiber-For-Lighting-Decorations/253189403496?ssPageName=STRK%3AMEBIDX%3AIT&var=552285229283&_trksid=p2057872.m2749.l2649
2 Color sensor $7.95 1 https://www.adafruit.com/product/1334
3 16 gauge floral wire $11.99 1 https://www.amazon.com/gp/product/B00T831TFA/ref=ppx_yo_dt_b_asin_title_o00_s00?ie=UTF8&psc=1
4 Fabrics $3.99/yd

Including shipping total is $14.18

2 yards https://www.fabricwholesaledirect.com/products/sheer-voile-fire-retardant-fabric?gclid=Cj0KCQiAk-7jBRD9ARIsAEy8mh7xxCRl9hFRSNDtoD39ELNlrFHEVmJTnGmABucK8v3UQuPzZhtuZJoaAgeFEALw_wcB&fbclid=IwAR34tdd2dbImfbFrF7y8HEeAAJFUZJpFmekLj1aYBwW7GRi0Cw8Gx2MD5G4
5 Cellophane $15.99 1 https://www.amazon.com/gp/product/B07GR4NCC9/ref=ppx_yo_dt_b_asin_title_o01_s00?ie=UTF8&psc=1
6 Heat spray $5.77 1 https://www.amazon.com/gp/product/B000PCWRMC/ref=ppx_yo_dt_b_asin_title_o02_s00?ie=UTF8&psc=1
7 Elastic $.60/foot 10 feet https://www.strapworks.com/Elastic_p/e.htm
8
9


Areas of concern:

  • We need sleeve design support to make sure the movement of the right arm won’t affect the circuit attached on the back with the wings.

Project Post 5: Lit Lehenga

Individual: Jessica Fernandes

Weekly accomplishments:

  • I tested and wrote the code for the light sensor on the Circuit to turn on its lights in darker surroundings. The lights brighten in proportion to the environment’s level of darkness.
  • Materials I have: Circuit Playground Express, light sensors, power source to test
  • Materials on the way: LEDs, Enclosure, power source for final stage
I worked out the code to trigger the lights on the circuit playground express to illuminate in a darker environment.

Linked below are my pictures of:

Materials

Areas of concern

  • Ensure that the additional LED sequins are triggered by the light sensor; it doesn’t function as planned currently. Connect the hardware in a wearable configuration to plan where they’ll ultimately be sewn. (The materials are expected to arrive this Monday, April 8th.)

Project Post #5

Safe Sleeve

Jake Cordover

Weekly Accomplishments:

I have finally received the two sensors this week, thus I have begun implementing the program to measure the actual knee data. Bluetooth seems to be a little finicky, so I have focused on developing the code on a wired basis at this point. I have gotten it to the point where the accuracy seems to be within 5-10 degrees of the desired value, however, there seems to be a lot of noise and/or drift. I plan on hopefully implementing some techniques or researching what can be done to reduce the drift or noise.

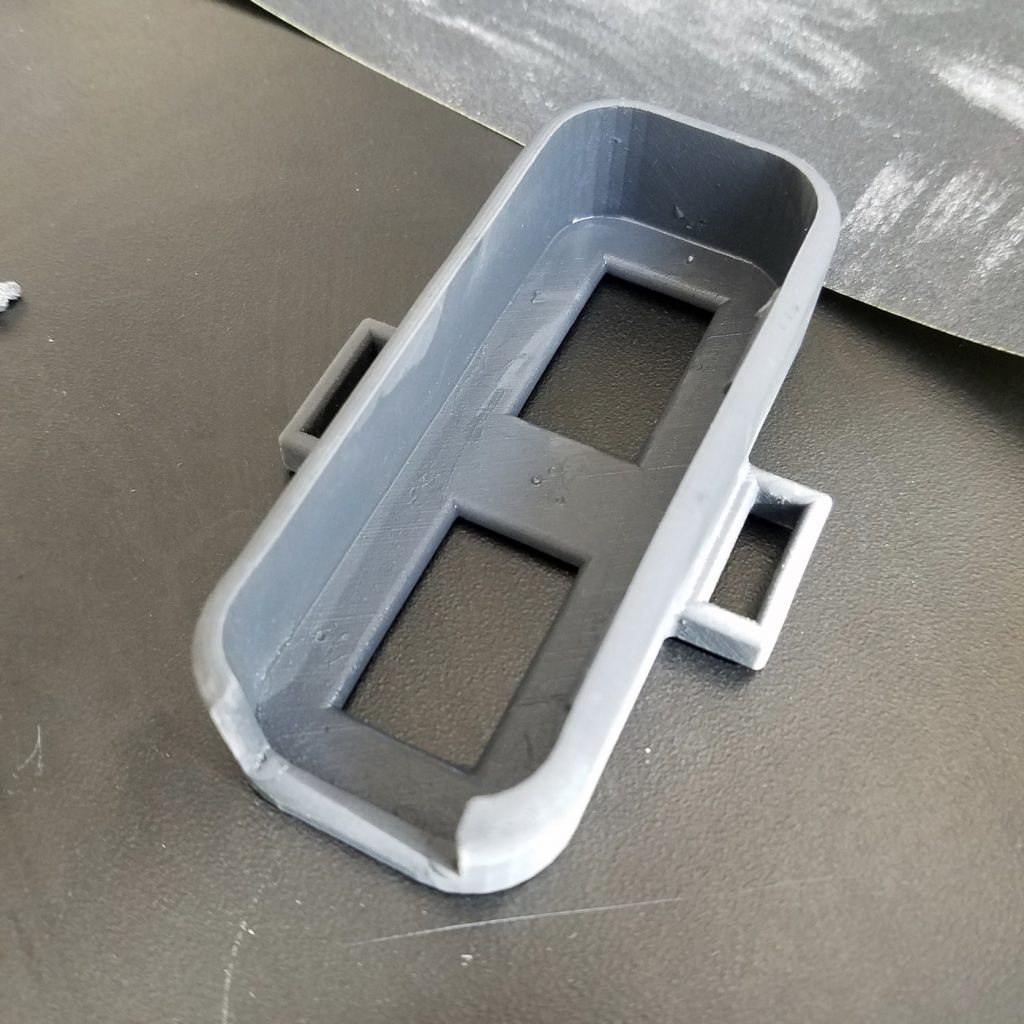
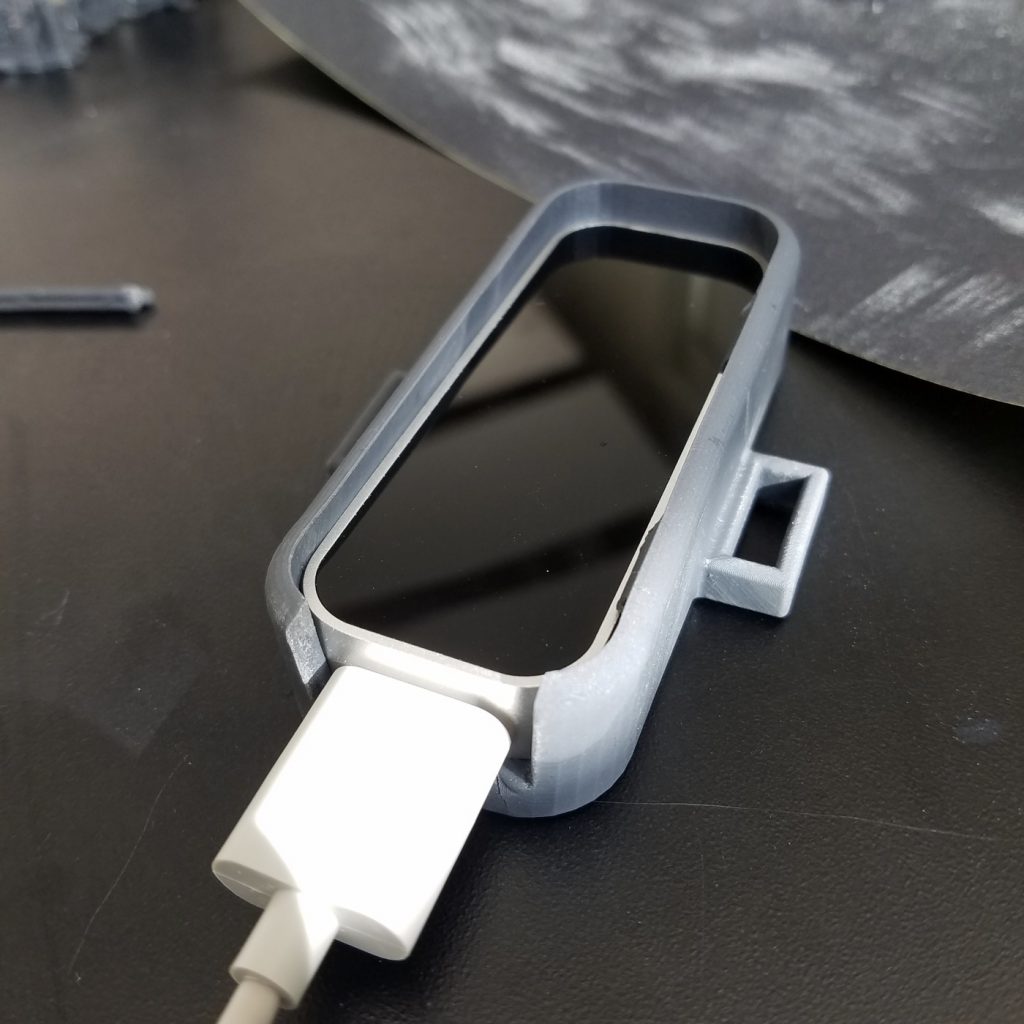
Otherwise, I have printed a prototype of the enclosure that I will be using to secure the sensors. Since I have the sensors, I can adjust the prototype’s dimensions and design, and hopefully have the enclosure pretty close to the final version.

Images:

The images are of the 3D printed enclosure prototype.

Materials (no change):

Part/Material Price ($) Quantity Link
Potential IMU 1 117 with discount secured 1 https://yostlabs.com/product/bluetooth-mini/
Knee Sleeve 1 16.97 1 https://www.amazon.com/PowerLix-Compression-Knee-Sleeve-Basketball/dp/B01MQYADOT/ref=sr_1_5?keywords=powerlix+knee+sleeve&qid=1552264456&s=gateway&sr=8-5
Knee Sleeve 2 20 1 https://www.amazon.com/Zensah-Knee-Compression-Sleeve/dp/B00GPU7QRO/ref=sr_1_6?keywords=zensah+knee+sleeve&qid=1552264496&s=gateway&sr=8-6#customerReviews
3D printing and associated costs TBD TBD TBD

Areas of concern:

I’m a little concerned about the reliability and functionality of the Bluetooth, but at this point I am focusing on getting the best measurements using a wired approach.

Otherwise, the drift/noise issue is potentially very problematic. This may require a significant effort to smooth, otherwise I might need to start looking for a workaround.


Project Post #5: Michael Leykin

Project Title: Penetration of Endpoints and Networks Infiltration System

Project Team: Me, Myself and I

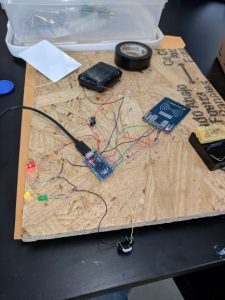
Weekly Accomplishments + Pics:

This week I got all my software working on the RFID thief and bash bunny, both are ready to go. Need to figure out a way to effectively demonstrate, will be packing these circuits up this week and designing neat “hats” to cover them to 3D print using autodesk inventor.

Material List:


Part

Price Quantity Link
wireless network adapter $28.50 1 https://www.amazon.com/gp/product/B0035OCVO6/ref=ppx_od_dt_b_asin_title_s01?ie=UTF8&psc=1
Ethernet cable $3 1 https://www.amazon.com/AmazonBasics-RJ45-Cat-6-Ethernet-Patch-Cable-5-Feet-1-5-Meters/dp/B00N2VILDM/?tag=whtnb-20
Raspberry Pi 3 or 3 B+ $38.10 1 https://www.amazon.com/ELEMENT-Element14-Raspberry-Pi-Motherboard/dp/B07BDR5PDW/?tag=whtnb-20
microSD card $6.85 1 https://www.amazon.com/SanDisk-microSDHC-Standard-Packaging-SDSQUNC-032G-GN6MA/dp/B010Q57T02/?tag=whtnb-20
power source (Enokay Power Supply for Raspberry Pi 5V 2.5A Micro USB Charger Adapter with On Off Switch) $8.59 1 https://www.amazon.com/Enokay-Supply-Raspberry-Charger-Adapter/dp/B01MZX466R/?tag=whtnb-20
USB keyboard/mouse interface (Rii Mini Wireless 2.4GHz Keyboard with Mouse Touchpad Remote Control, Black (mini X1)) $16.99 1 https://www.amazon.com/gp/product/B00I5SW8MC/?tag=whtnb-20
SD card adapter $7.99 1 https://www.amazon.com/Vanja-standard-Connector-Notebooks-Smartphones/dp/B00W02VHM6/?tag=whtnb-20
Raspberry Pi Zero Wifi $10.00 1 https://www.adafruit.com/category/933?src=raspberrypi
Pi Zero USB Stem $5.00 1 https://shop.pimoroni.com/products/zero-stem-usb-otg-connector
2 x Tactile Push Button Switch With LED lights $3.00 1 https://www.aliexpress.com/item/5PCS-1-set-12X12X7-3-Tactile-Push-Button-Switch-Momentary-Tact-LED-5-Color-12X12X7-3mm/32873551440.html?spm=2114.search0104.3.2.3b0241a0ILdgzL&ws_ab_test=searchweb0_0,searchweb201602_5_10065_10130_10068_10890_10547_319_10546_317_10548_10545_10696_453_10084_454_10083_10618_10307_537_536_10902_10059_10884_10887_321_322_10103,searchweb201603_58,ppcSwitch_0&algo_expid=0747bf75-f245-43c5-a0c1-4966ea4078a8-0&algo_pvid=0747bf75-f245-43c5-a0c1-4966ea4078a8&transAbTest=ae803_5
DIP switch with 4 switches $3.00 1 https://www.aliexpress.com/item/10pcs-lot-Slide-Type-SMT-SMD-Dip-Switch-2-54mm-Pitch-2-Row-4-Pin-2/32956815576.html?spm=2114.search0104.3.3.4c971641sXqPaV&ws_ab_test=searchweb0_0,searchweb201602_5_10065_10130_10068_10890_10547_319_10546_317_10548_10545_10696_453_10084_454_10083_10618_10307_537_536_10902_10059_10884_10887_321_322_10103,searchweb201603_58,ppcSwitch_0&algo_expid=60dfe6ec-dd9e-4db7-93f0-5f94aec30ef4-0&algo_pvid=60dfe6ec-dd9e-4db7-93f0-5f94aec30ef4&transAbTest=ae803_5
2 x 330R resistors HAVE 1
MFRC522 RFID reader module $5.49 1 https://www.amazon.com/gp/product/B01CSTW0IA/ref=ppx_od_dt_b_asin_title_s01?ie=UTF8&psc=1
MIFARE 1K RFID card (with changeable UID, 13.56Mhz) Included 1
some RFID card to copy (only 13.56Mhz cards can be read/written by this particular card reader module) Included 1
Tactile Touch Push Button Switch Tact Switches 6 X 6 X 5mm Included 1
LEDs (red, yellow, green) + resistors (1k ohm) $7.00 1 https://www.amazon.com/gp/product/B01ER728F6/ref=ppx_od_dt_b_asin_title_s02?ie=UTF8&psc=1
3 AA batteries (1.5V each) HAVE 1
2 zener diodes (3.7V) or (3.6V) $8.00 1 https://www.amazon.com/gp/product/B07BTKVRG8/ref=ppx_od_dt_b_asin_title_s01?ie=UTF8&psc=1
switch (3 Terminals ON/ON 2 Positions SPDT Electronic Push Button Sliding Switches) $5.00 1 https://www.amazon.com/gp/product/B0799R529Z/ref=ppx_od_dt_b_asin_title_s02?ie=UTF8&psc=1
cables, hot glue, tape (30AWG Insulated Silver Plated Single Core Copper PCB 0.25mm Kynar Wrapping Wire) $5.00 1 https://www.amazon.com/gp/product/B07M7BHKRV/ref=ppx_od_dt_b_asin_title_s01?ie=UTF8&psc=1
Arduino Pro Micro 5V $20.89 1 https://www.amazon.com/gp/product/B01MTU9GOB/ref=ppx_yo_dt_b_asin_title_o04_s00?ie=UTF8&psc=1
PCB Prototyping Board $10.00 1 https://www.amazon.com/gp/product/B072Z7Y19F/ref=ppx_od_dt_b_asin_title_s02?ie=UTF8&psc=1
Solder Gun $67.98 1 https://www.amazon.com/gp/product/B01MDTO6X7/ref=ppx_yo_dt_b_asin_title_o06_s00?ie=UTF8&psc=1
Desoldering Gun and Desoldering Wick $7.69 1 https://www.amazon.com/gp/product/B07BB8DGMP/ref=ppx_yo_dt_b_asin_title_o07_s00?ie=UTF8&psc=1
Battery Pack For Raspberry Pi 3 B+ $25.25 1 https://www.amazon.com/gp/product/B07BSG7V3J/ref=ppx_yo_dt_b_asin_title_o02_s00?ie=UTF8&psc=1

Areas of Concern: Still need to figure out a way to boost my wifi pumpkin to be more powerful and need to find a way to effectively demonstrate my tools, may be difficult without getting into technicalities.

Project Post #5: Virtual Vermin

Virtual Vermin

Jeff Brandt


Weekly Accomplishments:

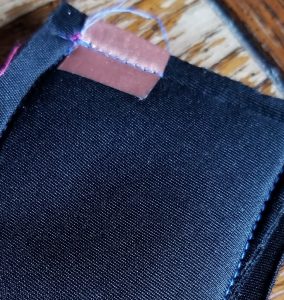
  • Completed manufacturing of soft switch to be placed in fingertips


Images:

Material List:

Wireless Mouse // Quantity: 1 // $9.99 // https://www.amazon.com/gp/product/B015X2OD52/ref=ppx_yo_dt_b_asin_title_o00_s00?ie=UTF8&psc=1

Conductive Fabric // Quantity: 1 sq. ft. // ? // Supplies in classroom

Conductive Thread // Quantity: 2 yds. // ? // Supplies in classroom

Negative Poisson Ratio Foam // Quantity: 1 sq. ft. // Free // Supplied by my research lab

Gloves // Quantity: 1 // $11.95 // https://www.amazon.com/Agloves-screen-gloves-texting-gloves/dp/B004A9FI2M/ref=sr_1_6?keywords=thin+glove&qid=1552266834&s=electronics&sr=1-6

3D printed cover for circuit board // Quantity: 1 // ? (Depends on final print) // creating in Solidworks


Areas of Concern:

The same as last week but my plan is to complete all parts before integrating them all at once.

After prototyping the connections to circuit board, the area I am most concerned with is actually integrating all components into the physical glove. It isn’t a major concern and will most likely just take some trial and error.


Project Post #5 Sungjin (SJ) Park

Project Title 

Heart Rater

Project  Team

Sungjin (SJ) Park

Weekly Accomplishments

  • Switched Arduino device and fixed code to make it work on circuit playground express.
  • Redesigned the form of glove.
  • Made it blink with the pulse.

Image


Material List 

Added List

  • Part/Material: Adafruit Circuit Playground Express
  • Price: Provided in class
  • Quantity: 1

Removed List

Kept List

  • Pulse Sensor (Heart-Rate Monitor)
  • Price: $24.99
  • Quantity: 1
  • Link to a purchase location:  https://shop.openbci.com/products/pulse-sensor?utm_medium=cpc&utm_source=googlepla&variant=22543672899&gclid=Cj0KCQjwjpjkBRDRARIsAKv-0O12qE-56tiH7XDqo-T9Cz1l4Yf1ybwdN9RlAyg_Nkxs_yUG0b9LqbsaAkcxEALw_wcB


Areas of Concern

  • It is necessary for me to do soldering on each pin to minimize extra wires such as alligator clips.
  • I also need to order small sized battery to fit on back of the glove.
  • With the design I intend to implement, I will start putting everything together this following week.

Project Post #5 – Velcro MIDI Jacket

Project Post 5

Project Title

Velcro MIDI Jacket

Project Team

Junda Chen, Jeff Ma, Yudong Huang, William Black

Weekly Accomplishments

Note

  • Accomplished item: item
  • Major responsible men: (man1, man2, …)

List

  • 3D Print Leap Motion case
    • Printed the model in Makerspace (Jeff, Yudong)
    • Integrate Leap  motion on jacket (Jeff, Yudong)
  • Theremin Software
    • Run on Raspberry Pi 3+ (Have a big trouble with Raspberry PI) (Junda, Jeff)
    • Java script to experiment/benchmark (Junda, William)
    • Python script to experiment/benchmark (Junda, William)
  • Jacket
    • Select and buy Velcro (Yudong, Jeff, William)
    • Select (and buy) a jacket. (Yudong, Jeff)
    • Integrate Velcro on Jacket (Yudong)
    • Re-Design the light effect of the jacket (Yudong, Jeff)

Image/Video

Figure 1. Velcro Jacket design. We attach the velcro to jacket and it looks like this. We will try to integrate it on the velcro if possible this week.

Figure 2,3. Leap Motion case. Using PVA we printed the case of Leap Motion, polished it and tried it on body. It seems great : )

Material list

  • Circuit Board: (Potentially) MIDI encode/decoder, Leap motion image processor,
    • Arduion (1):
    • Circuit Playground (1)22
    • Raspberry Pi 3B + (1, with toolkits): $30-50
  • Leap Motion (1): $96
  • LED Strip light (2, TBD)
  • Black velcro fabric (we have in the studio)
  • A Jacket (1, TBD)
  • (Safe) Infrared LED (20)
  • Long USB cable (x2) (for emergency and design)


Areas of Concern

  • Raspberry Pi Power Supply and Performance: We have a big headache. These are the approaches we tried to do — we might need some help
    • Change a PI — it’s on its way from Amazon.
    • Check Power Supply. — we tried to use Michael’s power adaptor (official), Mike’s  power adaptor (5V 2.4A), Mike’s roommate’s power adaptor (5V 2.5A and 9V 4A). None of them work. Our speculation is: the PI works, but the kernel might not be able to boot because of reason other than power adaptor (see below).
    • Check SD card image. — we tried the combination of the following methods — it does not work by far.
      • Change image (all newest from the official download website: https://www.raspberrypi.org/downloads/)
        • Noobs
        • Raspbien
        • Snappy Ubuntu kernel
        • Ubuntu Mate kernel
      • Change SD card format
        • FAT32: especially for TF card larger than 32G (https://www.sdcard.org/developers/overview/capacity/)
        • exFAT
      • Change TF card
        • Sony Micro TF 128G (Mike’s card — might be too large, but was bootable when using FAT32)
        • Samsum TF 32G
  • User Experience: How to let our users know how to operate without a screen?


Project Post #5: ROETE

Radio Outdoor Emergency Transmitter Electronic

Natalie Tack

Weekly Accomplishments:

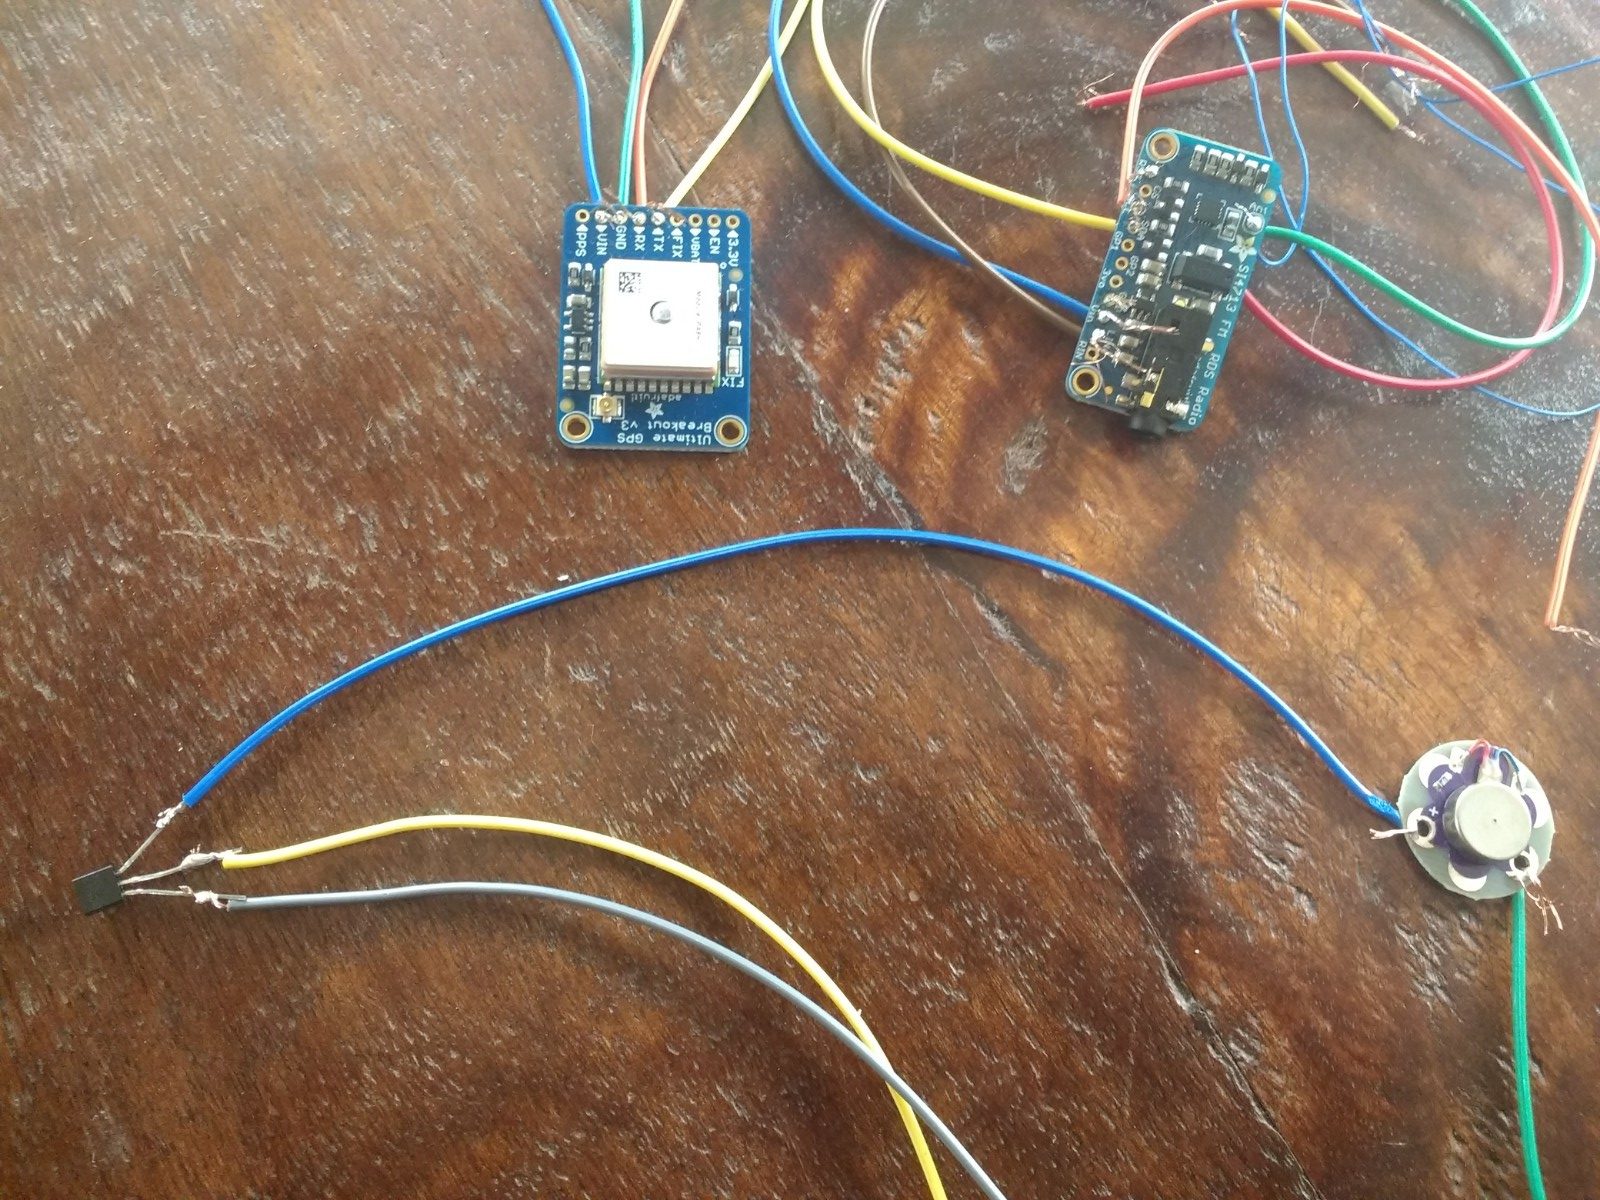
This week I got the GPS working, the vibrator working (with Kevin’s help), and ordered the patch from the embroidery shop (thank you Marianne for the fabric!).

I also soldered all the connections for each respective module. The only thing that is not yet soldered is all the connections to the Circuit Playground Express. I want to get all the modules working together on the Circuit Playground Express before soldering those connections.

Image:

Material List:

  1. FM Stereo Radio Transmitter
    1. Price: $20
    2. Quantity: 1
    3. Link: https://www.amazon.com/Adafruit-Stereo-Transmitter-RBDS-Breakout/dp/B00SK8ME4Y#
  2. GPS Module
    1. Price: $40
    2. Quantity: 1
    3. Link: https://www.adafruit.com/product/746
  3. Vibration Module
    1. Price: $6.95
    2. Quantity: 1
    3. Link: https://www.sparkfun.com/products/11008?_ga=2.218497438.624035456.1554576553-2048369341.1554576553
  4. Patch
    1. Price: $20
    2. Quantity: 1
    3. Link: http://eliteembroideryandscreenprinting.com/
  5. Transistor
    1. Price: $0.30
    2. Quantity: 1
    3. https://www.digikey.com/product-detail/en/on-semiconductor/PN2222ABU/PN2222AFS-ND/6534&?gclid=EAIaIQobChMIn9Kmo5G84QIV1LjACh2IEQZDEAQYAyABEgJoIfD_BwE

Areas of Concern:

I do not currently have any areas of concern for this week, I just want to get all the modules working together, so when the button is pressed three times, it should start the radio, then vibrate 3 times, then say the message on the radio, with the GPS coordinates.

I plan to get all the modules working together this week and then solder them together when they do.