InGlove – Project Post #3

Curt, Shruthi, Vedant

Weekly Accomplishments

Curt

In the week before spring break I primarily worked on designing the robotic finger and experimenting with mounting locations for the finger. In the images section I will cover the limited prototype that I constructed to see if the mounting location made sense and a couple of screen captures of the current finger design. My next step is to focus on 3D printing the finger and to work on a custom flex sensor that can measure two joints in the glove. I also need to explore a mounting mechanism for the finger that is comfortable yet secure.

Vedant

The week before spring break, we were able to make a DIY flex sensor using some duct tape, conductive thread and a few pieces of Velostat (pressure-sensitive fabric). We tested that out using a voltage divider circuit and got some promising results in the changing voltage. I was able to connect that voltage divider circuit with a Circuit Playground and use the serial plotter in the Arduino IDE and found that there actually wasn’t very much noise from the DIY flex sensor.

In addition to that, the Photon Particle and flex sensors came in, and we got stared with how to use the Particle and get started with some basic circuits connected to it and how to use the Particle cloud IDE. We were also trying to get some readings from the flex sensors on the Particle cloud over WiFi, but we were not being able to, so I helped diagnose the problem and found that one of the sensors we ordered was defective. However, trying the same code and circuit with the other sensor, we were able to get some promising readings.

Shruthi

Over the past week me and Vedanth worked together on trying out different kinds of flex sensors. We ordered a batch of long and short ones from adafruit as well as tried making one one our own using velostat and conductive threads. We built voltage divider circuits to measure the change in voltage drop with the varying resistance of the flex sensor. Both of us were fairly new to hardware debugging, but we eventually figured out that one of the flex sensors we ordered was defective. We were successfully able to get the readings on the other one. However, in this whole process we found that our DIY flex sensor had comparable results in flex detection as the store-bought one. We might consider using DIY sensors for the remaining fingers as they are more affordable.

Images

SRF Sub-Project

In Figures 1 and 2 I am presenting the physical mockup to get a sense of the hand and how the finger takes up space around it. The goal of this is to make the design process more concrete.
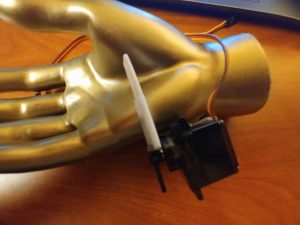
Figure 1: Simple mockup of the finger to get a sense of how the technology interacts with hand in 3D space.
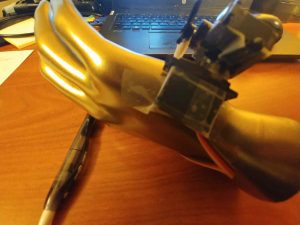
Figure 2: Mockup of finger constructed with the servo motors, tape and a piece of plastic.

Figures 3  and 4 depict the current CAD (using Fusion 360) for the finger. Note that I am still thinking about the mounting to the hand. While it should be rigid it must also be comfortable (though the finger is worn over the glove so there is some cushioning already on the hand.
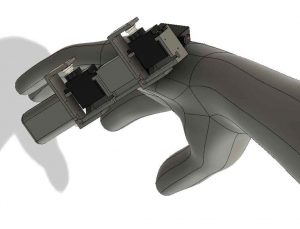
Figure 3:  View of finger backside.
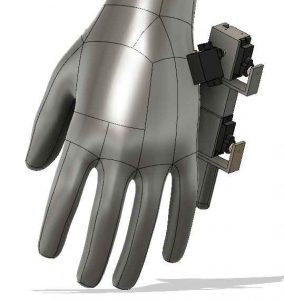
Figure 4:  View of back of hand, note the finger mounting location that I am considering.

Materials List

Home Assistant Sub-Project

  1. Particle Photon – $19.00 (1)
  2. Flex sensor – 4.5 inches – $12.95 (1)
  3. Flex sensor – 2.5 inches – $7.95 (1)

*After initial prototype, purchase more flex sensors.

SRF Sub-Project

Already purchased / owned

  1. Glove for prototype [final version subject to change based on prototype]
  2. Sparkfun IMU – $14.95 (1)
  3. Flex Sensor – 4.5 inches  – $15.95 (1)
  4. ESP32 Dev Board – $15.00 (1)
  5. High Torque Micro Servo – $9.95 (3)
  6. Resistive Force Sensor – $7.00 (1)
  7. Flex sensor – 4.5 inches – $12.95 (1)

Future / After initial prototype

  1. Resistive Force Sensor – $7.00 (5)
  2. Flex sensor – 4.5 inches – $12.95 (3) and/or Flex Sensor 2.5 inches – $7.95 (8)

Areas of Concern

For the glove we will continue to explore the mounting strategies for the flex sensor. Once we complete this we will need to capture gesture data. Currently there is no concern with this aspect however feedback and suggestions for mounting are welcome.

In regards to the SRF subproject, Curt still needs to figure out how to mount the finger. The original idea was to modify a skateboard / snowboard arm brace but a suggestion that was brought up was to modify a soft-support brace to allow full wrist movement. Again suggestions and feedback is welcome.

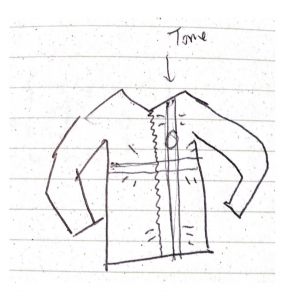
Project Post #3: Theremin Jacket

Project Team

Junda Chen, Jeff Ma, Yudong Huang, William Black

Weekly Accomplishments

([x]: Finished Task)

  • 3D PrintLeap Motion case
  • [x] First software prototype for theremin
    • [x] Motion trace: proximity and height change
    • [x] Data Transfer and MIDI encode/decode
    • [x] Run on Arduino/Raspberry Pi
  • Leap Motion Optimization
    • [x] Add an infrared light source to
    • Determine where the light should be
      • Wrist
      • On Jacket
  • Jacket
    • [x] Jacket and light
    • Select a jacket.
    • [x] Design the jacket.
    • Design the light effect of the jacket

Image/Video

Material list

  • [x] Circuit Board: (Potentially) MIDI encode/decoder, Leap motion image processor,
  • [x] Leap Motion (1): $96
  • [x] LED Strip light (2, TBD)
  • A Jacket (1, TBD)
  • [x] (Safe) Infrared LED (20)

Areas of Concern

  • Infrared LED Safety to eye: To design a better tracking of hand while not directly influence users’ eye is a design challenge, and that might require some research in the area.

——

Development Log

Cylon.js: an Arduino API to control the leap motion

Adafruit strip LED : a $17.99

Leap Motion installation: Troubleshooting in Windows.

Flow – PP3

project title  Flow

project team Julia and Yiting

weekly accomplishments

  • Yiting’s accomplishments
    • I have watched the Lynda course suggested by Makerspace on 3d printing (Additive Manufacturing: Materials for 3D Printing) as well as 3d modeling and repairing on Course: Learning 3D Printing
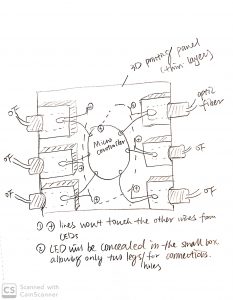
    • I am planning to use AutoCAD to work on a 3d printing design for the support for optical fiber as well as microcontroller
    • I have found two similar designs (here and here) and would love to adapt some of the design in it and create a suitable design.
  • Julia’s accomplishments
    • Researched and began working on code for the light sensor and lights
    • Came to the conclusion to adapt the Arduino code from Adafruit’s Chameleon Scarf project and began tweaking it

images 

3D Printing Modeling Design Draft

Pinterest board of wings

Changes to our approach 

  • We came into conclusion that the sleeve will be better to be connected the straps which will support the wings
  • We were brainstorming about the easiness of putting on the sleeve if we can use a zipper or other tools – still debating

Material list

Part/Material Price Quantity Link to a purchase location
1 Side Glow Fiber Optic Cable 1.5mm~8mm Optical Fiber For Lighting Decorations

[1.5mm for 15 meters]

$15.99 w/o tax 1 here
2 Color sensor $7.95 1 here
16 gauge floral wire $11.99 1 here
4 Fabrics $3.99/yd

Including shipping total is $14.18

2 yards here
5 Cellophane $15.99 1 here
6 Straps to support wings
7
8
9


Areas of concern

  1. We are still thinking about the easiness of wearing the wings if they are attached to the sleeve. We have found different ways to connect the strap attached to the wings and the sleeves here: https://www.kobakant.at/DIY/?p=1272
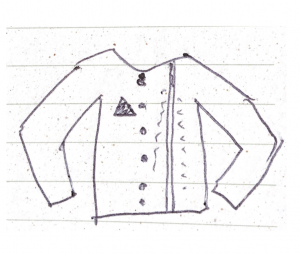
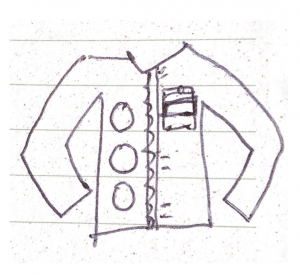
  2. We are not sure about the design for the sleeves to create the fantasy sense we want with the wings.
  3. Where can I use the 3d printing software without paying? I tried the designlab on the 6th floor of Humanities but couldn’t find one.

Project Post #3: Scavenger Stuffs

Weekly Accomplishments:

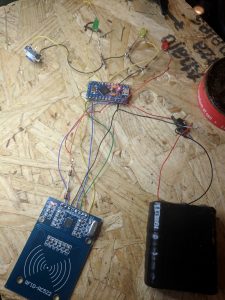
The first stuffed animal is almost done, barring the last few details of eyes and claws. “Jody” was given the last few fabric details earlier in the week, and the pocket installed has been tested to fit with the components ordered. The plush design should be done by end of week, if not the first day.

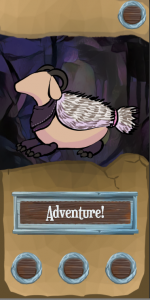
The game itself has begun progress as well. Jody has a digital sketch of herself in the game that has been rigged with basic animation, and the game’s UI has been set up for the main screen (without functionality besides simple button clicks). Using the DeepDreamGenerator AI found online, I converted some free-for-use background pictures into painter-like backgrounds for use in the game.

I’ve started work on getting the RaspberryPI set up as well with the RFID reader. Everything is wired together in the breadboard right now, and I’m just waiting on the SD card to load up Raspbian so I can get back to work.

Images:

Additional Material List:

    1. Battery/USB Charger (still torn on which I’ll be using, but right now it isn’t a priority)
    2. MicroSD Card (this might add a bit to the expense of the plush
    3. Cost of Plastic for 3D printing the pendants (depends on whether I’m crushing the old pendant ot make the new one, or working around the original key fob. Again, I’ll make this call once I have a base product working).

Areas of Concern:

I was initially a bit concerned by how elaborate the RFID reader would be to set up. I’ve found enough tutorials that hopefully I won’t run into a deadend, but I’m currently having issues with my MicroSD card not being recognized by my main computer which is slowing down progress. This seems like more of a minor hurdle though, and I’ve got plenty to work on in the meantime.

Project Post#3: Michael Leykin

Project Title: Penetration of Endpoints and Network Infiltration System

Project Team: Me, Myself and I

Weekly Accomplishments:

GOT ALL MY PARTS!!!!!!!!!

Learned the ways of the solder gun.

Finished soldering tool number 1: RFID cloner!

OBSERVE THE FINE CRAFTSMANSHIP!

Materials List:

Part Price Quantity Link
wireless network adapter $28.50 1 https://www.amazon.com/gp/product/B0035OCVO6/ref=ppx_od_dt_b_asin_title_s01?ie=UTF8&psc=1
Ethernet cable $3 1 https://www.amazon.com/AmazonBasics-RJ45-Cat-6-Ethernet-Patch-Cable-5-Feet-1-5-Meters/dp/B00N2VILDM/?tag=whtnb-20
Raspberry Pi 3 or 3 B+ $38.10 1 https://www.amazon.com/ELEMENT-Element14-Raspberry-Pi-Motherboard/dp/B07BDR5PDW/?tag=whtnb-20
microSD card $6.85 1 https://www.amazon.com/SanDisk-microSDHC-Standard-Packaging-SDSQUNC-032G-GN6MA/dp/B010Q57T02/?tag=whtnb-20
power source (Enokay Power Supply for Raspberry Pi 5V 2.5A Micro USB Charger Adapter with On Off Switch) $8.59 1 https://www.amazon.com/Enokay-Supply-Raspberry-Charger-Adapter/dp/B01MZX466R/?tag=whtnb-20
USB keyboard/mouse interface (Rii Mini Wireless 2.4GHz Keyboard with Mouse Touchpad Remote Control, Black (mini X1)) $16.99 1 https://www.amazon.com/gp/product/B00I5SW8MC/?tag=whtnb-20
SD card adapter $7.99 1 https://www.amazon.com/Vanja-standard-Connector-Notebooks-Smartphones/dp/B00W02VHM6/?tag=whtnb-20
Raspberry Pi Zero Wifi $10.00 1 https://www.adafruit.com/category/933?src=raspberrypi
Pi Zero USB Stem $5.00 1 https://shop.pimoroni.com/products/zero-stem-usb-otg-connector
2 x Tactile Push Button Switch With LED lights $3.00 1 https://www.aliexpress.com/item/5PCS-1-set-12X12X7-3-Tactile-Push-Button-Switch-Momentary-Tact-LED-5-Color-12X12X7-3mm/32873551440.html?spm=2114.search0104.3.2.3b0241a0ILdgzL&ws_ab_test=searchweb0_0,searchweb201602_5_10065_10130_10068_10890_10547_319_10546_317_10548_10545_10696_453_10084_454_10083_10618_10307_537_536_10902_10059_10884_10887_321_322_10103,searchweb201603_58,ppcSwitch_0&algo_expid=0747bf75-f245-43c5-a0c1-4966ea4078a8-0&algo_pvid=0747bf75-f245-43c5-a0c1-4966ea4078a8&transAbTest=ae803_5
DIP switch with 4 switches $3.00 1 https://www.aliexpress.com/item/10pcs-lot-Slide-Type-SMT-SMD-Dip-Switch-2-54mm-Pitch-2-Row-4-Pin-2/32956815576.html?spm=2114.search0104.3.3.4c971641sXqPaV&ws_ab_test=searchweb0_0,searchweb201602_5_10065_10130_10068_10890_10547_319_10546_317_10548_10545_10696_453_10084_454_10083_10618_10307_537_536_10902_10059_10884_10887_321_322_10103,searchweb201603_58,ppcSwitch_0&algo_expid=60dfe6ec-dd9e-4db7-93f0-5f94aec30ef4-0&algo_pvid=60dfe6ec-dd9e-4db7-93f0-5f94aec30ef4&transAbTest=ae803_5
2 x 330R resistors HAVE 1
MFRC522 RFID reader module $5.49 1 https://www.amazon.com/gp/product/B01CSTW0IA/ref=ppx_od_dt_b_asin_title_s01?ie=UTF8&psc=1
MIFARE 1K RFID card (with changeable UID, 13.56Mhz) Included 1
some RFID card to copy (only 13.56Mhz cards can be read/written by this particular card reader module) Included 1
Tactile Touch Push Button Switch Tact Switches 6 X 6 X 5mm Included 1
LEDs (red, yellow, green) + resistors (1k ohm) $7.00 1 https://www.amazon.com/gp/product/B01ER728F6/ref=ppx_od_dt_b_asin_title_s02?ie=UTF8&psc=1
3 AA batteries (1.5V each) HAVE 1
2 zener diodes (3.7V) or (3.6V) $8.00 1 https://www.amazon.com/gp/product/B07BTKVRG8/ref=ppx_od_dt_b_asin_title_s01?ie=UTF8&psc=1
switch (3 Terminals ON/ON 2 Positions SPDT Electronic Push Button Sliding Switches) $5.00 1 https://www.amazon.com/gp/product/B0799R529Z/ref=ppx_od_dt_b_asin_title_s02?ie=UTF8&psc=1
cables, hot glue, tape (30AWG Insulated Silver Plated Single Core Copper PCB 0.25mm Kynar Wrapping Wire) $5.00 1 https://www.amazon.com/gp/product/B07M7BHKRV/ref=ppx_od_dt_b_asin_title_s01?ie=UTF8&psc=1
Arduino Pro Micro 5V $20.89 1 https://www.amazon.com/gp/product/B01MTU9GOB/ref=ppx_yo_dt_b_asin_title_o04_s00?ie=UTF8&psc=1
PCB Prototyping Board $10.00 1 https://www.amazon.com/gp/product/B072Z7Y19F/ref=ppx_od_dt_b_asin_title_s02?ie=UTF8&psc=1
Solder Gun $67.98 1 https://www.amazon.com/gp/product/B01MDTO6X7/ref=ppx_yo_dt_b_asin_title_o06_s00?ie=UTF8&psc=1
Desoldering Gun and Desoldering Wick $7.69 1 https://www.amazon.com/gp/product/B07BB8DGMP/ref=ppx_yo_dt_b_asin_title_o07_s00?ie=UTF8&psc=1

Areas of Concern: Learning how to solder turned out to be a bigger challenge then I initially thought, however I believe I have become competent in this enough for the rest of the tools. I have completed the most intensive project first to get the most practice, installing the software and solving for bugs will be a even bigger challenge. As the semester continues I will probably need assistance with my circuits and debugging, but this is normal. I look forward to tackling these challenges.

Project Post #3 Sungjin (SJ) Park

Project Title

  • Heart Rater

Weekly Accomplishments

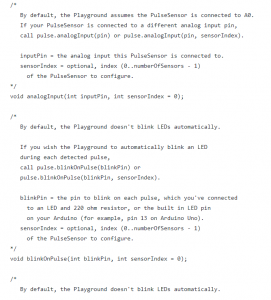
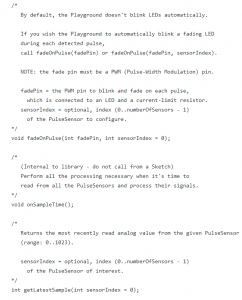
  • Found a reference code for tracking heart rate on Arduino Uno. Currently modifying the code to fit my needs.

Images

  • Methods that need to be modified.

Material List

Areas of Concern

  • Materials I have ordered are still shipping. Thus, I am currently implementing codes prior to materials delivered.

Project Post #3

PROJECT POST #3

Project Title: Vis Hat  

Project Team: Lydia, Fu, Jay, Sharon

Weekly Accomplishments:

Lydia:

  • Sourced and ordered remaining materials
  • Researching more about brain data analysis, how to reduce noise of data, the form the data will be in
  • Researching and beginning to draft response test experiments for once the sensor/emitters are built and ready for use
  • Researching more about color/form correlation to emotion and coming up with plan/ideas for visualization of data; researching source code for data visualization that could be useful

Fu:

  • Researching the design, testing, working principle for project system and more papers about them.
  • Working on circuit design, including photodiode circuit, emitters and wiring to Arduino Due.

Jay:

  • Research: NIRS process, underlying physiology, brain physiology, parts research, methods and data processing research
  • Drafting circuit design
  • Drafting visualization plan

Sharon:

  • Research: design of the head band, brain analysis, algorithm
  • Read more papers about brain blood activity and design the algorithm
  • Understand how brain react with emotion changing

Images:

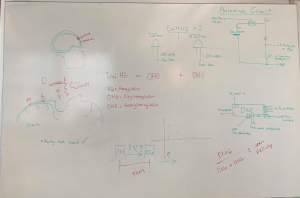
The following image shows the relationship between the absorption coefficient and the wavelength and illustrates working principle about how NIR light in and out are read.

The following image shows the circuit design about the photodiode circuit, also about how emitters and photodiode are wired to the Arduino Due. We are going to measure the hemoglobin and deoxyhemoglobin, which are the modified beer lambert law we are going to use.

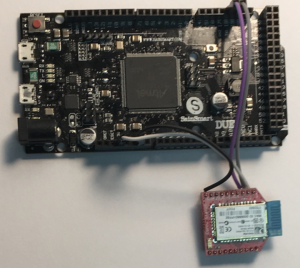
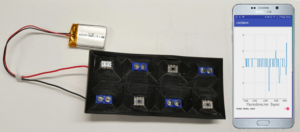
The following images show (1) a bluetooth-Arduino Due setup we’re planning to implement and (2) a sensor/emitter setup we’ve been researching and reading into as alternative to a previous set up. Our result could be a combination of the two (previous one pictured in Project Post #2).

Material List

title/link # needed price/unit notes shipping and tax TOTAL PRICE:
arduino due 1 34.43 34.43
NPN transistor 1 5.99 this one unit contains ~200 resistors 5.99
730nm emitter 2 8.61 9.54 26.76
850nm emitter 2 1.46 2.92
850 max nir detector/sensor 2 5.37 9.02 19.76
bluetooth 1 28.95 RN41XVC (with chip antenna) 8.81 37.76


Areas of Concern:

Some areas of concern have to do with the data we will be dealing with. Because we have yet to gather any data and a large portion of the project involves data analysis/clean-up, it’s hard to plan for possible obstacles in advance. Essentially, we will only be able to truly begin the software development stage once we understand further the state of the information we will receive from our sensor/emitter setup and once this data collection process has begun. Because this isn’t something to which we quite have access yet, reaching out for help would also not be the most beneficial at this time. However, once we gather some initial data in the early testing process, it would be beneficial to meet with someone (i.e. a professor possibly) experienced in brain data analysis. We’ve reached out to Professor Barry Vanveen, who has experience with this and who is willing to help us out when we reach this stage in the project.


Project Post #3: Circuit Tattoo

Circuit Tattoo

John Compas

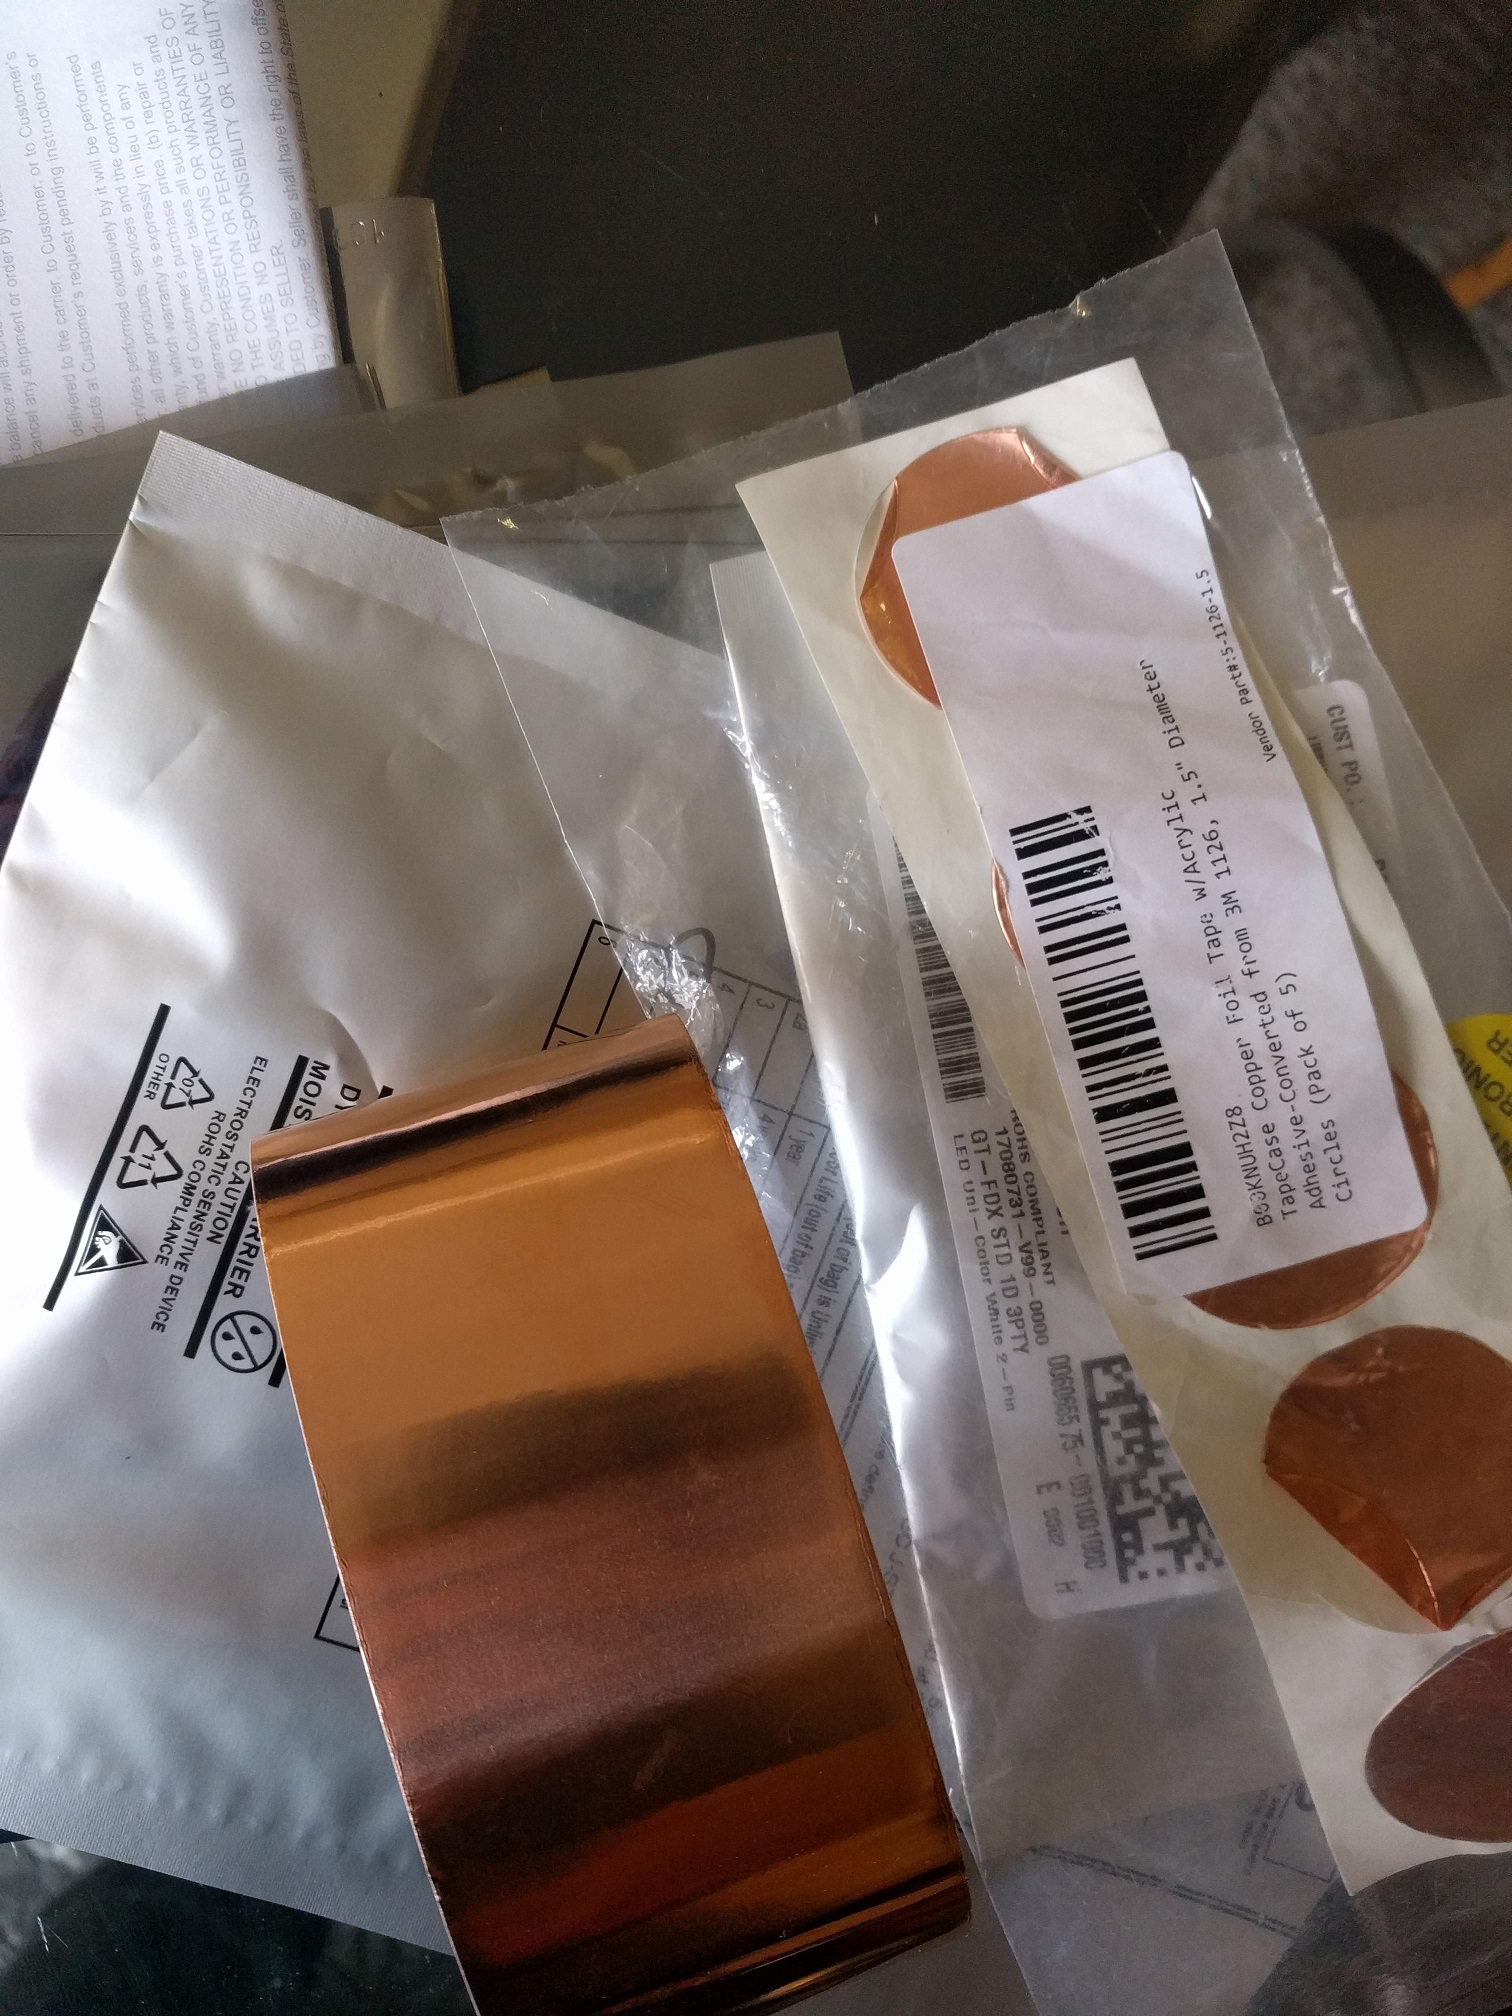
I have ordered thicker conductive material, mostly conductive tape. I’ll test it on the vinyl cutter tomorrow morning to see how well it performs.

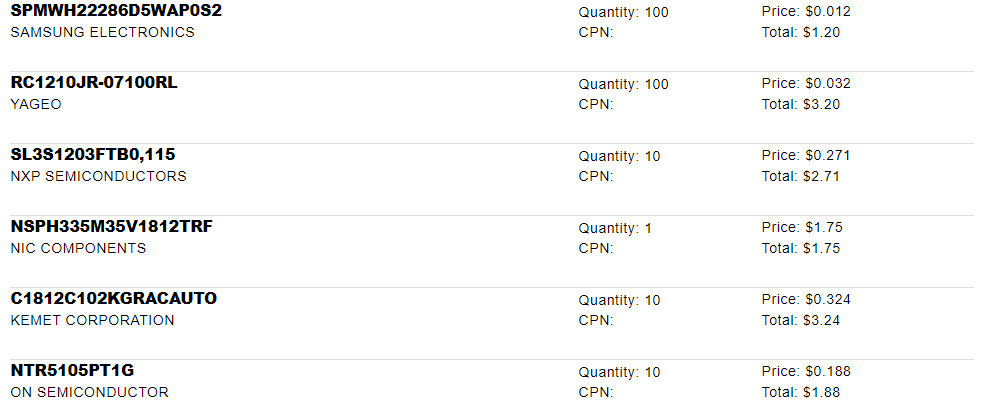
I’ve ordered some SMD components from Arrow to test out my first few designs, such as a multiplexed 2×2 array.

The design will utilize the SMD components to create an array that can be driven by the circuit playground.

I’m researching the antennas for the UHF RFID ICs that I ordered and will use AntSym to design them. I’m currently getting started working with it to determine how well it will work for me.

I think the antennas will certainly be the most challenging aspect of this project, along with getting the conductive material for the tattoos right. However, I think this new round of material will work much better than the leaf.

Project Post #3: Virtual Vermin

Virtual Vermin

Jeff Brandt


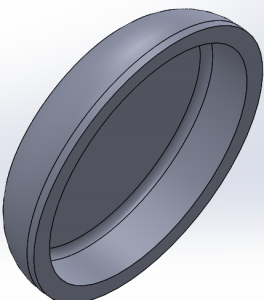
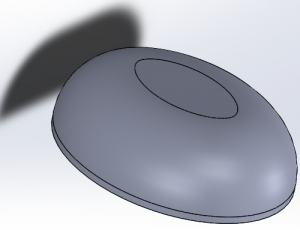
Weekly Accomplishments:

  • Created paper model of circuit board cover to get more accurate dimensions
  • Began designing the circuit board cover in Solidworks


Images:

Material List:

Wireless Mouse // Quantity: 1 // $9.99 // https://www.amazon.com/gp/product/B015X2OD52/ref=ppx_yo_dt_b_asin_title_o00_s00?ie=UTF8&psc=1

Conductive Fabric // Quantity: 1 sq. ft. // ? // Supplies in classroom?

Conductive Thread // Quantity: 2 yds. // ? // Supplies in classroom?

Negative Poisson Ratio Foam // Quantity: 1 sq. ft. // Free // Supplied by my research lab

Gloves // Quantity: 1 // $11.95 // https://www.amazon.com/Agloves-screen-gloves-texting-gloves/dp/B004A9FI2M/ref=sr_1_6?keywords=thin+glove&qid=1552266834&s=electronics&sr=1-6

Adafruit Circuit Playground // Quantity: 1 // Supplied // Already given in class

Short Flex Sensor // Quantity: 1 // $7.95 // https://www.adafruit.com/product/1070

Membrane LED Keypad // Quantity: 1 // $2.95 // https://www.adafruit.com/product/1333

Round Force Sensitive Resistor // Quantity: 3 // $7.00 // https://www.adafruit.com/product/166

Small Piezo Touchpad // Quantity: 3 // $0.95 // https://www.adafruit.com/product/1740

3D printed cover for circuit board // Quantity: 1 // ? (Depends on final print) // creating in Solidworks

Areas of Concern:

As of right now, the area that I am most concerned with is integrating the fingertip sensors into the preexisting mouse circuit board. I am looking for some help in separating the current buttons while keeping the rest of the circuit board intact.

Project Post 3

Project title: Qi Jeans
Project team: Gregg Van Dycke
Weekly accomplishments: I have a mock jean pocket that fits the phone, and have started a second mock jean pocket with the phone slot as well as the internal pocket for the wireless charger.
Images:

No picture of mock pocket. I left it in my locker.
Material list: 10000mah wireless charging portable battery
Areas of concern: What I am most concerned with is functionality, as in how well the device will be able to charge the phone. Being early prototype I thought this might be a concern since this isn’t the designed use case of the charger. But I have ideas to on how to change it for the next iteration of Qi Jeans.