Using four capacitive touches to have four light outputs.
One sound output when shaking it.
Using light sensor to read the light level and give light output response.

Course website of DS/CS/ISyE 518: Wearable Technology Spring 2019
Using four capacitive touches to have four light outputs.
One sound output when shaking it.
Using light sensor to read the light level and give light output response.
Note: a tiny bit before the video started recording, I clapped my hands to get the lights to flash.
Natalie Tack
Weekly Accomplishments: I found a radio to transmit audio from. It is hooked up to a Circuit Playground Express and can broadcast to any FM frequency. Currently, I have it able to transmit songs from my phone from a button press on the Circuit Playground Express.
Image: Temporarily secured on my warmup project
Changes in Approach: I have not made any yet, my main focus this past week was getting the radio to transmit audio.
Plan for this next week: To have the radio transmit audio that is stored on the Circuit Playground Express. Also, to have that audio only transmit after 3 button presses.
Material list:
CS518 warmup project where I made a soft gamepad which uses capacitive touch for 7 buttons and accelerometer shake for an eighth button.
Inspiration taken from Adafruit’s tutorial: https://learn.adafruit.com/plush-game-controller/overview
For this project I gave Makecode a try (which is a departure from my typical approach of using Arduino C/C++ for embedded systems). While it was easy to develop the software, I did feel a lack of structure that is allowed in a more traditional programming language. One benefit of using Makecode is that it does support a Gamepad HID whereas I could not find support for that in Arduino when using the Circuit Playground Express.
Code Link: https://makecode.com/_hhjbARFsTVKp
(Could not get code to show up in post)
Changes:
Material List:
App (software):
Pendants(each):
Stuffed Animal (each):
Shake to wake him up and he will play a sound and light up.
Make a loud noise to scare him and he will play a scared sound and light up a different way.
Touch his tongue to annoy him and he will make an annoyed sound and flash.
Individual: Jessica Fernandes
What is it:
The structure of this project is a lehenga, an Indian cultural skirt worn by women for traditional events and celebrations. This piece incorporates cultural textiles and light components to create the illusion of a cloud of light, celebrating and honoring the experience of growing up as a first generation, Indian American.
What it does:
The garment illuminates to create the impression of airy color diffusion. Light sensors trigger the LEDs to turn on in a certain level of darkness and can also be controlled by a switch embedded in the structure of the garment.
Who it’s for:
This garment is designed to be a statement piece for Indian women in search of unique, traditional clothing for Diwali (the festival of lights), among other cultural events.
How it’s used:
To activate the garment, the user would simply wear the skirt and turn on the light sensor that will trigger the lights to turn on. This switch is discretely integrated into the waist for ease of use. The power source will also be embedded in the structure of the skirt and will need to be charged when not in use.
How it’s unique:
Because the piece illuminates in darkness, it creates a moment of fantasy for the wearer. This is especially fitting for celebrations like Diwali.
Inspiration & Sketch
Lehengas and dress with lights
Materials
Skills
Timeline
Milestone 1 (March 25)
Darkness triggers the light sensor to turn on the other lights.
Milestone 2 (April 8)
Network of lights and sensors function in a form that can be draped onto the garment.
Milestone 3 (April 22)
The sensors, lights, and power source function and are integrated into the garment in an aesthetically pleasing finish.
Fallback Plan
If the initial plan does not succeed, I will adjust the features implemented based on what will accomplished the best functionality. This means potentially reducing the number of lights incorporated or changing the type of power source or changing the triggering of lights from sensors to a switch. These adjustments aim to simplify or bridge problems of functionality with more direct solutions.
Project Post #1
Virtual Vermin
Jeff Brandt
Virtual Vermin is a glove that can act as a wireless computer mouse. The device will be intended for individuals in a design heavy industry.
To use the VV, a user would simply put a glove on their hand as they normally would with either a latex or winter glove. After the device is placed on the hand, the hand itself becomes a computer mouse. Just by moving your hand around, an accelerometer would control the location of the cursor. While only the pointer and middle fingers will be necessary to control the device, each finger will have separate functions. To left click, simply down tap your pointer finger. To right click, tap down your middle finger. And, not forgetting about the scroll wheel, move your middle finger in an up or down motion to scroll through a web page. The flexibility of the hand also allows the wearer to operate a computer mouse on a curved surface, something that is usually not possible.
My project differs from existing products because it provides the user with unlimited access to the scroll wheel. A trackpad on most laptops makes it difficult to click and scroll at the same time which is often useful for CAD drawing or 3-D modeling.
Some inspiration that is already out there are the Flying Fingers Mouse and the Maestro Gesture Glove.
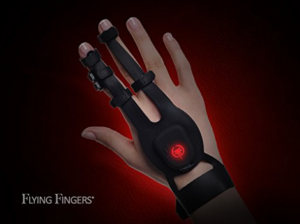
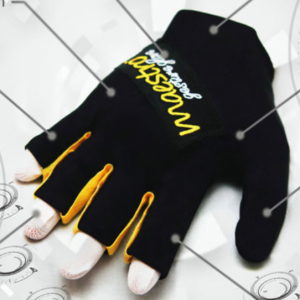
As for the materials that I will need:
Concepts that I will need to master will include:
A tentative timeline for the VV is as follows:
A fallback plan for the Virtual Vermin would be to eliminate some of the more complex capabilities like the wireless component or the scroll wheel function. To be a success, the bare minimum that must be accomplished would be to have a glove that can left click and move the cursor around on the computer screen.
Project Title
Theremin Jacket
Team Member
Jeff Ma, Junda Chen, William Black, Yudong Huang
Project Description
1) What does our project do?
The concept of Theremin Jacket comes from the Theremin, an electronic musical instrument that could be controlled without physical contact by the performer. Thus, the Theremin Jacket we want to make allows the wearer to control an external connected MIDI to play music without any physical contact.
2) Who is our project for?
Theremin Jacket is for people who are fans of music, or more specifically, fans of the electronic musical instrument Theremin. It could also provide a chance to those without any experience of playing musical instrument to play music.
3) Describe how someone would use the developed device. What are the steps that a user would go through to interface with the technology?
First, there will be a switch on the jacket that allows wearers to turn on/off the circuit. When circuit is on, sensors on the jacket will read positions of wearers’ hands and arms in real time. After that, those data will be transmitted to the external connected MIDI through bluetooth and the MIDI will receive and play corresponding tones.
Besides the features mentioned above, we might also want to allow wearers to play different type of sounds by moving different parts of body instead of just two arms (ex. Playing drum by moving one foot up and down). We could also try allowing user store customize MIDI instrumental sounds in an external device and display sounds by speaker or earphone.
4) What makes your project different from existing products?
As we have researched so far, we have not found a wearable technology that support Theremin and MIDI music that allows user to move and control the flow of music. There are products that allow user to move but produce funny music (e.g. movement jacket), and products that allow user to control music but in a fixed, not fully interact-able way (e.g. arm MIDI keyboard, MIDI shirt, etc).
Our project aims to provide an easy to control interface to detect user hand movement. User adjust pitch by putting hands in different heights ( or different relative position from the other device ) and control music flow by the touch of buttons and proximity to body.
Inspirations

Sketch

Material/Tools Needed
Skills/Concept to Master
Timeline
Milestone 1 (March 25)
Milestone 2 (April 8)
Milestone 3 (April 22)
Fallback Plan
We are planning to implement a jacket that allows wearers to control different parameters of music (i.e. pitch, amplitude or duration). If later in this semester we could determine that we have fallen behind what we have expected, we could: 1) Instead of having both arms to work, just implement and make sure one arm to work, and decrease the number of parameters of music we are going to control, or 2) Instead of making a Theremin Jacket, just simply make a position detector for parts of a body.
John Compas
I would like to explore the possibilities of using gold leaf, tattoo paper, and SMT components to create wearable circuits. These temporary tattoos could be artistic, lighting up in response to the wearer’s environment, or more utilitarian, such as utilizing near RFID to respond to a request with sensor data and an ID. I’m interested in investigating the space of what is possible with this topology especially with antennas and RFID technology.
My project is for anyone, to show to demonstrate the capabilities of the technology and fascinate people.
Interfacing with a complete device would be simple. The tattoo would be applied like any other with a spray bottle of water to get the adhesive to activate on the wearer’s skin. In the case a passive UHF RFID tag, the sensor would lay dormant until activated by a strong RF emitter. Storing the received RF energy in a capacitor, the integrated sensor IC would read a sensor value and respond to the request as dictated by UHF protocol ISO 18000-6C. The reader would then report this value to a tablet or phone.
More artistic designs could change LED color and intensity based on skin temperature and conductivity, or by the intensity of received RF signals in a certain band. For example, LEDs could visualize the intensity of different frequency signals around the wearer using multiple antennas with varying resonant frequencies.
Existing work as focused more on either ease of use, or improving some technical aspect of this technology. I would like to focus on antennas and poetic interaction with the user.
Duo-Skin, MIT
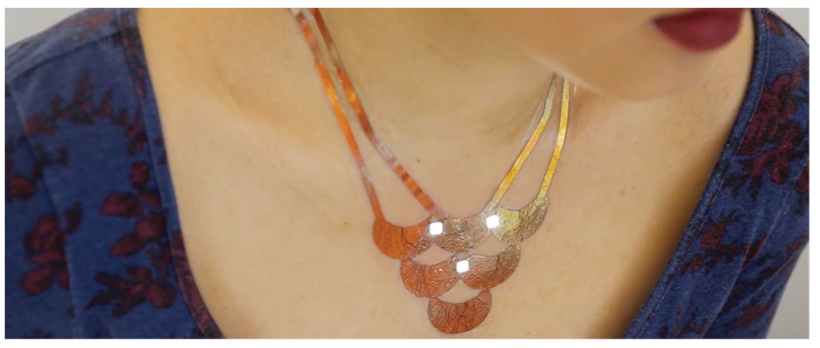
A project from a group of MIT, Duo-Skin aimed to demonstrate the ease of creating wearable, temporary tattoos. They were successful in creating computer-powered MIDI controllers, RFID tags, and letting a team of volunteers quickly create their own circuitry.
iSkin, Carnegie Mellon
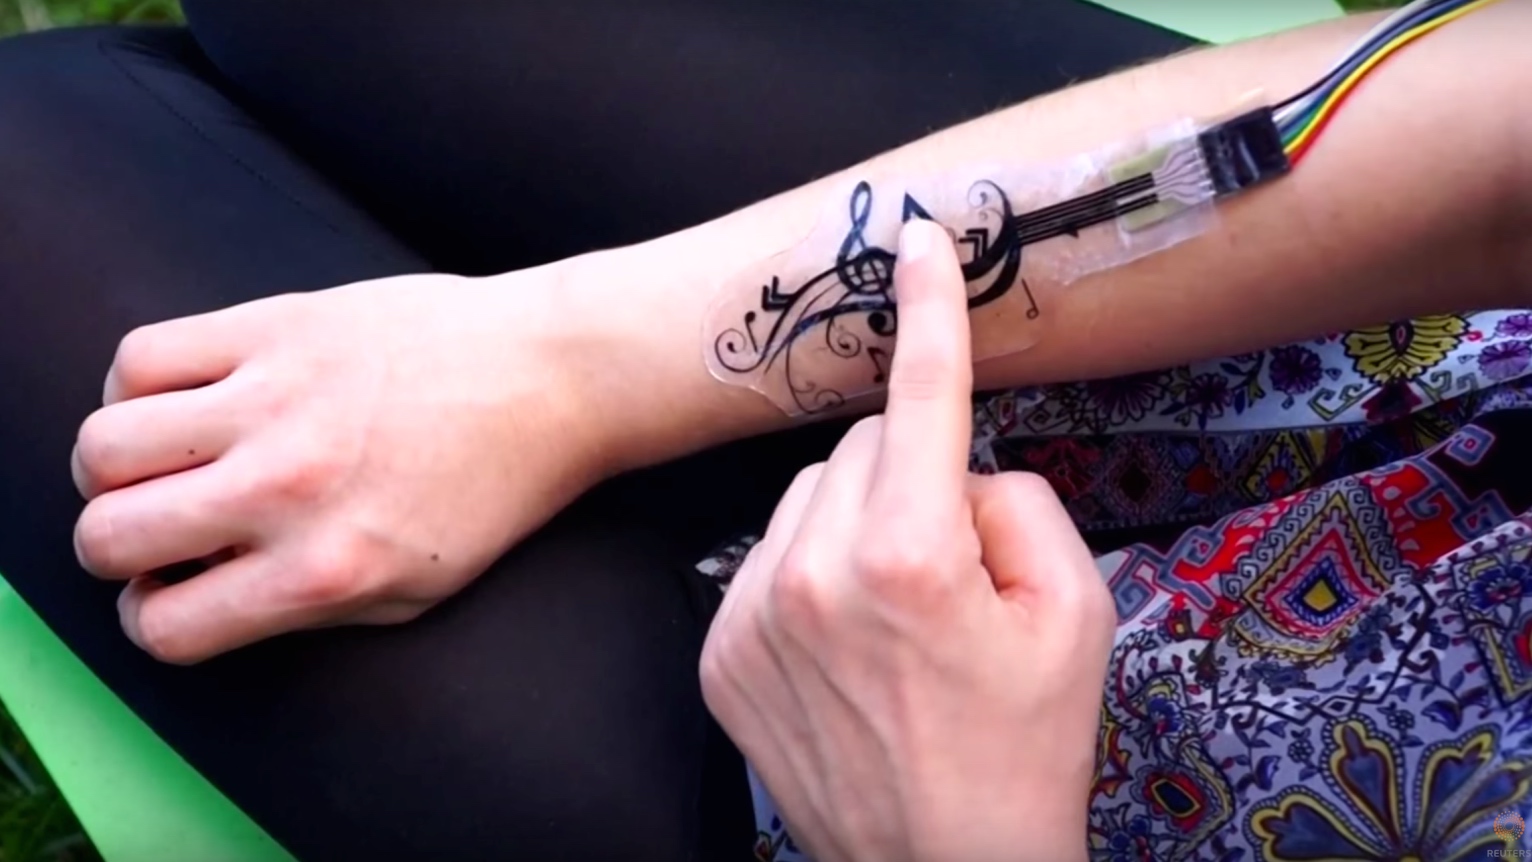
iSkin was a much more engineered approach and came before the MIT study. They demonstrated interfaces using layers of cPDMS (a silicone elastomer) and touch. The study is good source of detailed information about how their capacitive touch sensors work but was less “friendly” than the Duo-Skin.
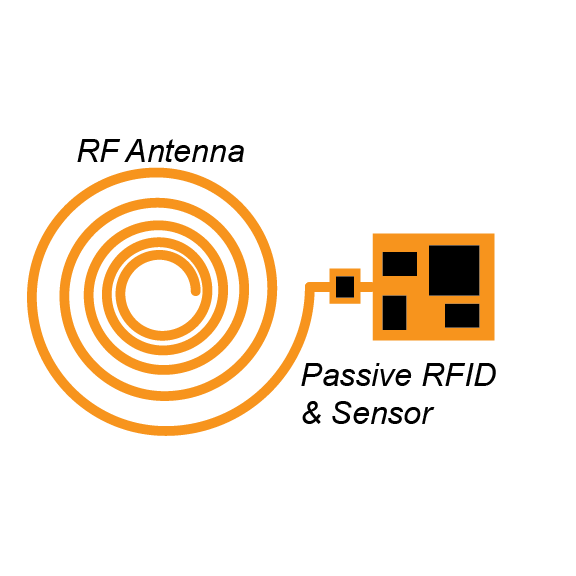
Example UHF RFID Sensor, passively powered that responds with ID and data.
(I’m not great at antenna design, the feedpoint should probably be in the middle, but this is the idea)
I will need to research antenna design thoroughly, as I have little experience with it in the past. I’m aware of the challenges with circuitry and antennas in the gigahertz range but have never designed any myself.
Cutting the stencils will (hopefully) not be done by hand, but the layering of the tattoos will need to be done by me. Soldering the SMT components to the gold leaf will also potentially be a challenge. Burning the leaf out might be easy, but it seems like a challenge that has been overcome in the past so I’m hopeful that I will find a method.
March 8: Order Prototype Materials, Find Tools & Initial Design
March 13: Demo of Circuitry
March 25: Duplication
April 8: Improvement
April 22: Environmental Testing
As a whole, I see the antenna aspects of this project as the most challenging. I have a decent amount of experience in conventional circuit design and microcontroller programming. The circuits here are not particularly challenging, outside of the feed point with the antenna.
The gold leaf could present a challenge, but DuoSkin reported it as relatively durable with sufficient trace widths. If it isn’t working for some reason, other conductive tape or material could be attempted.
As a bare minimum, I expect to at least duplicate the results gathered by MIT in their DuoSkin study. Part of the aim of that paper was the technical ease at which circuits like these could be created, so I don’t anticipate duplication taking longer than the two months that we have.